Set table plan manually
With the ready2order software you have the option of creating a table plan yourself. This can take a few minutes, so make sure you give yourself enough time!
This is a temporary solution. We know that it is not yet a perfect way to create a table plan, but we are working on making this feature better and more intuitive.
To set up your seating plan, proceed as follows:
1) Determine table buttons per row
- Click on the white gear in the sidebar to access the settings
- Click on tables
- Under "Table buttons per row" you can define how many buttons you want to be displayed
- In our example we have specified 6 columns
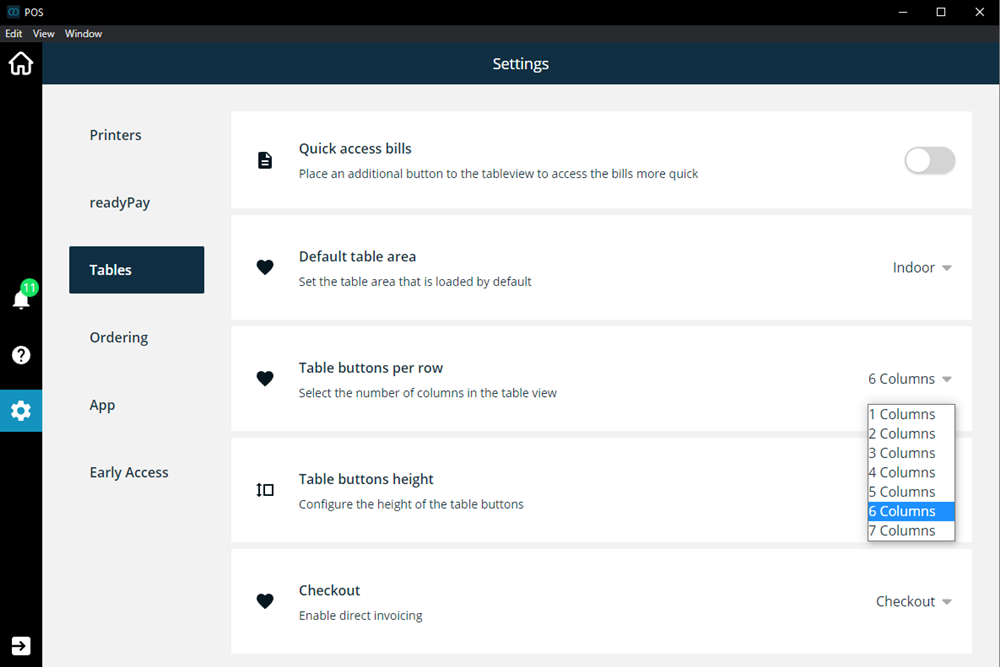
- In our example we have specified 6 columns
2) Insert placeholder
Now you can try to map your tables using placeholders in the administration interface.
At the same time, you can also open your POS so that you can see how the placeholders affect the design.
Now proceed as follows:
- Log in to the Admin Interface and click on tables
- Click Add Placeholder as many times as necessary
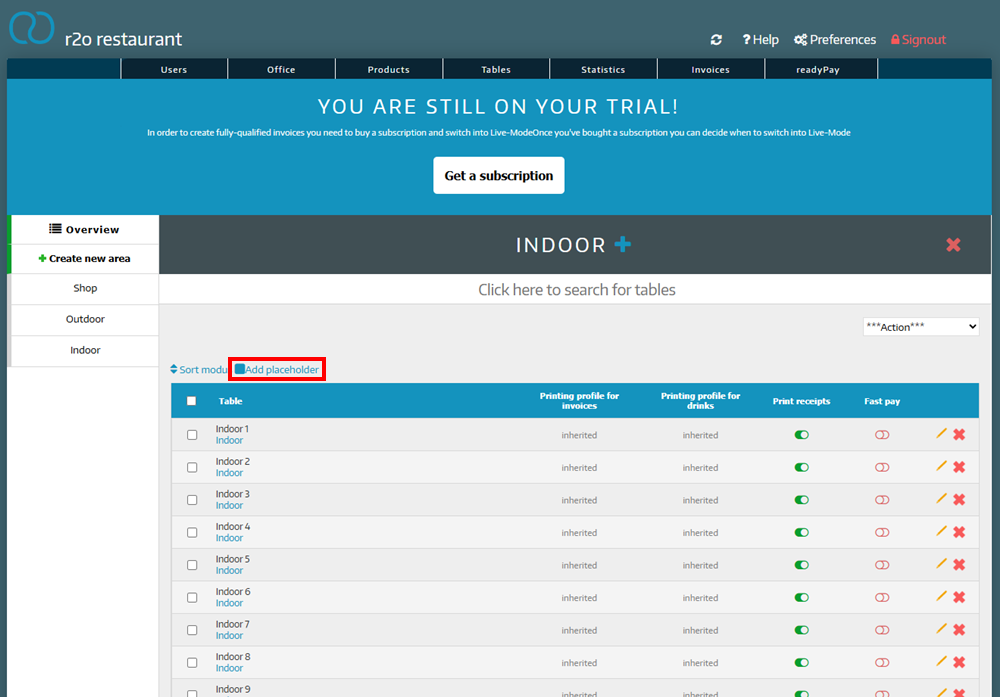 Placeholders are easy to add and delete, so you can't go wrong here!
 - Click on Sort Mode
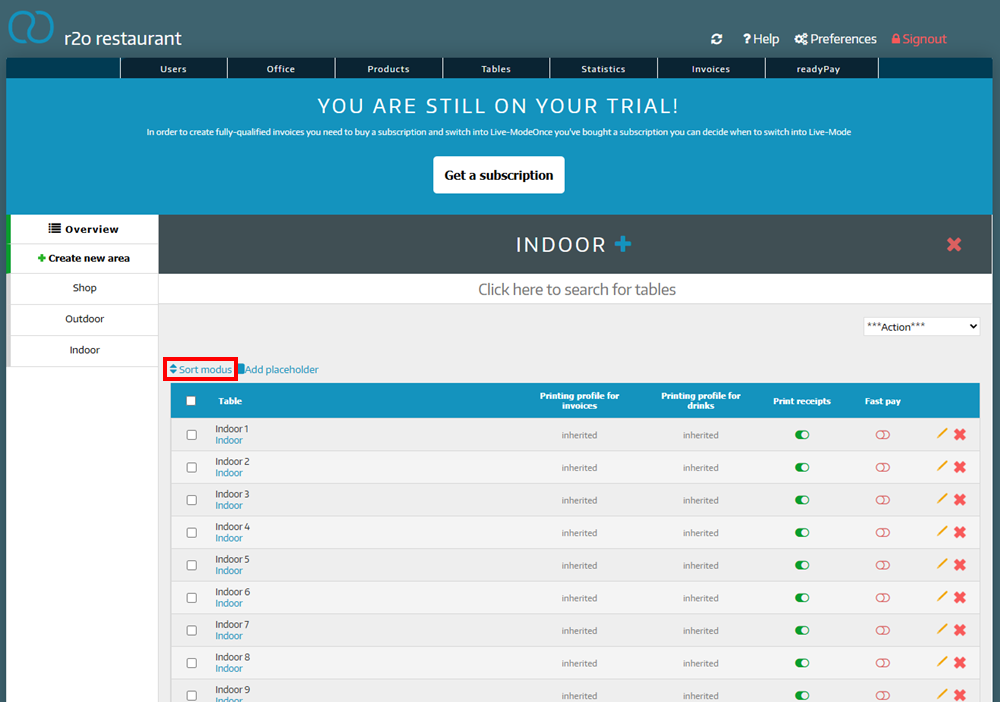
- Now you can move tables and placeholders
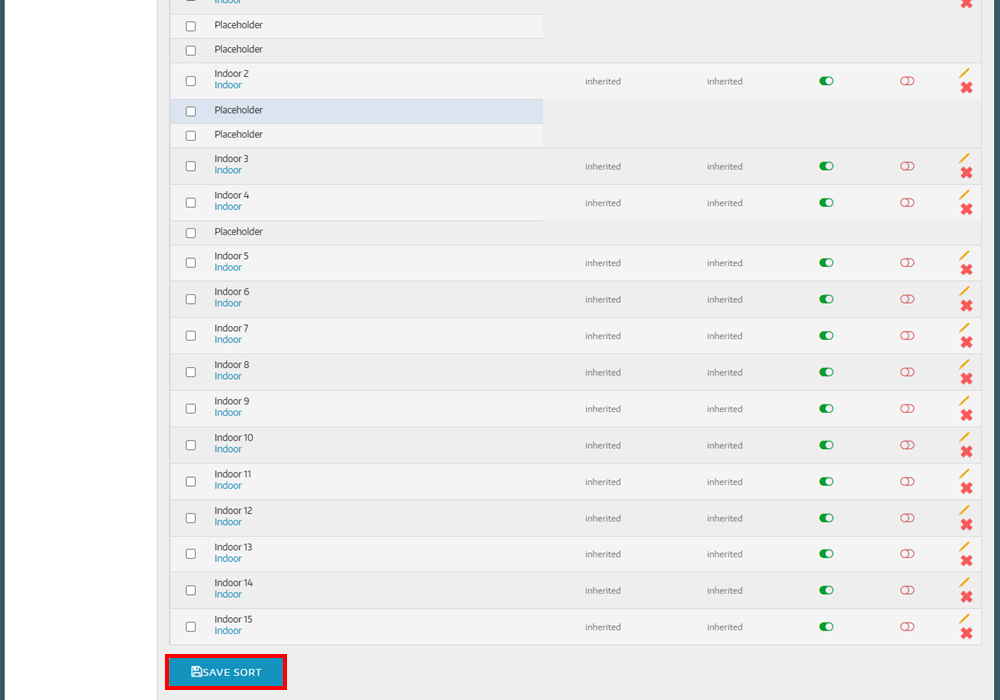
- When you are ready, you can save your sorting by clicking on the corresponding button
Example
In our example, we have set 6 columns in the checkout interface. This means that the first 6 tables and placeholders form a row. We want to have 2 tables in the first row. So we create 2 tables and immediately after them 4 placeholders follow - and the row is full.
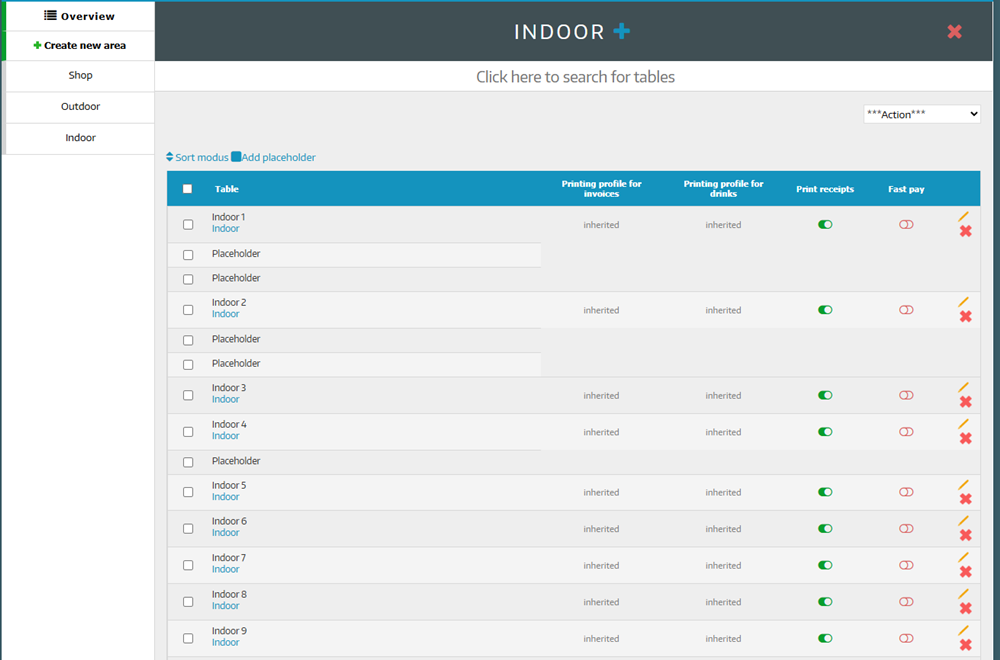
In our example, the finished table plan in the Admin Interface looks like this:
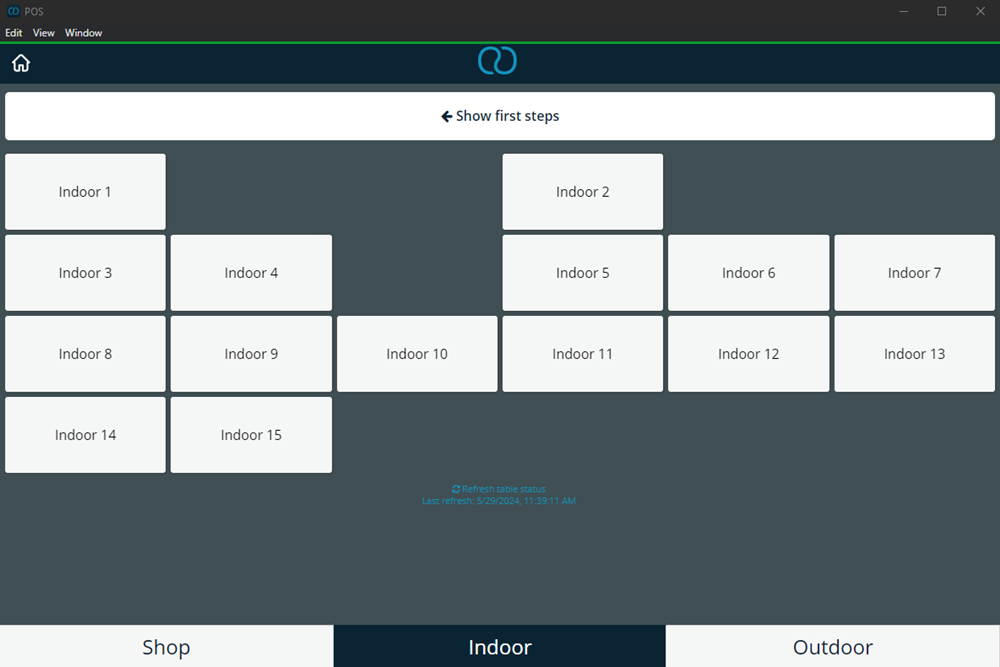
In the POS this table plan looks like this:
This is how you can create a table plan!
Did you know that our AI assistant readyBot can also answer your support requests via chat? Click here to access the chat.