How can I create a temporary table?
For example, if you simply add a few tables to your garden in summer, you can use the temporary table function.
Create temporary tables
To do this, proceed as follows:
- Log in to the Admin Interface
- Click on Tables
- On the left, select the area for which you want to create temporary tables.
- If you click on the name of the area (before the blue plus), you will get to the preferences for this table area
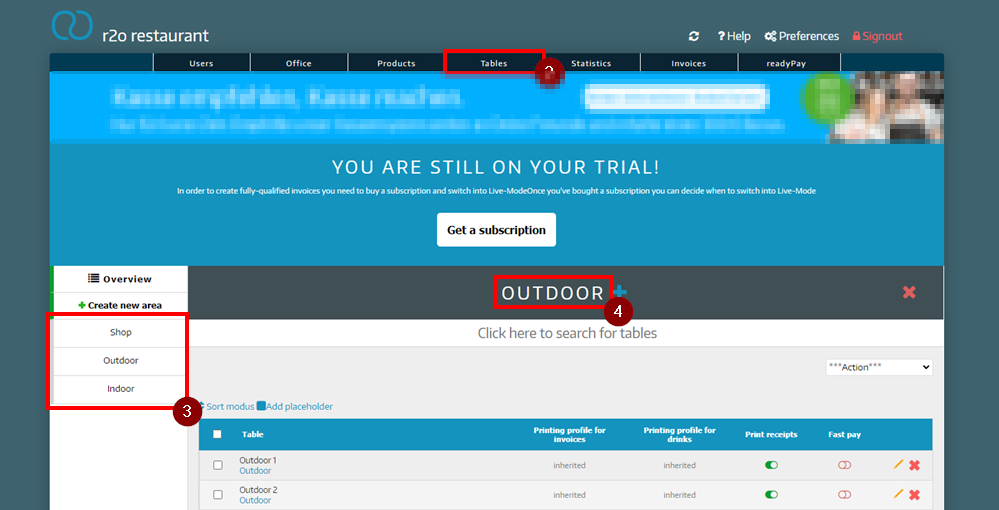
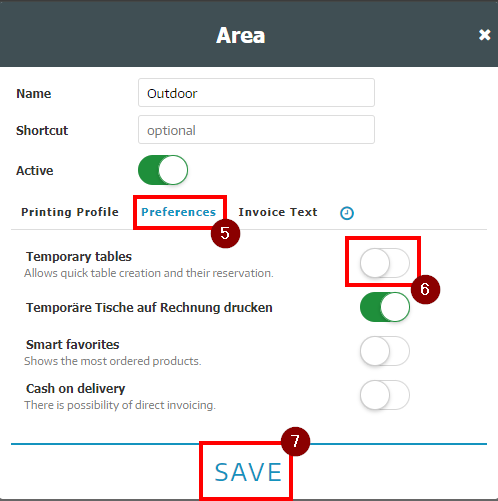
- Click here on the Preferences tab
- Activate the Temporary tables
- Click Save
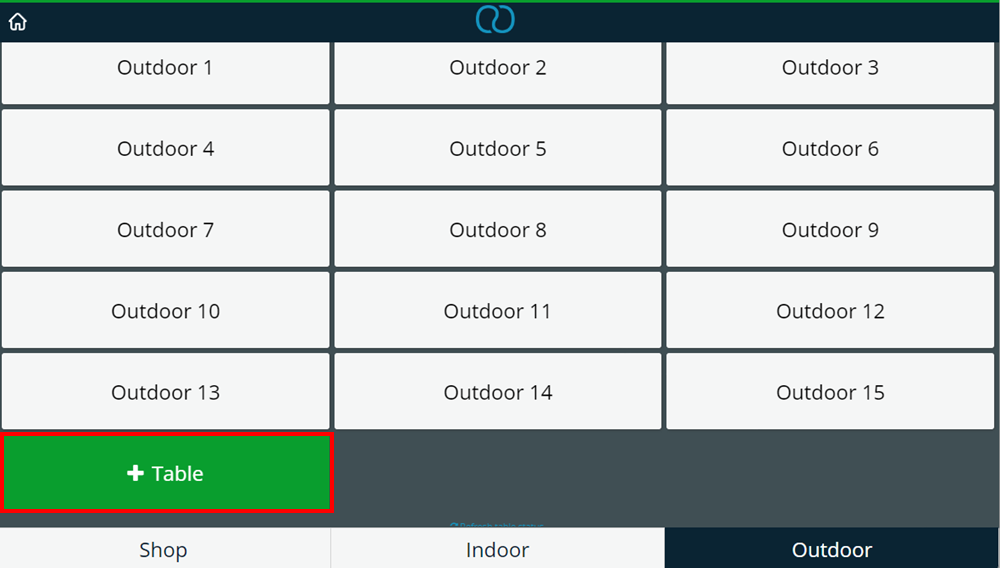
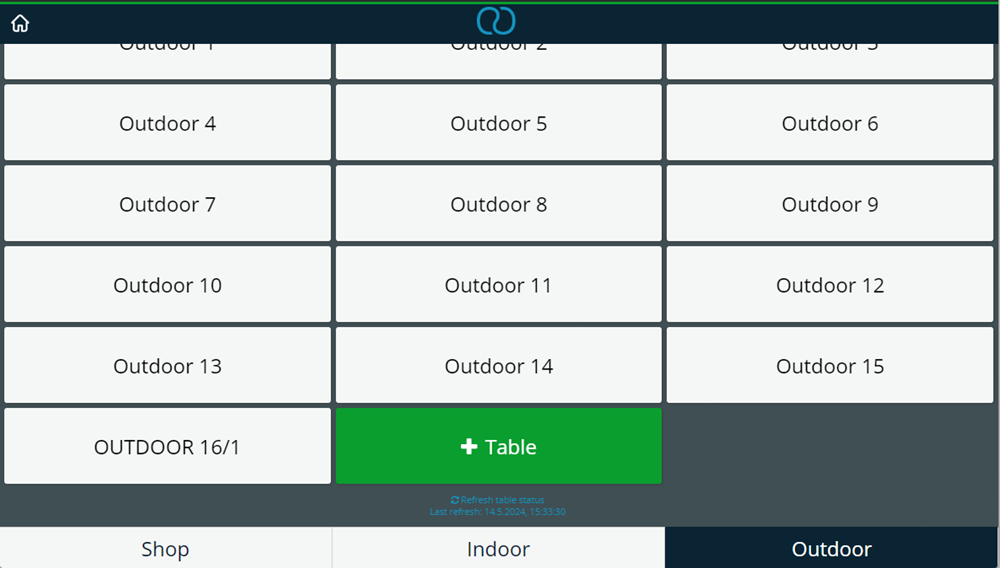
Now you can easily create temporary tables in the POS
- Click on the area for which you have set the function
- Click on the green button with + table
- Enter a table name
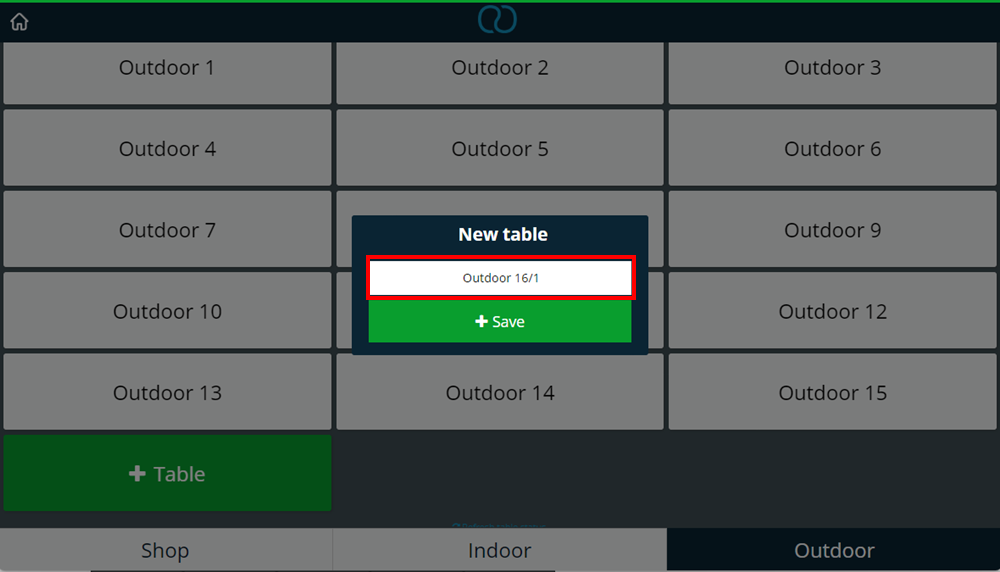
- Click Save
- Now you can use this table like your other regular tables!
Deletion of temporary tables after billing
If you want to delete the temporary table immediately after billing, the following function must be activated:
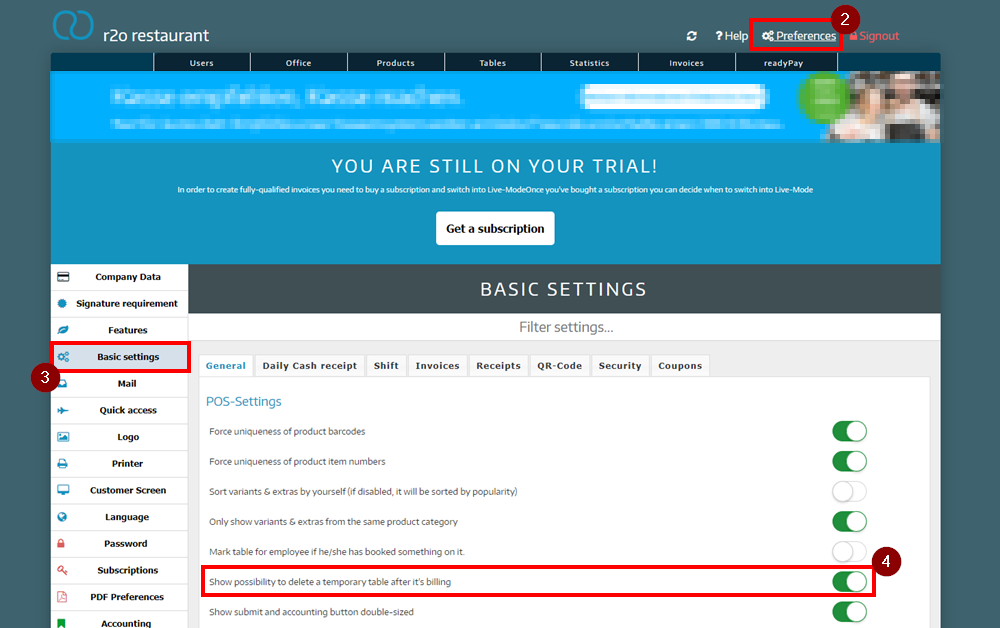
- Log in to the Admin Interface
- Click on Preferences
- Click on Basic settings
- Activate the option Possibility to delete a temporary tables after its settlement
If this setting is activated, you will be asked immediately after billing whether you want to delete the table.
Did you know that our AI assistant readyBot can also answer your support requests via chat? Click here to access the chat.