How do I create products in the Admin Interface?

In this article, you will learn how to create and manage new products directly in the ready2order administration interface. Products can be both physical products and services, such as a "men's haircut".
To create a new product, proceed as follows:
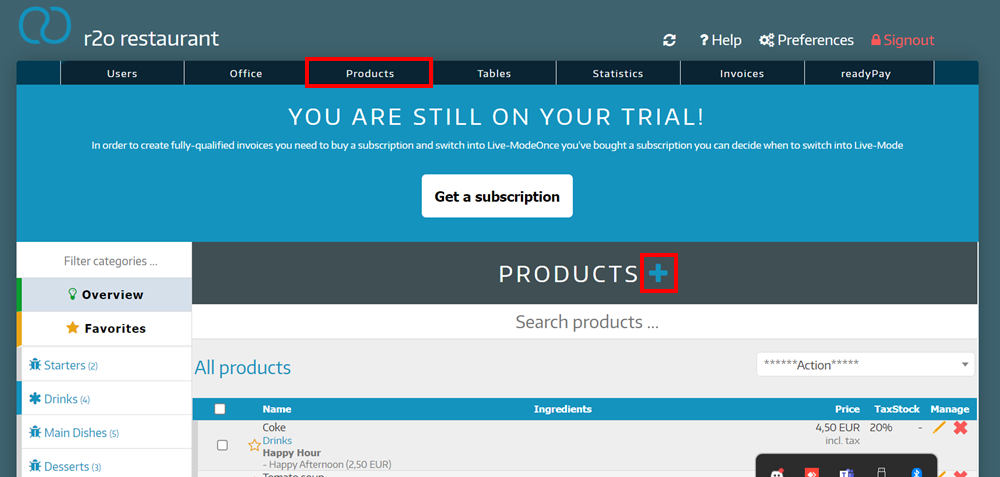
- Click on Products
- Click on the blue + next to Product
- A new window is opening up
Product description
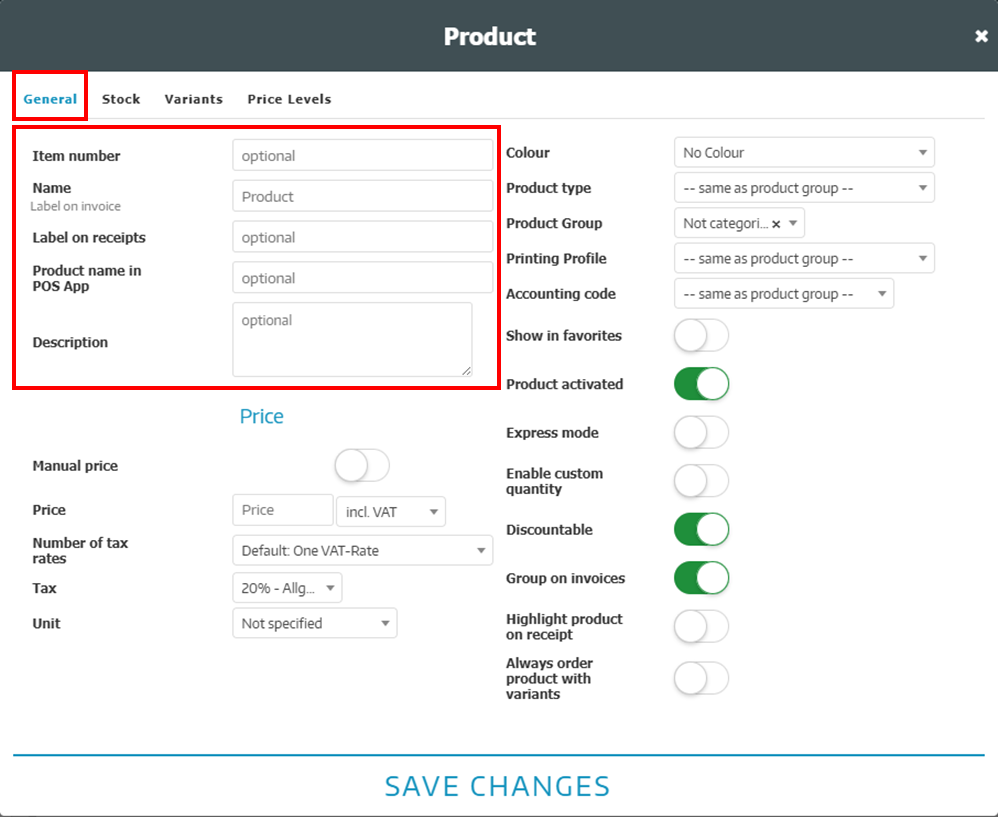
The first part of the product description consists of
- Item number (optional): Enter an article number
- Barcode (optional): Use “random barcode” in blue to generate a random barcode (to use this function you have to enable barcodes under Preferences > Features > Enable barcodes)
- Name: Name of the product
- Label on receipts (optional): Name of the product on receipts
- Description (optional): Optionally enter a description of the product
- Product name in POS App (optional): Name of the product in the POS App
Determine the price of the product
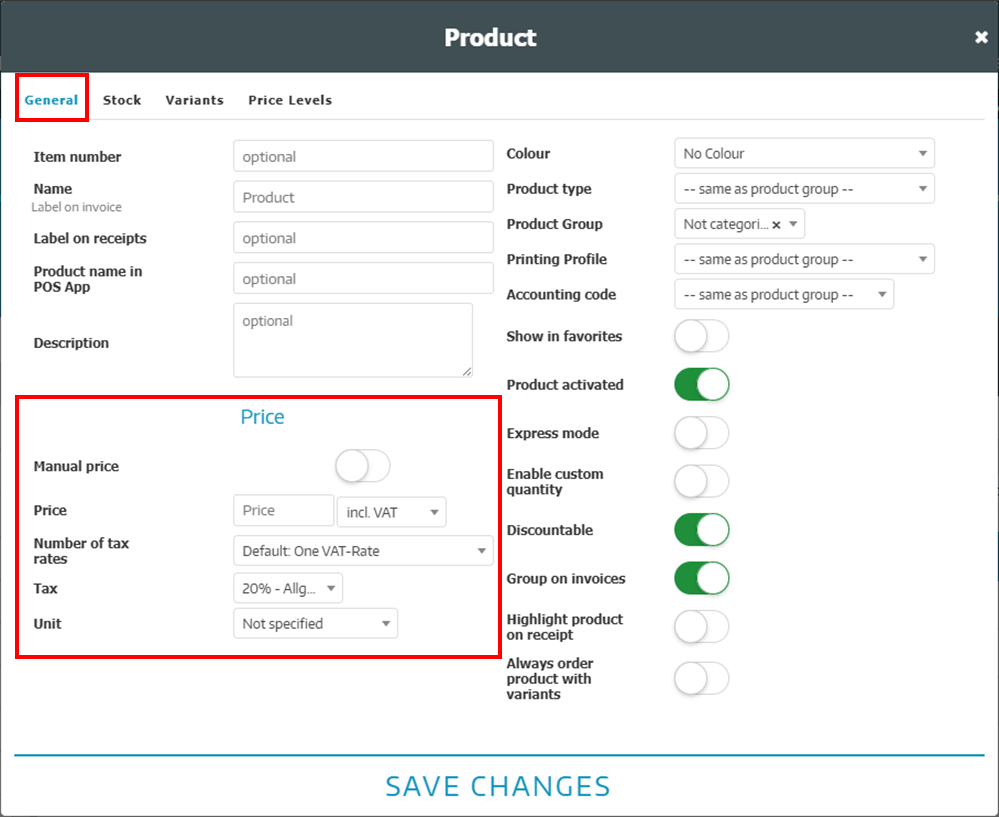
The price is made up of the following elements:
- Manual price: If this is activated, a price must be entered manually at the checkout
- Price: Enter a fixed price for the product and choose between gross and net
- Number of tax rates: Choose multiple tax rates if needed
- Tax: Choose the tax that suits you
- Unit: Choose a unit if needed
Additional options of a product
For each product, you can select the following additional options to make the product easier to find in the POS:
- Color: Give the product a color to find it faster
- Product type: Is usually the same as the product group
- Product group: Specify the appropriate product group for the product
- Printing profile: Which printer should be used to print the receipt for this product?
- Accounting code: Select an Accounting code for the product if needed
As a rule, the receipt of a product is printed with the same printer as the product group
Other additional options that you can easily activate or deactivate:
- Show in favorites
- Express mode
- Quantity input enable
- Discountable
- Group by invoice
- Highlight product on receipts
- Always invoice product with variant
Activate stock
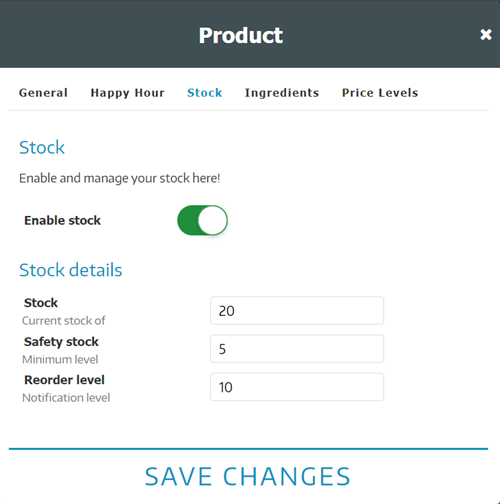
To activate the stock, proceed as follows:
- In the product creation click on Stock
- Click on Enable stock
- Stock: Enter the current stock level
- Minimum stock: How many products must ALWAYS be in stock?
- Notification level: From how many products do you want to be informed that only a few products are left?
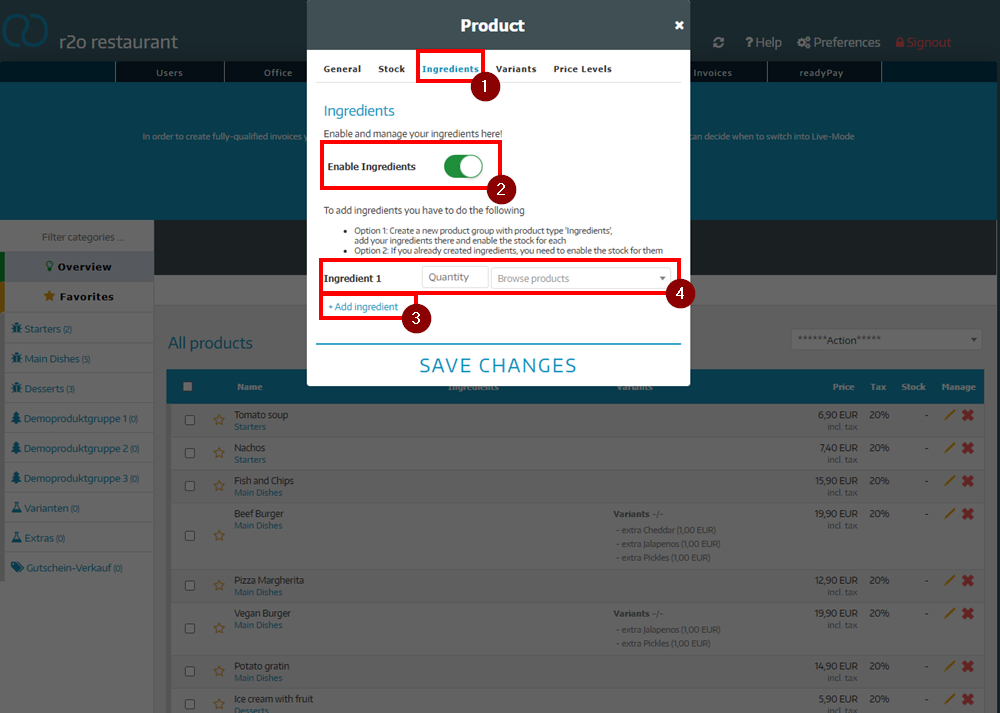
Ingredients
To activate Ingredients for your products, proceed as follows:
- In the product creation, click on Ingredients
- Enable ingredients
- Click Add Ingredient
- Now you can add ingredients, there are two options:
- Create a new product group with the setting Product type: Ingredients, create all your raw materials there and activate the stock for these products
- You have already successfully created raw materials or ingredients. Activate warehouse management for these products in order to be able to create them as ingredients for this product
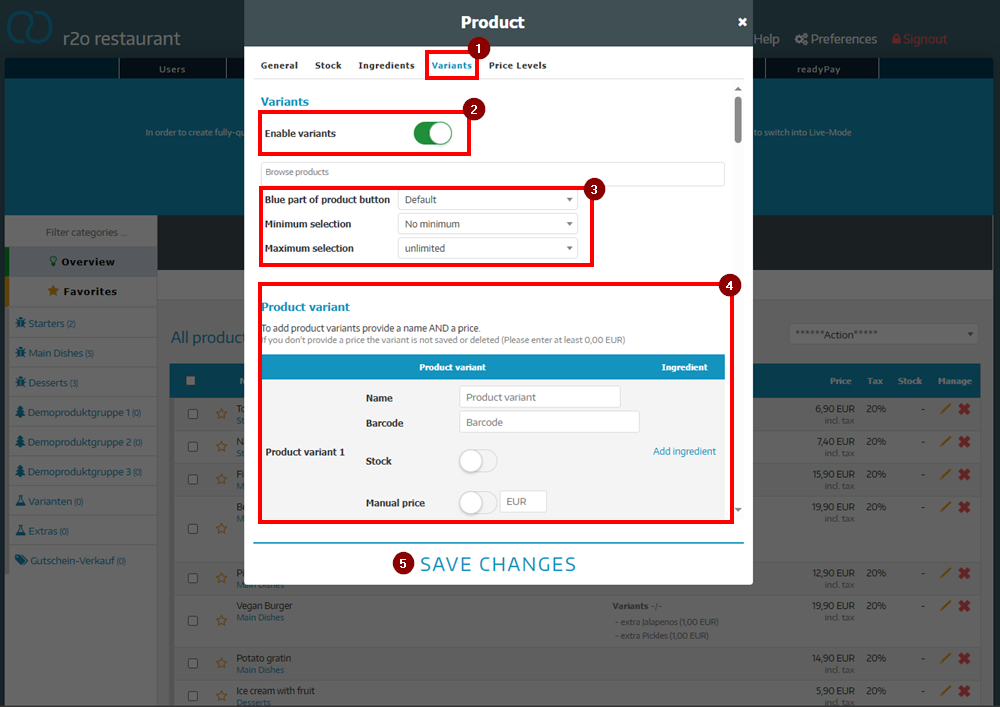
Create product variants
Product variants allow you to sell an additional selection of products as a combination with one product.
To create variants of your product, proceed as follows:
- In the product creation, click on Product variants
- Activate the product variants button
- Adjust the POS settings for the variants:
- Blue part of the product button: The “blue part” is the clickable area of a product to open the variants selection. Determine how large this area should be
- Minimum selection: Whether there must be a minimum selection of product variants
- Maximum selection: Whether there is a maximum selection of product variants
- Create your personal product variants
- Name: In our example pillow
- Barcode: Optionally enter a barcode
- Stock: Activate the stock if necessary
- Price: If necessary, activate manual pricing or enter a fixed price
- Click Save Changes
Create products with a scanner
To create products using a scanner, you can proceed as follows:
- Go to POS
- Click on Products
- Click on create new product
- Click in the Select Barcode field
- Scan any barcode of your choice
- This will be displayed automatically
- Enter a name for the product
- Click Save
The product is now identified with the barcode.