How to Create Product Groups
Product groups help you organize your products clearly – this is especially important when you sell many different items. They structure your product management, make navigation in the POS easier, and enable you to generate better reports by product group. In this guide, we will show you how to create, edit, and manage product groups.
Creating a Product Group
Step-by-step:
- Log in to the Admin Interface.
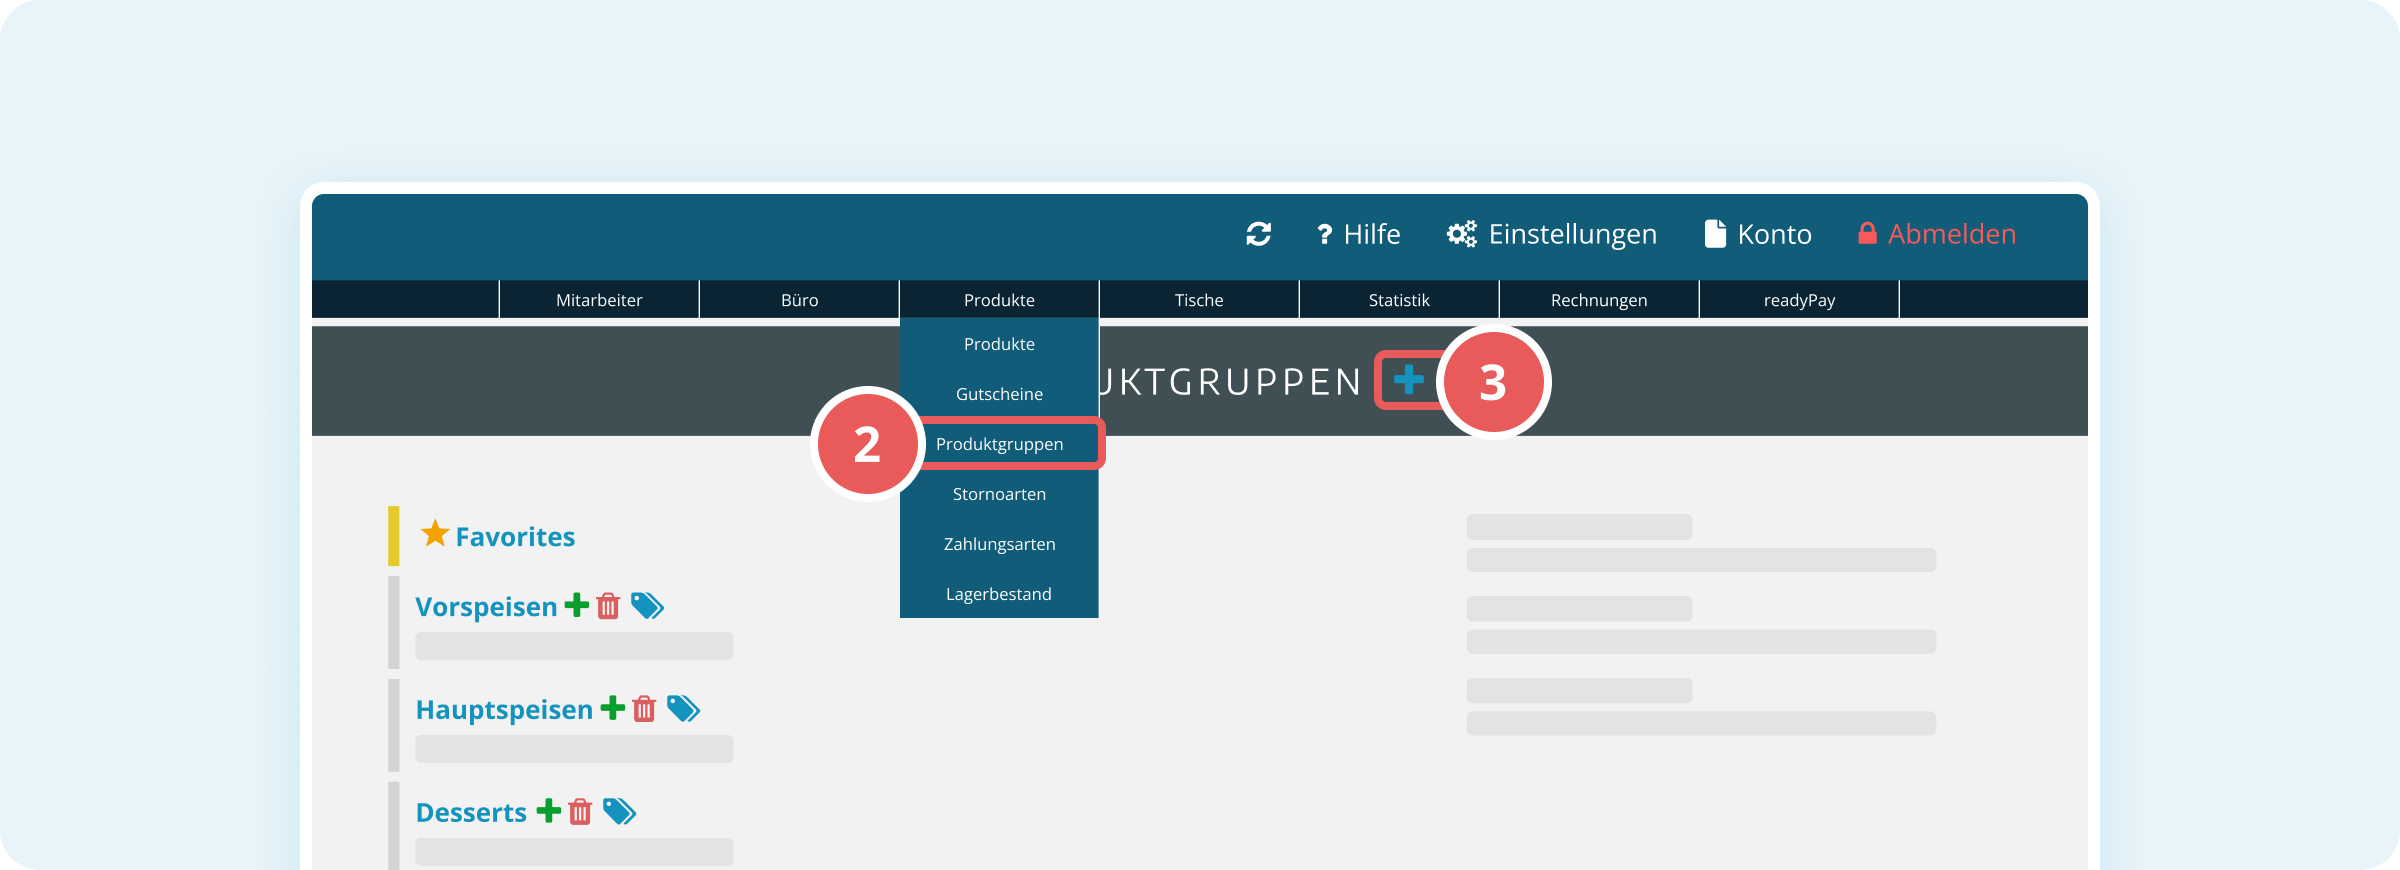
- Hover over Products in the navigation bar at the top and select Product Groups from the dropdown menu.
- Click the plus symbol (+) to the right of the heading "PRODUCT GROUPS" to create a new product group.
- Enter the following information in the dialog:
- Name: The designation of your product group (e.g., "Beverages", "Main Courses")
- Description (optional): A more detailed description of the group
- Abbreviation: Maximum 3 characters displayed in the POS (e.g., "GTR" for beverages)
- Active: Activate the toggle so the group appears in the POS
- Color: Choose a color for better orientation in the POS
- Type: Select the product type from the dropdown menu (e.g., "Variants" for products with options)
- Print Profile: Select a print profile if needed
- Subcategory of: If this group should be a subcategory, select the parent group here
- Click SAVE at the bottom of the dialog.
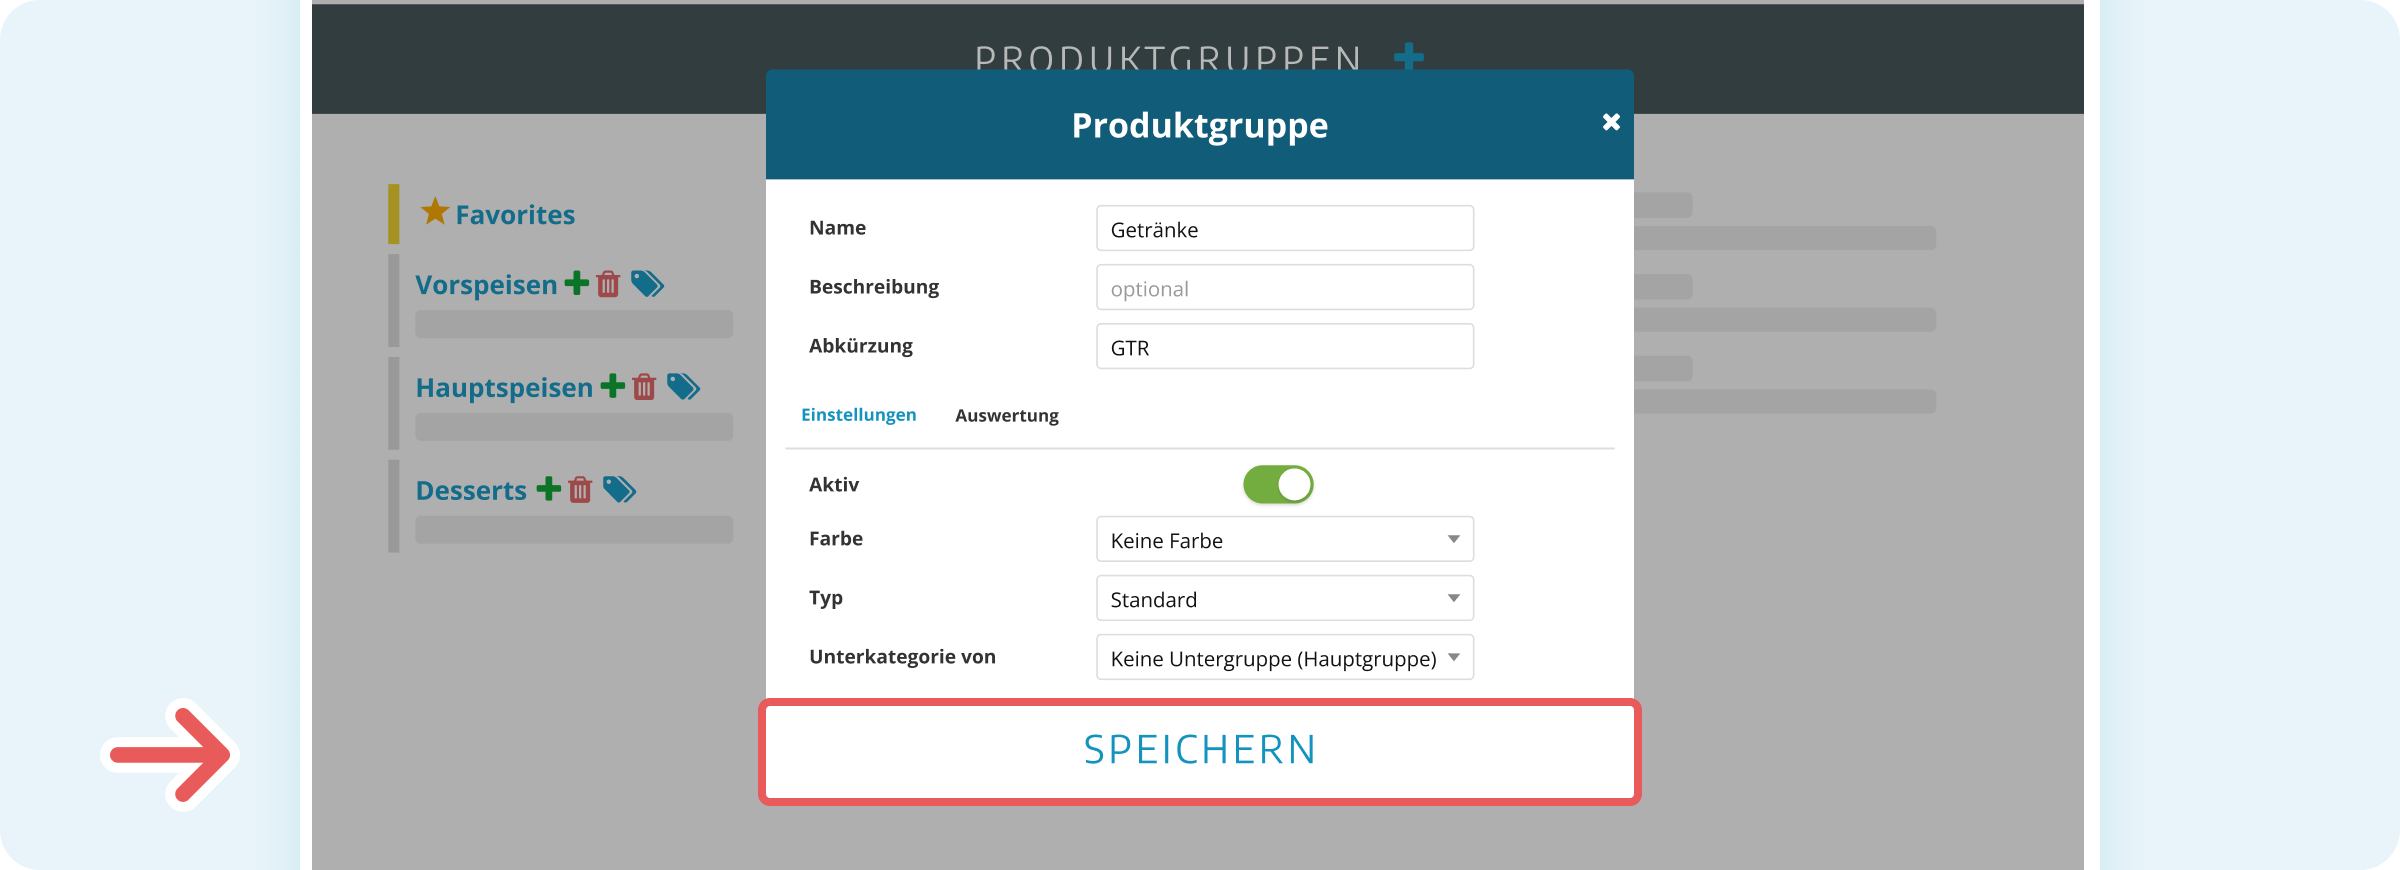
The new product group appears immediately in the overview and can be used in the POS.
Editing a Product Group
- Log in to the Admin Interface.
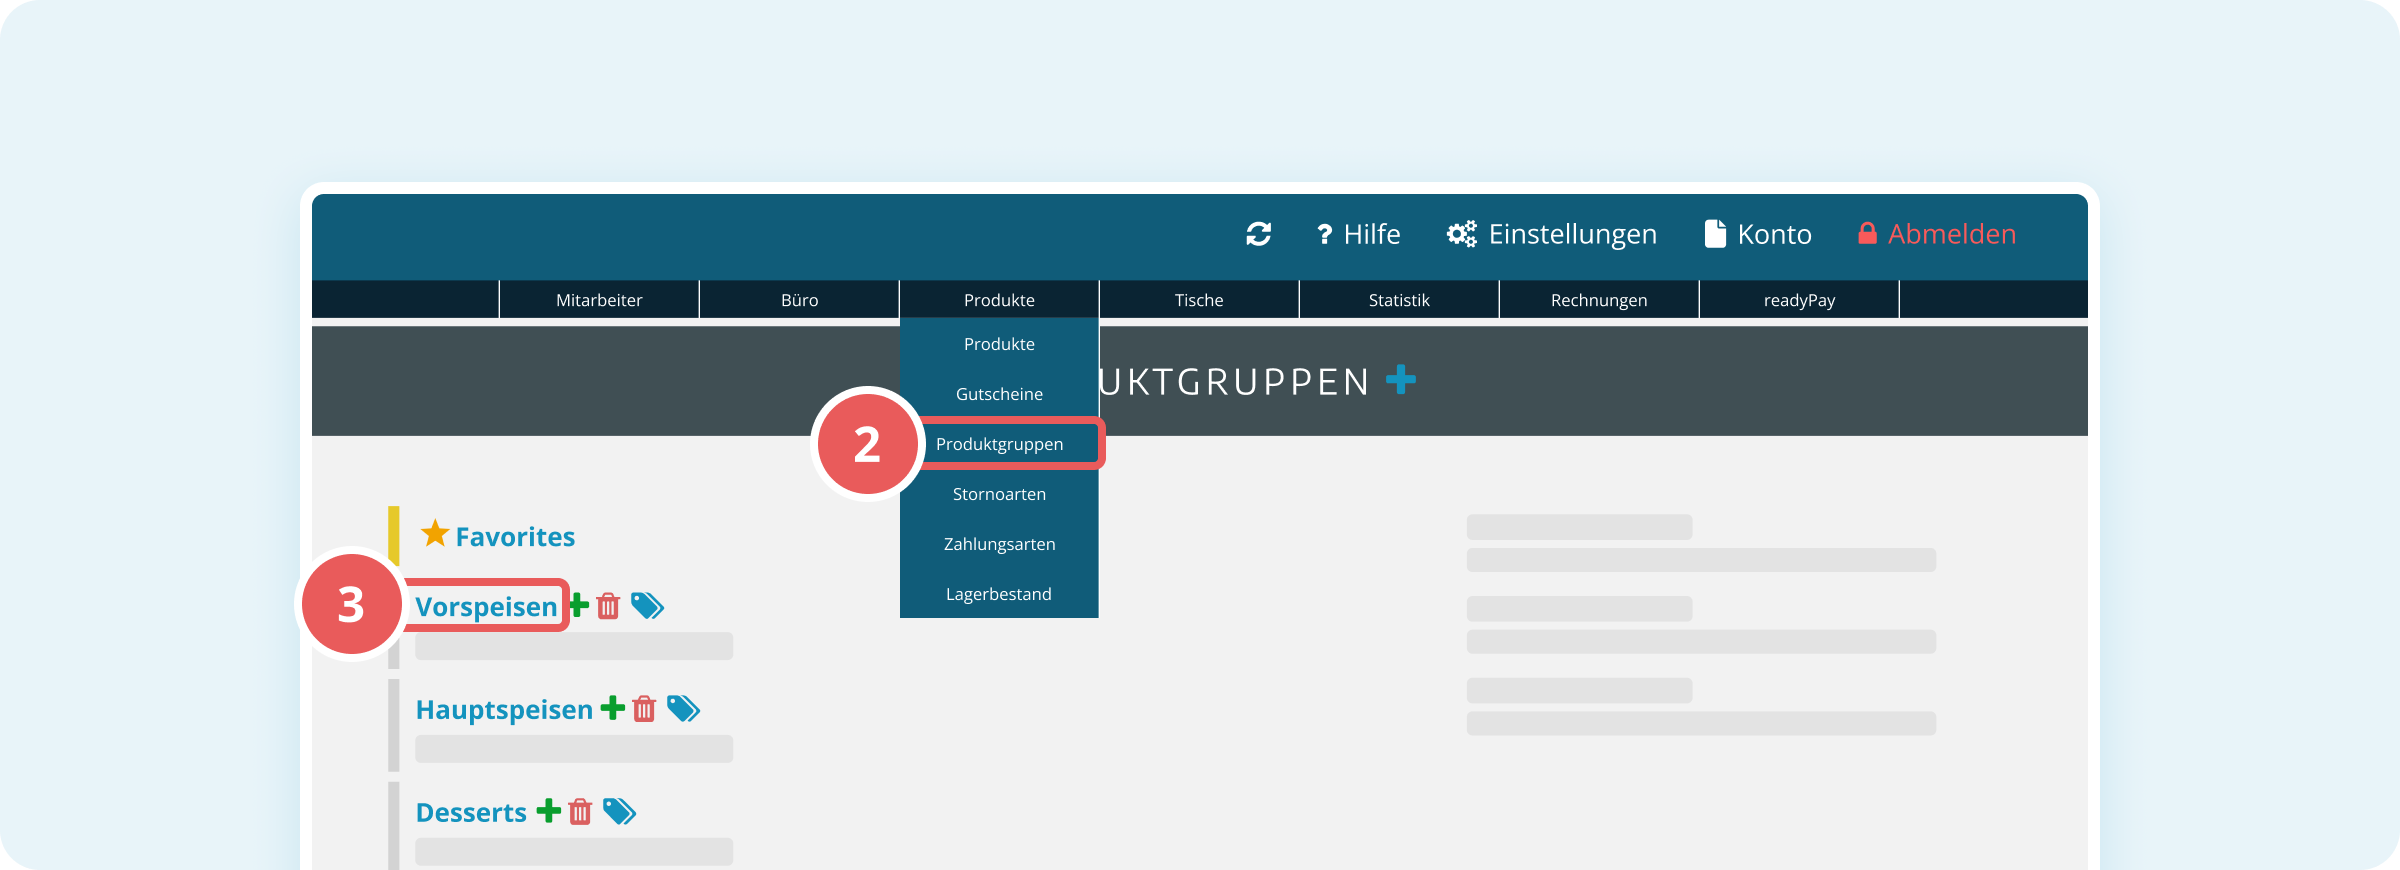
- Hover over Products in the navigation bar at the top and select Product Groups from the dropdown menu.
- Click directly on the name of the product group you wish to edit.
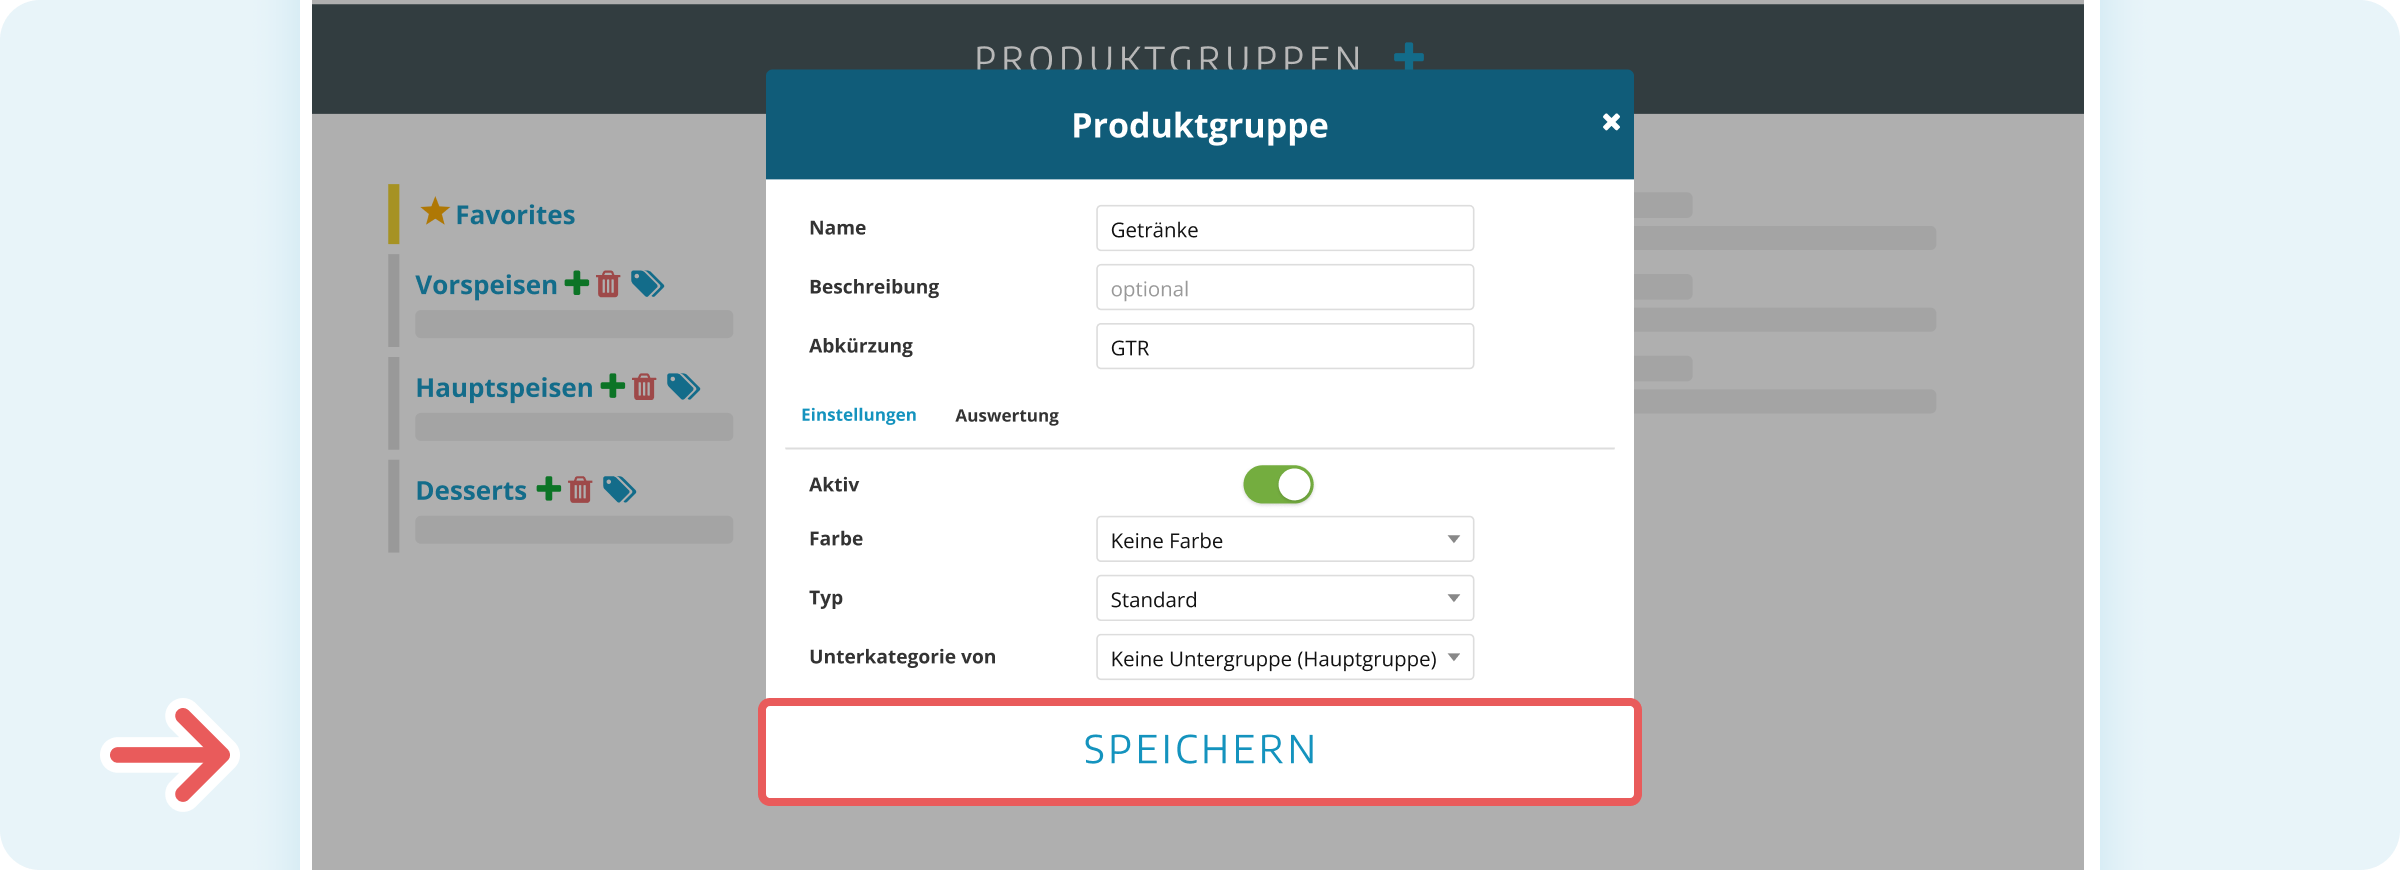
- Make the desired changes in the dialog.
- Click SAVE at the bottom of the dialog.
Adding a Subcategory
You can create further subgroups within a product group – this is particularly practical for extensive assortments.
- In the product group overview, click the green plus symbol (+) next to the desired product group.
- Fill in the fields as when creating a new product group.
- The Subcategory of field is automatically populated with the parent group.
- Click SAVE at the bottom of the dialog.
The subcategory is now displayed under the main group and can itself contain subcategories.
Adding a Product Directly to a Product Group
You can create products directly within a product group. This saves time when you want to create multiple products for the same group.
- In the product group overview, click the blue product symbol next to the desired product group.
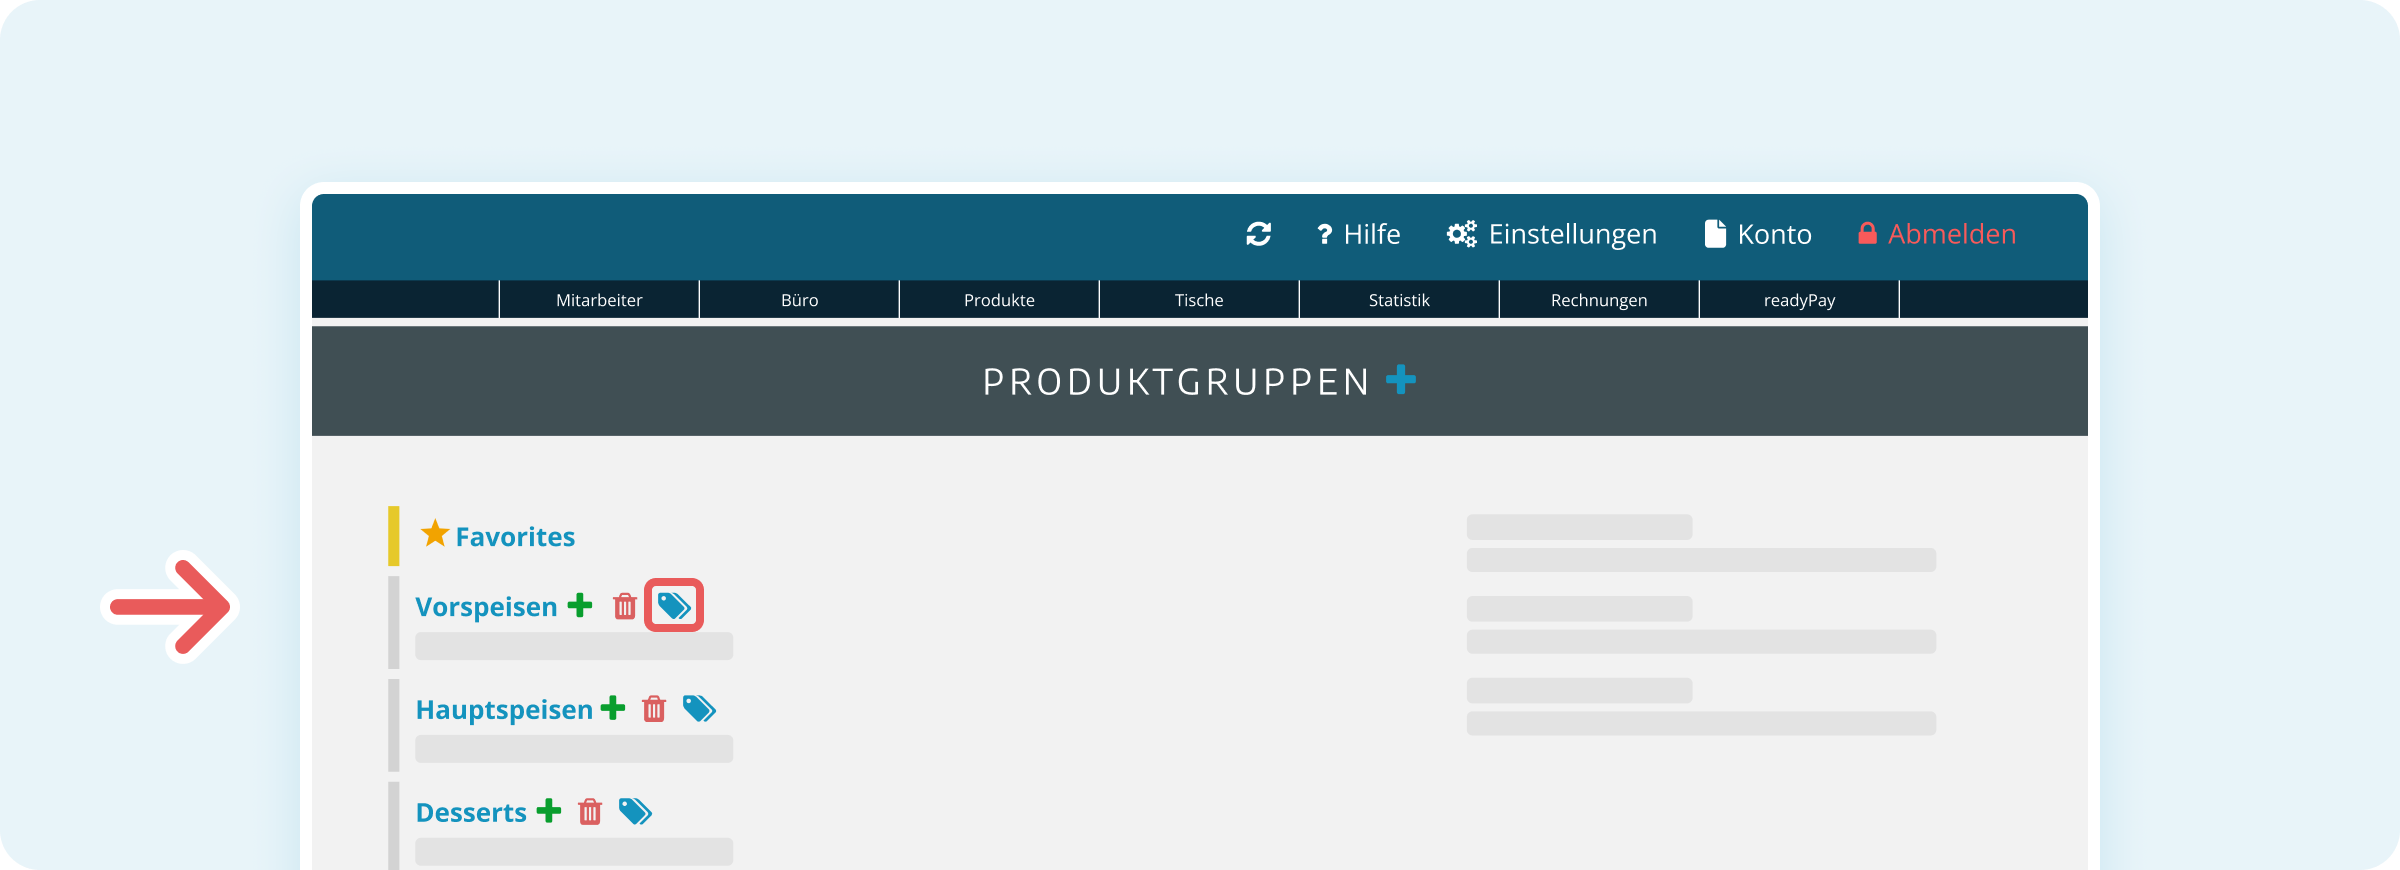
- The product creation dialog opens with the selected product group already pre-selected.
- Enter the product data.
- Save the new product.
Deleting a Product Group
- In the product group overview, click the red trash can symbol next to the desired product group.
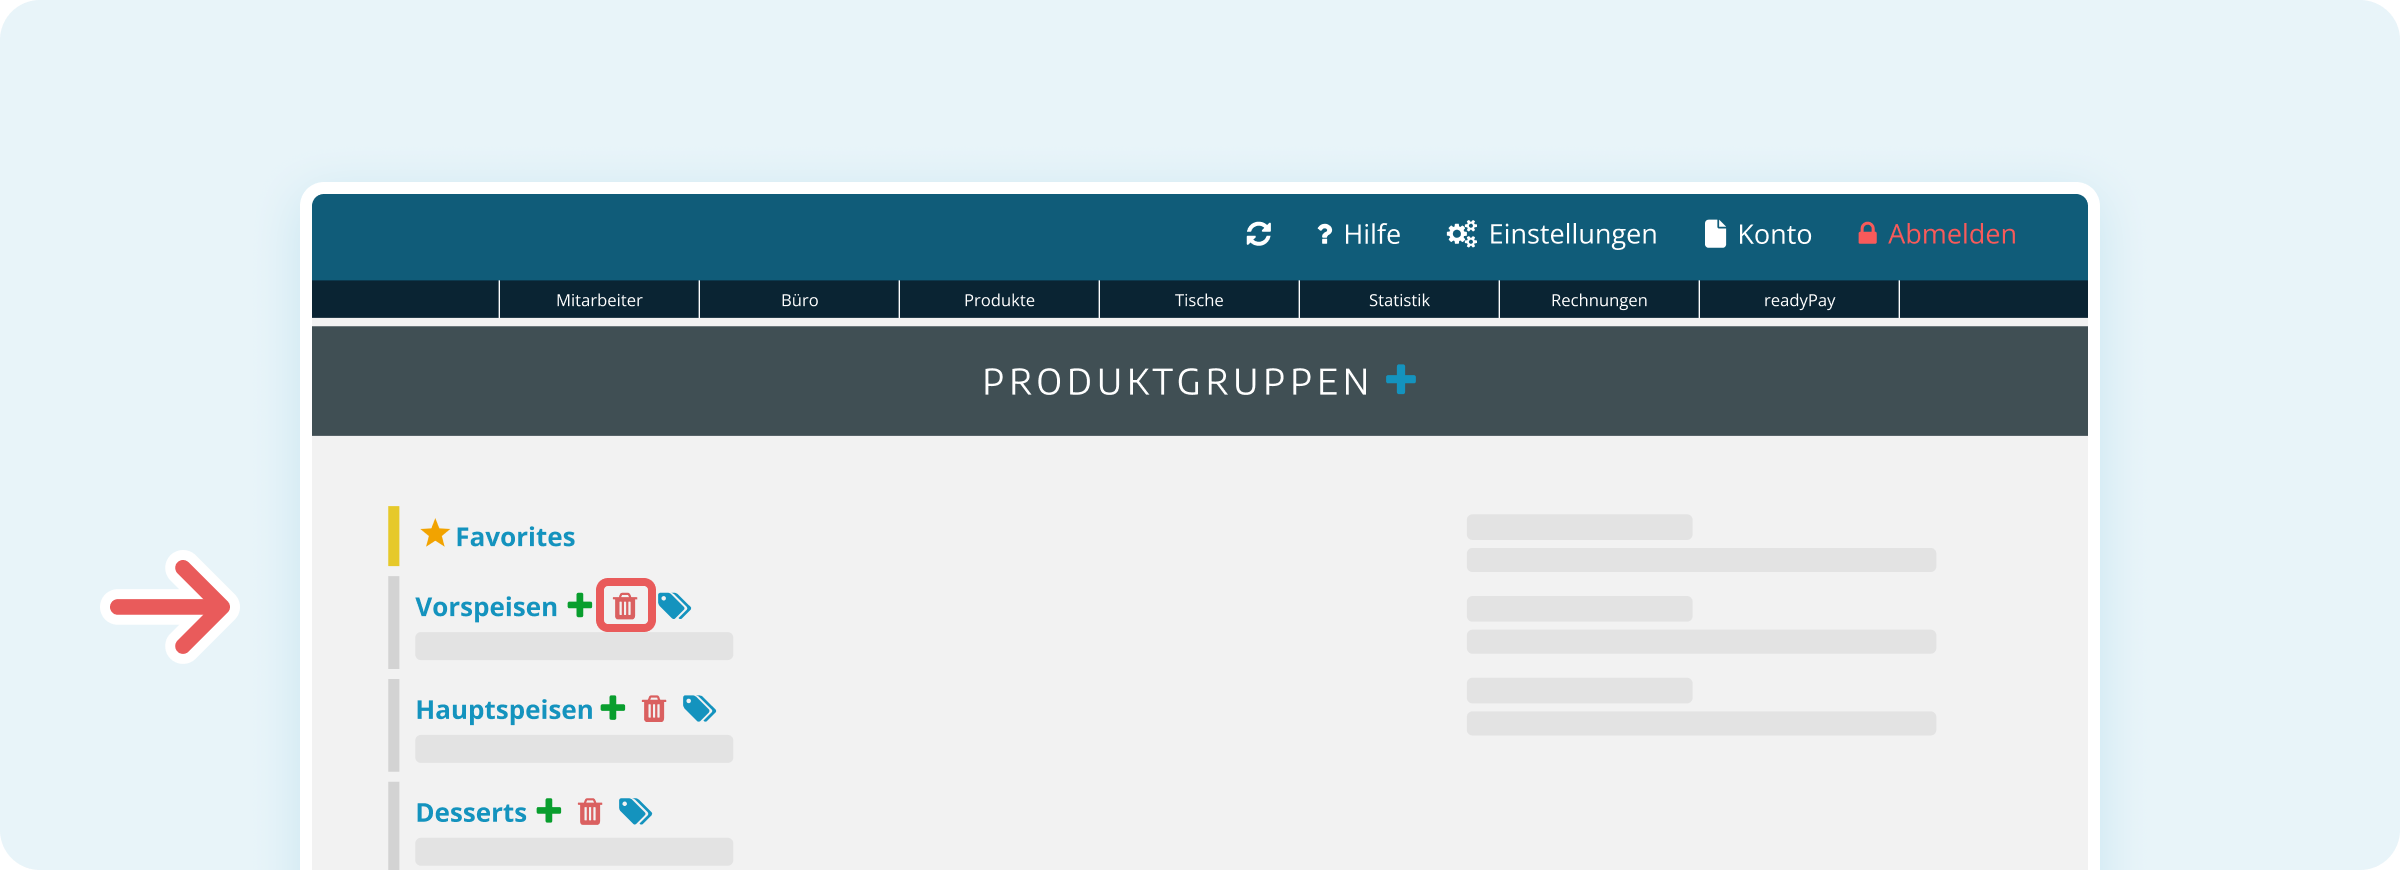
- Confirm the security prompt.
1. Hover over Products in the navigation bar at the top and select Products.
2. The products can be found in the left sidebar under not assigned.
Further Information
After you have created your product groups, you can now create products and assign them to these groups. You can find a guide for this in our article on product creation.
