Connect scales and other barcode-enabled devices to ready2order
Connect scales and other barcode-enabled devices to ready2order
Learn how you can efficiently use your counter, market, or store scales, as well as other systems and devices that generate barcodes, with ready2order.
Hardware requirements
To use the scale integration with ready2order , you need the following hardware components.
These ensure a smooth process when weighing, printing labels and scanning products.
– A scale with a printer
- Our recommendation: Bizerba Q1 800 with printer (with self-adhesive labels)
- Alternatives: Any commercially available counter scale with EAN-13 code printing function
– A scanner
The scanning function requires a device with a camera OR a handheld scanner. Examples include the readyGo , readyMini , a conventional tablet or smartphone, as well as the readyMax with a handheld scanner, or even a PC/Mac with a handheld scanner.
- Possibilities:
- Built-in camera (tablet, smartphone, readyGo, readyMini, readyMax)
- Handheld scanner (PC/Mac compatible)
- Activating the camera scanner:
- Go to settings > Ordering
- Activate the slider for Camera Scanner

Necessary settings in the Admin Interface :
In order for the scale and the cash register system to communicate correctly, some basic settings must be made:
- Open the ready2order Admin Interface .
- Navigate to settings > basic settings > Scale configuration
- Enter the following values:
- Price prefix: 22
- quantity n-prefix: 21
- Click Save to apply the settings.
Connection options
There are two different ways to connect a scale to the POS system. Depending on the scale's configuration, either the product weight or the price can be transferred directly to the POS via a barcode.
Variant A: quantity n prefix (21)
quantity and price are shown on both the label and the invoice
.
In this variant, the item's weight is transmitted to the POS system via the barcode. This allows both the quantity and price to be visible on the label and invoice. This method is suitable if you want customers to be able to see the weight on their invoice.
Advantages:
- quantity and price are visible on the label and invoice.
- Facilitates traceability for customers and accounting.
Disadvantages:
- The prices of the weighed items must be kept up to date both on the scale and in the cash register.
- Higher maintenance effort when prices change.
Setup steps:
- Generate Barcode:
Create an EAN-13 code using the scale software or use a free online generator such as the EAN-13 Generator .
This barcode has a total of 13 digits. We explain its structure in the following infographic. You can also download it here .
- In our example, we enter the following into the barcode generator:
- Define quantity prefix
Enter the number "21" as the prefix. This prefix indicates that the item is weight-dependent. - Enter article number
Use a five-digit item number, for example "00306" . - Store weight as a placeholder
Enter the weight in grams as a five-digit value, e.g., "00212" for 212 g. This value changes with each weighing. - Generate barcode
Combine the values to create a twelve-digit number:
"210030600212" (without check digit). - The barcode generator automatically calculates the check digit, so the complete code is:
"2100306002123" (with check digit "3" in this example).
- Define quantity prefix
- Enter barcode into the scale
Follow your scale's instruction manual to enter the barcode.
- Enter barcode in the cash register system:
- Go to Products > Create new product or edit an existing product.
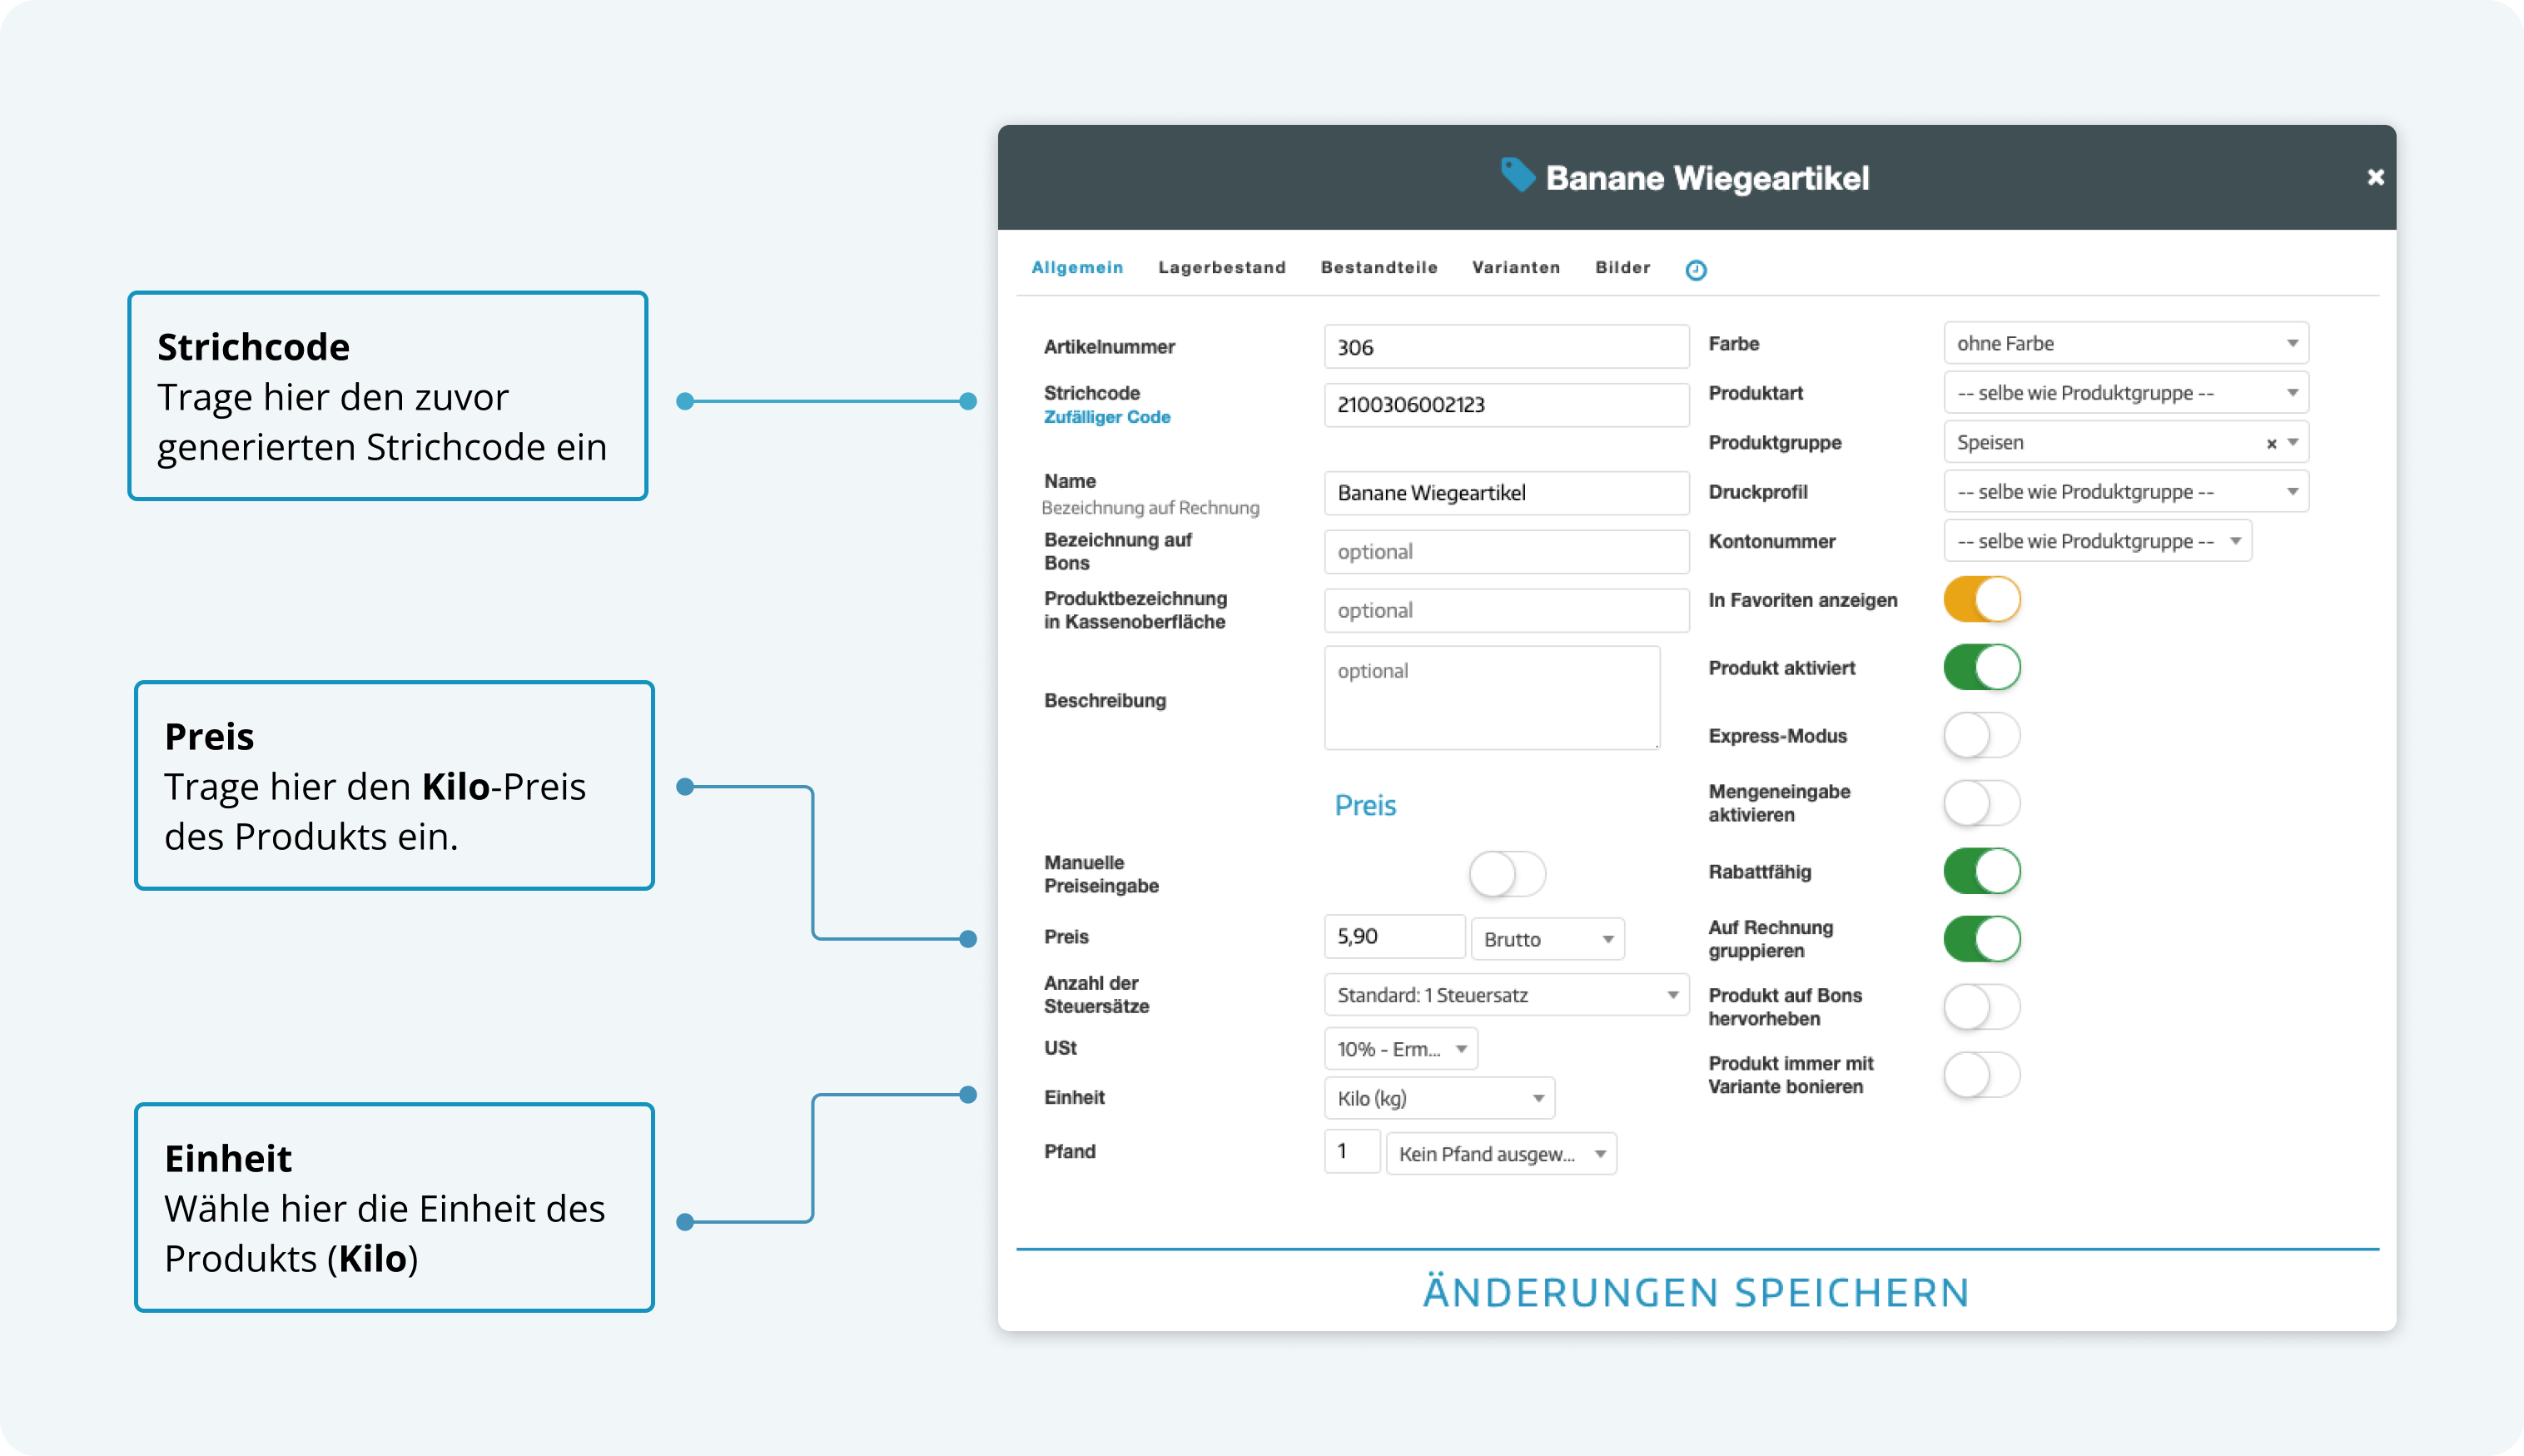
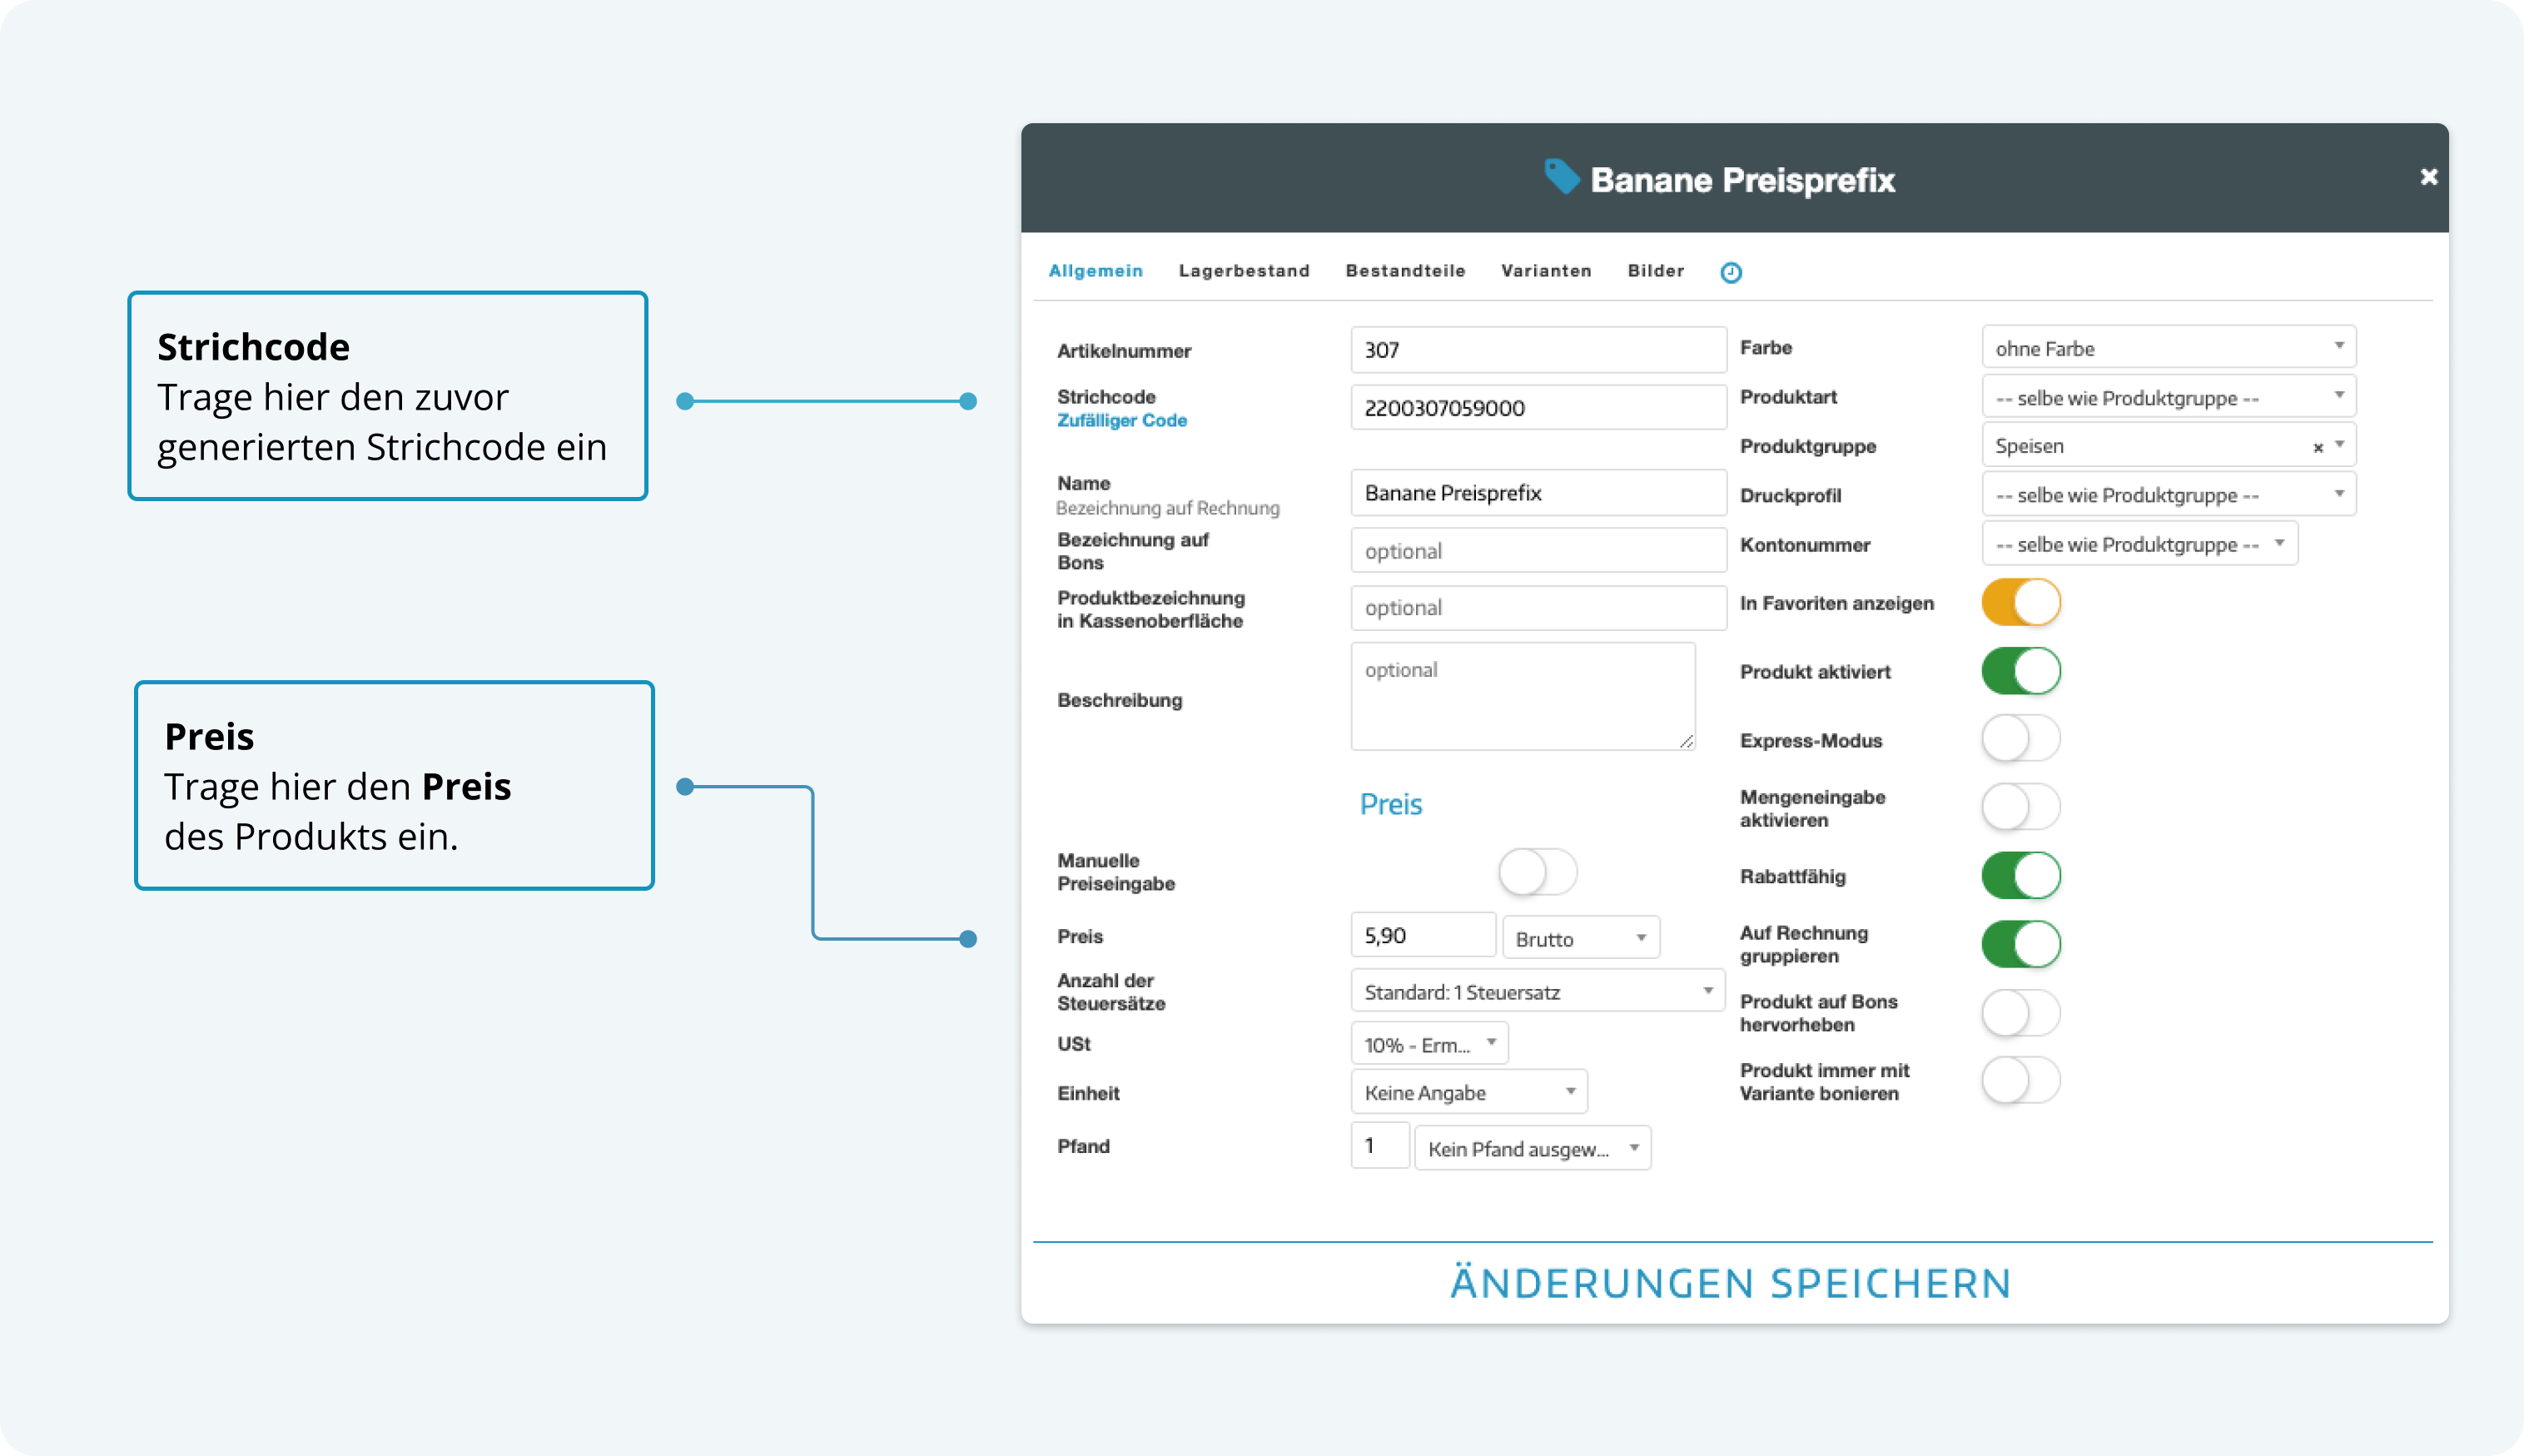
- Enter the generated EAN-13 code in the "Barcode " field.
Example: "Banana weighing item"
.
To visualize the quantity prefix (21), we created a product called "Banana Weighing Item." To edit products, click the pencil icon.
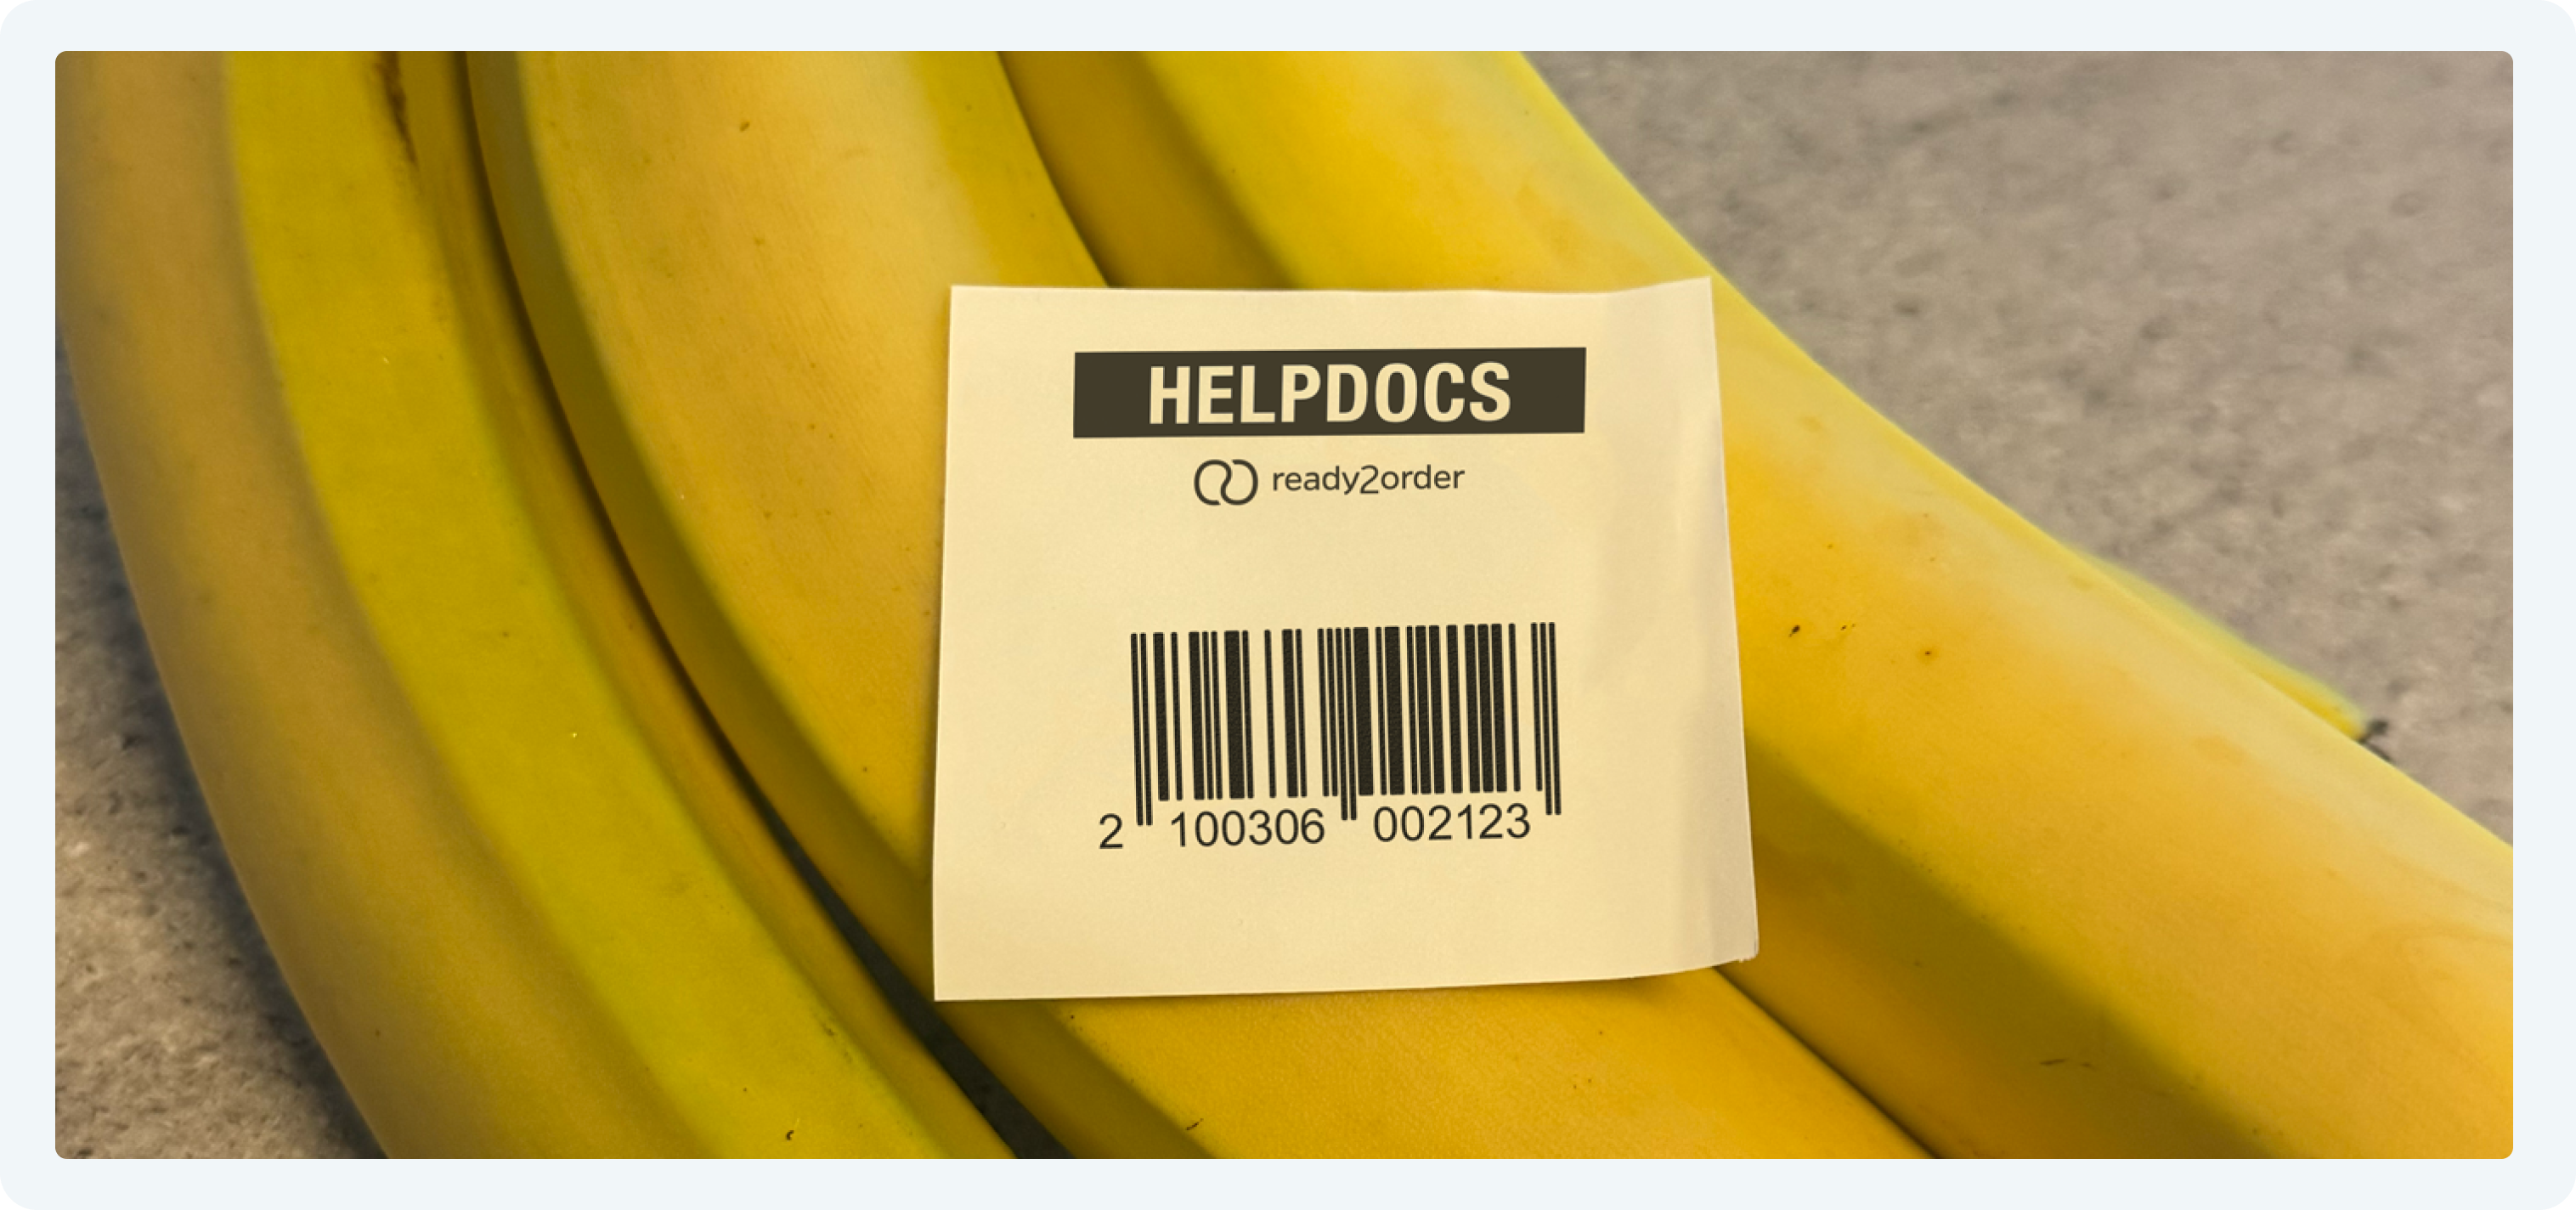
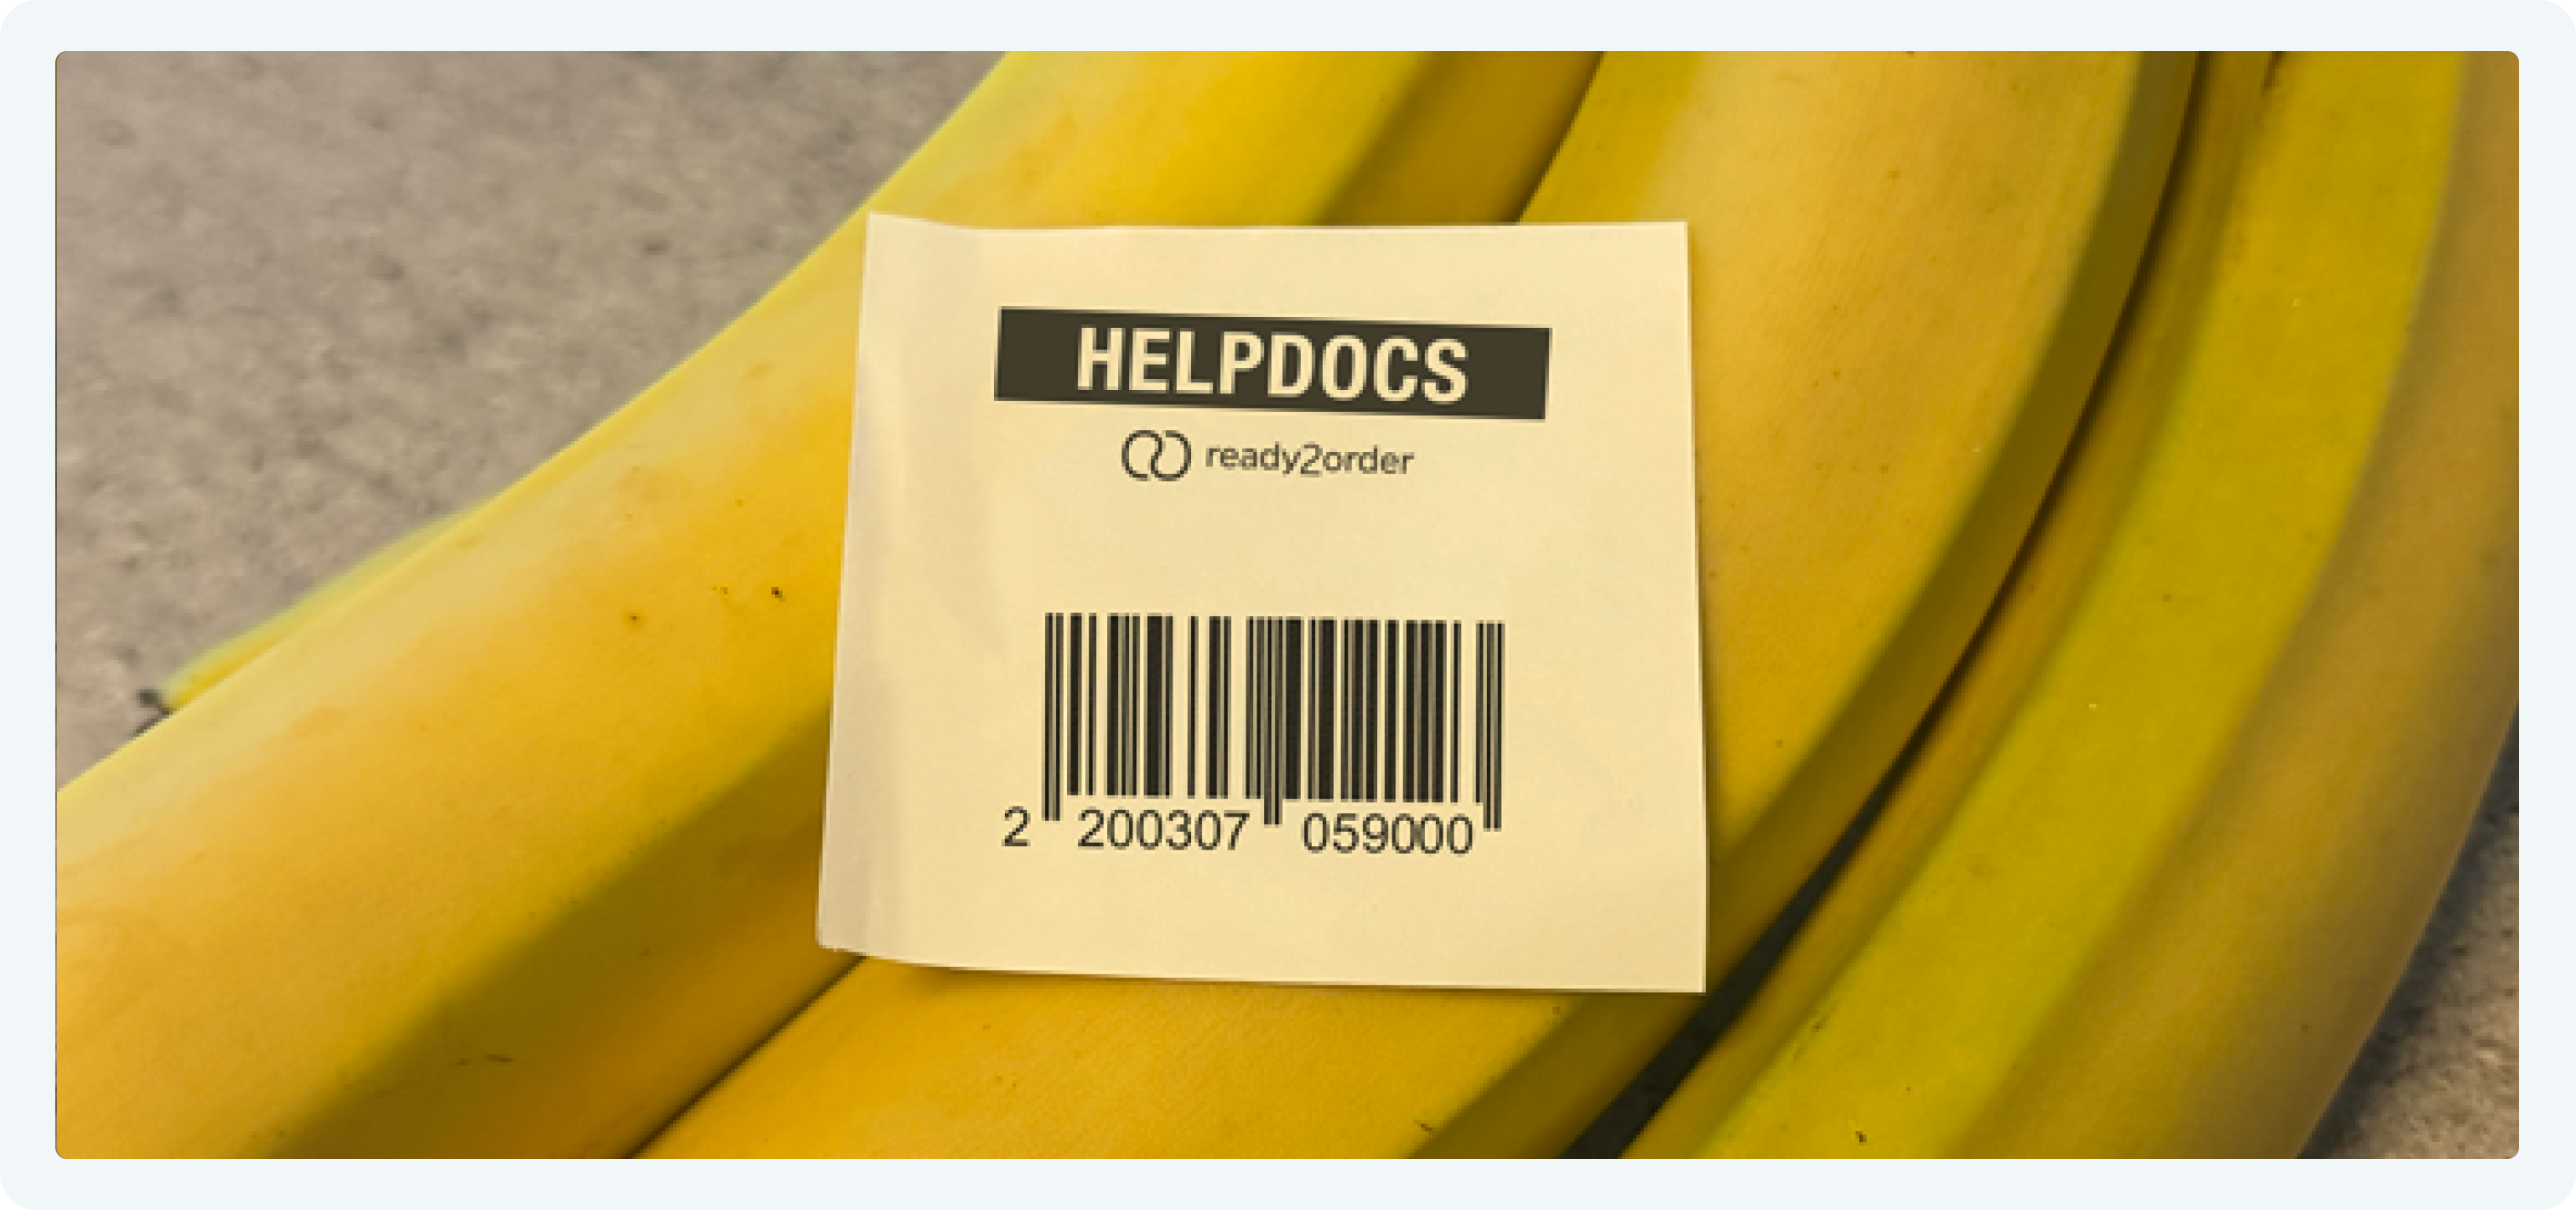
- Test run label printing:
Now the item (banana) can be weighed on the scale (in the example 212 grams) and the barcode can be printed.
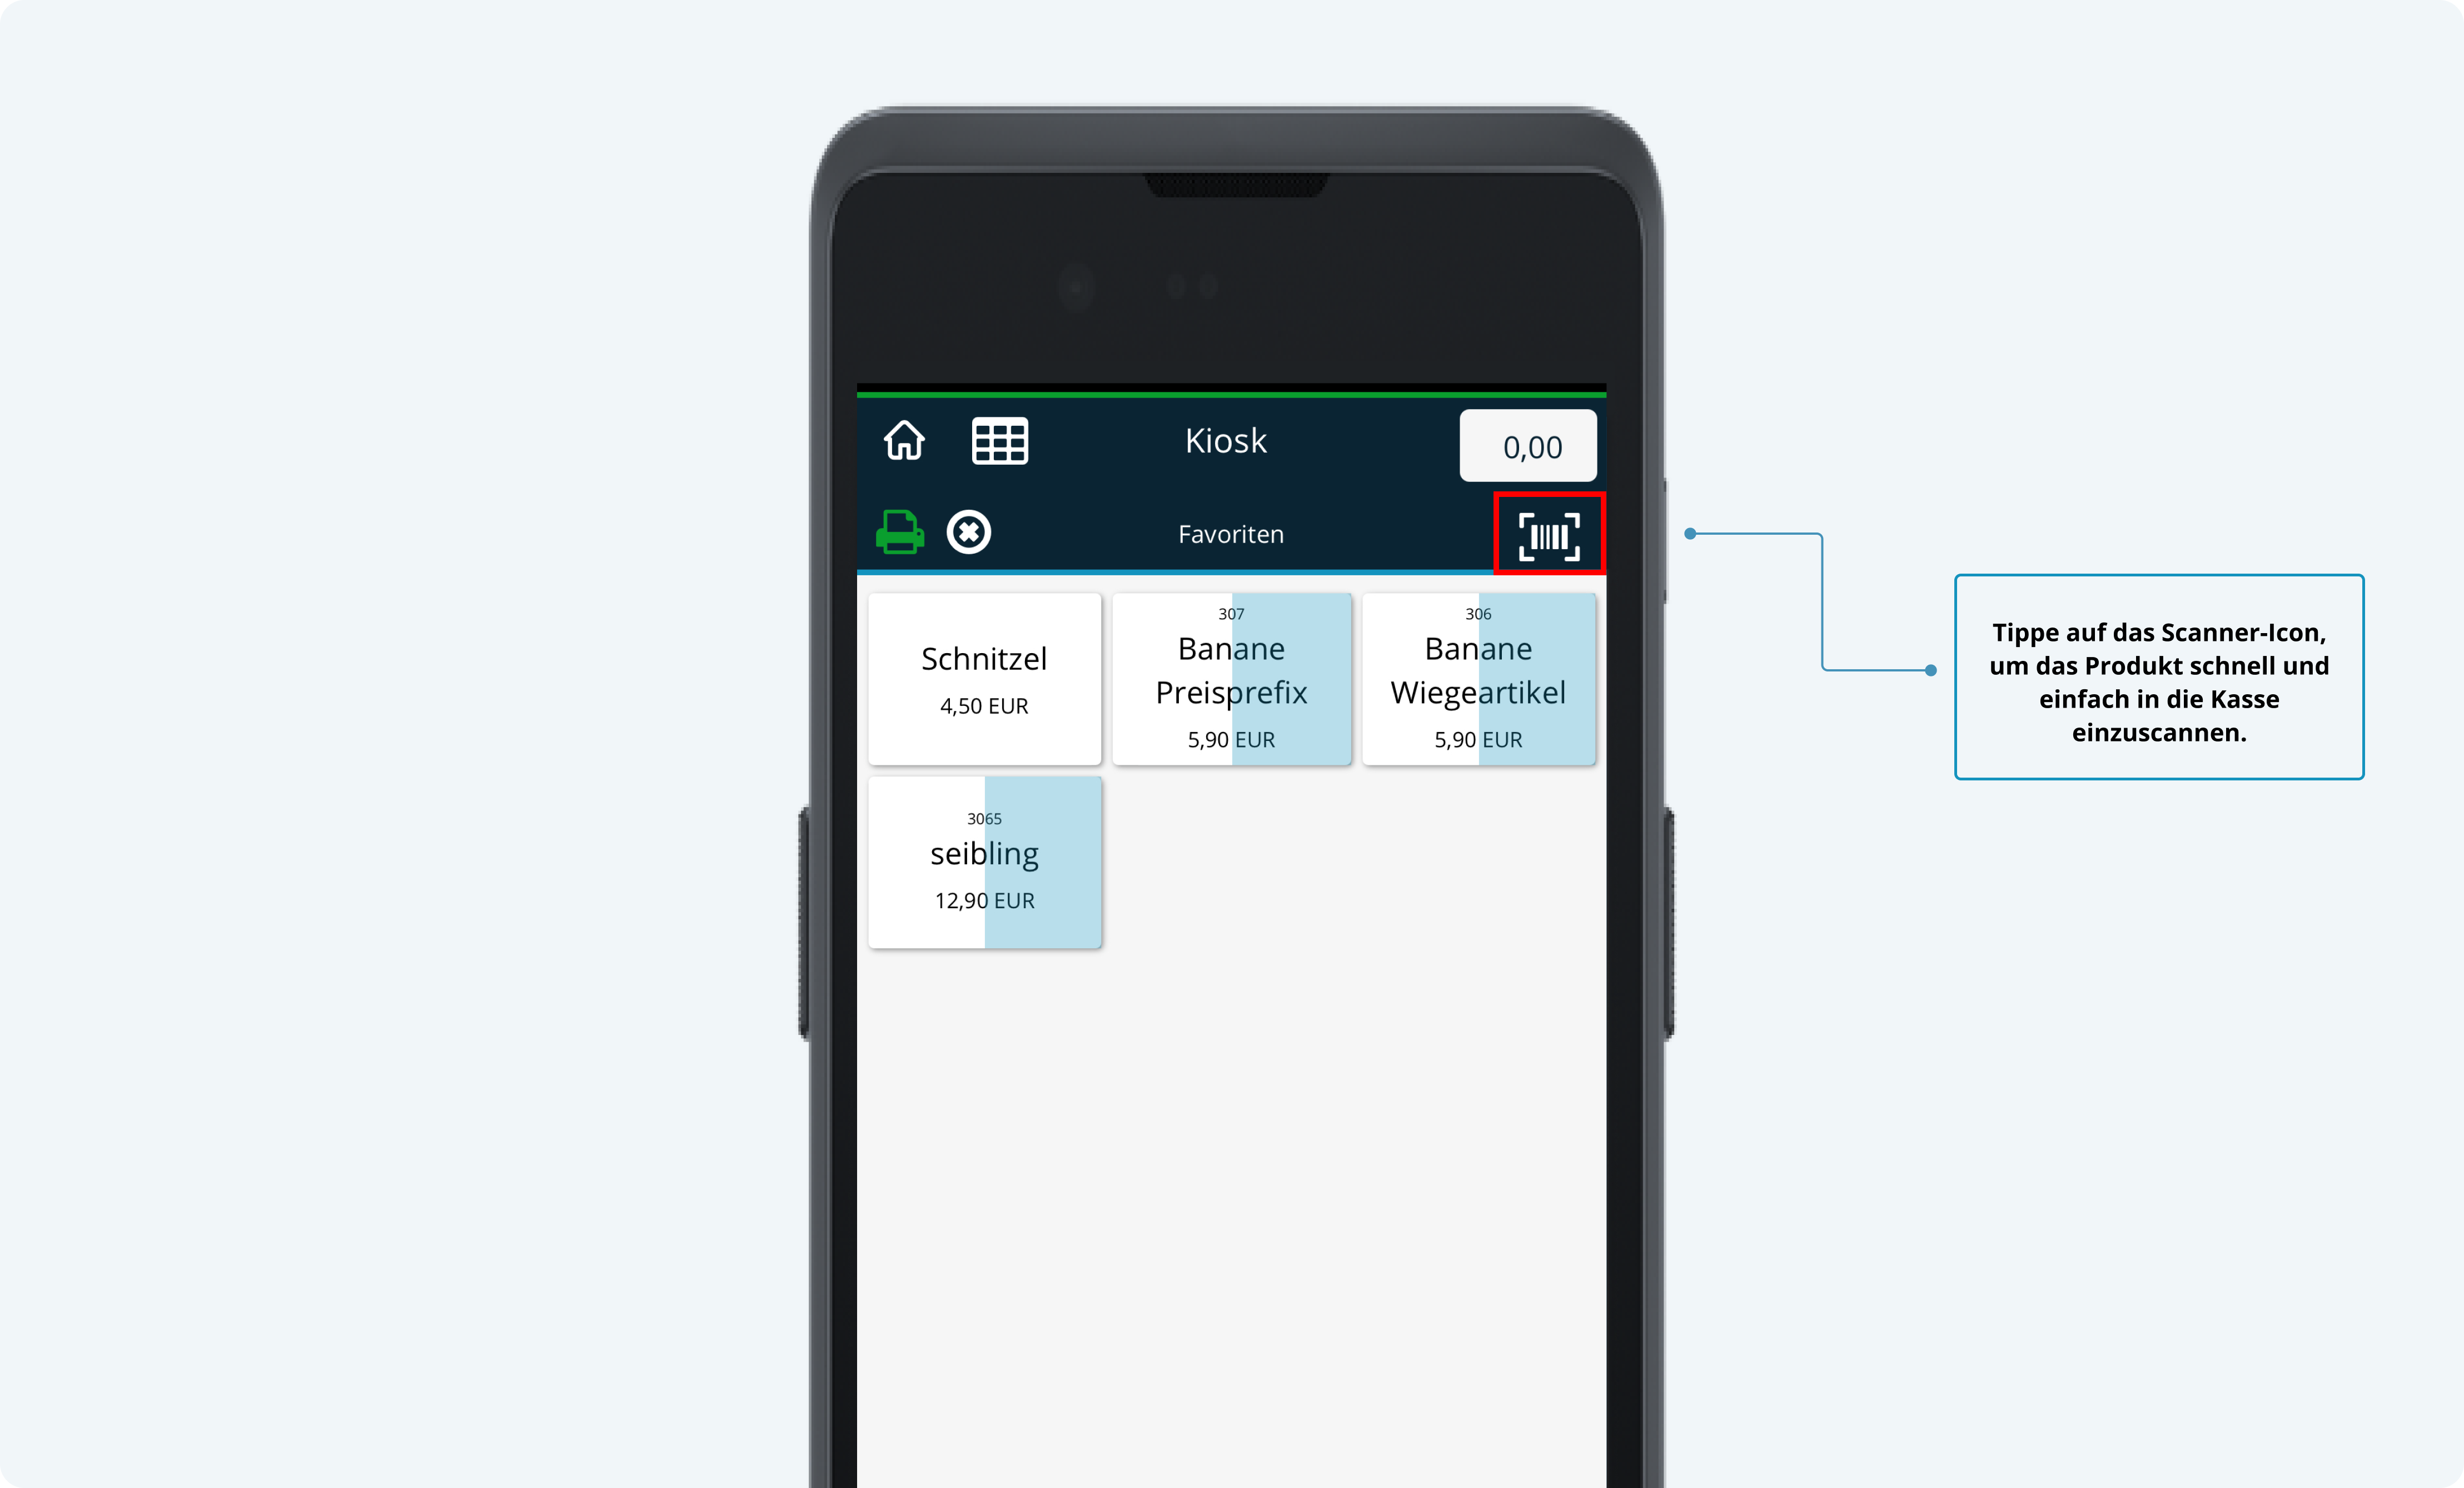
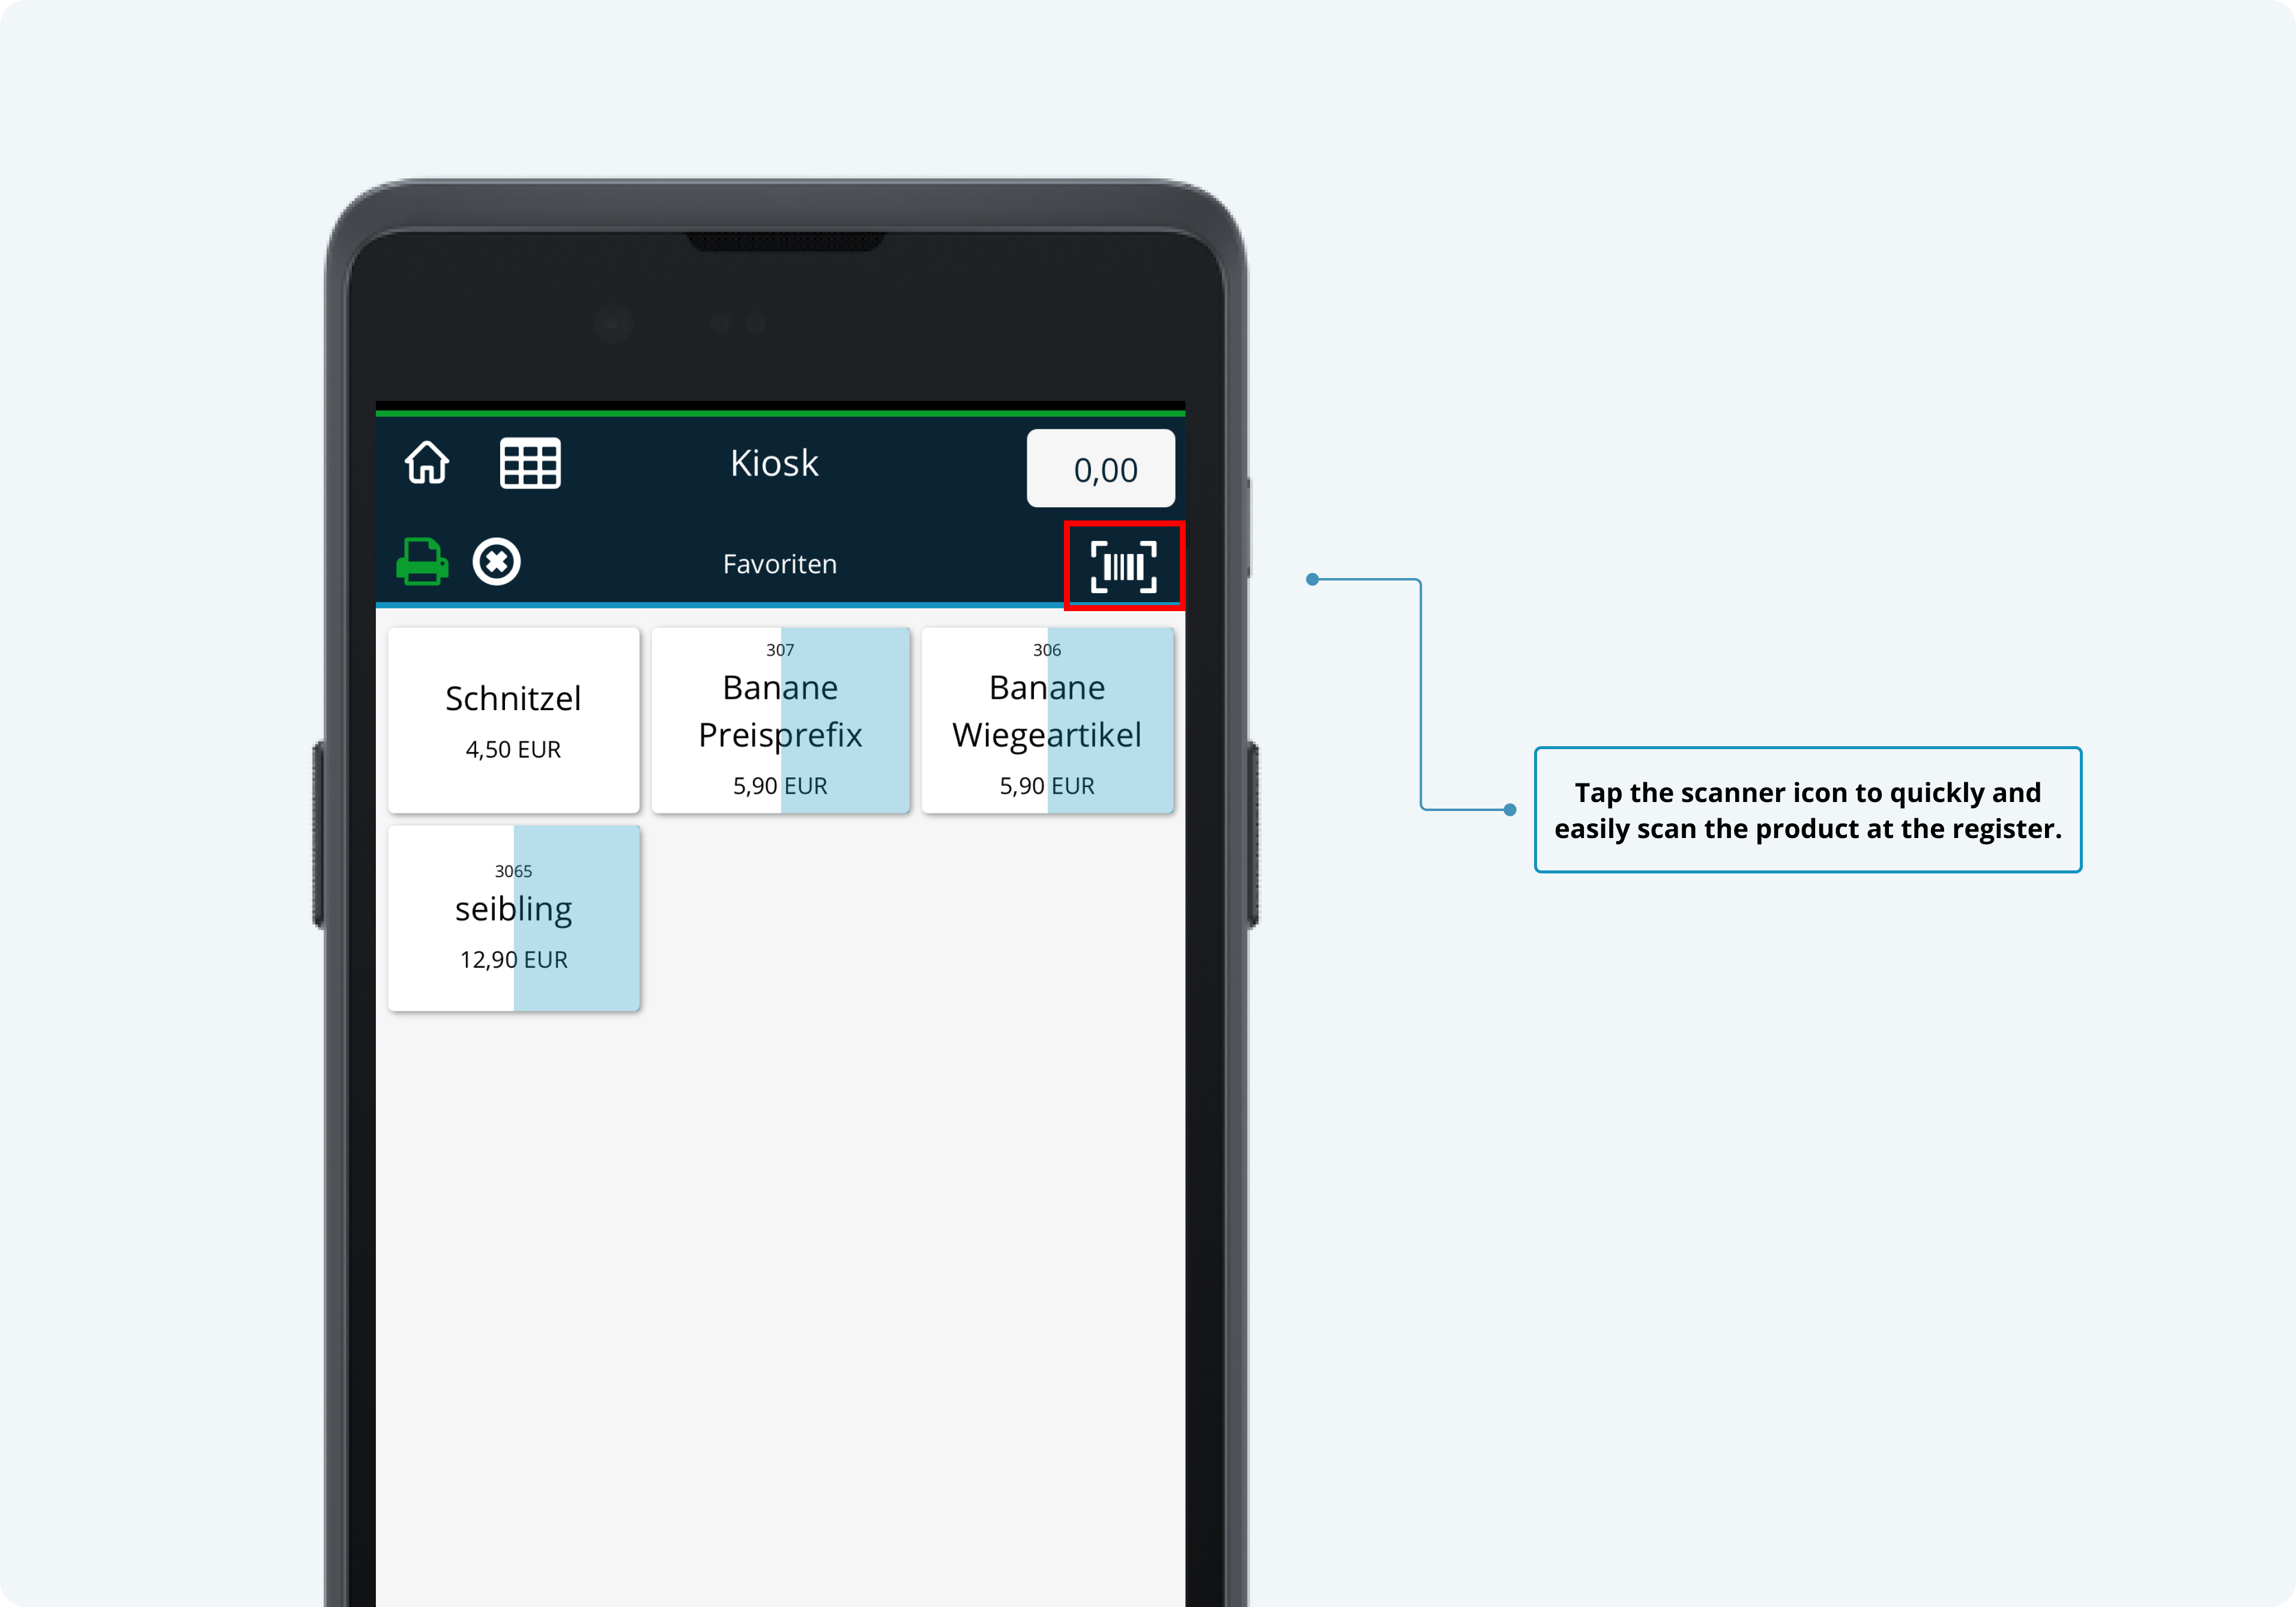
- The barcode on the banana can now be scanned:
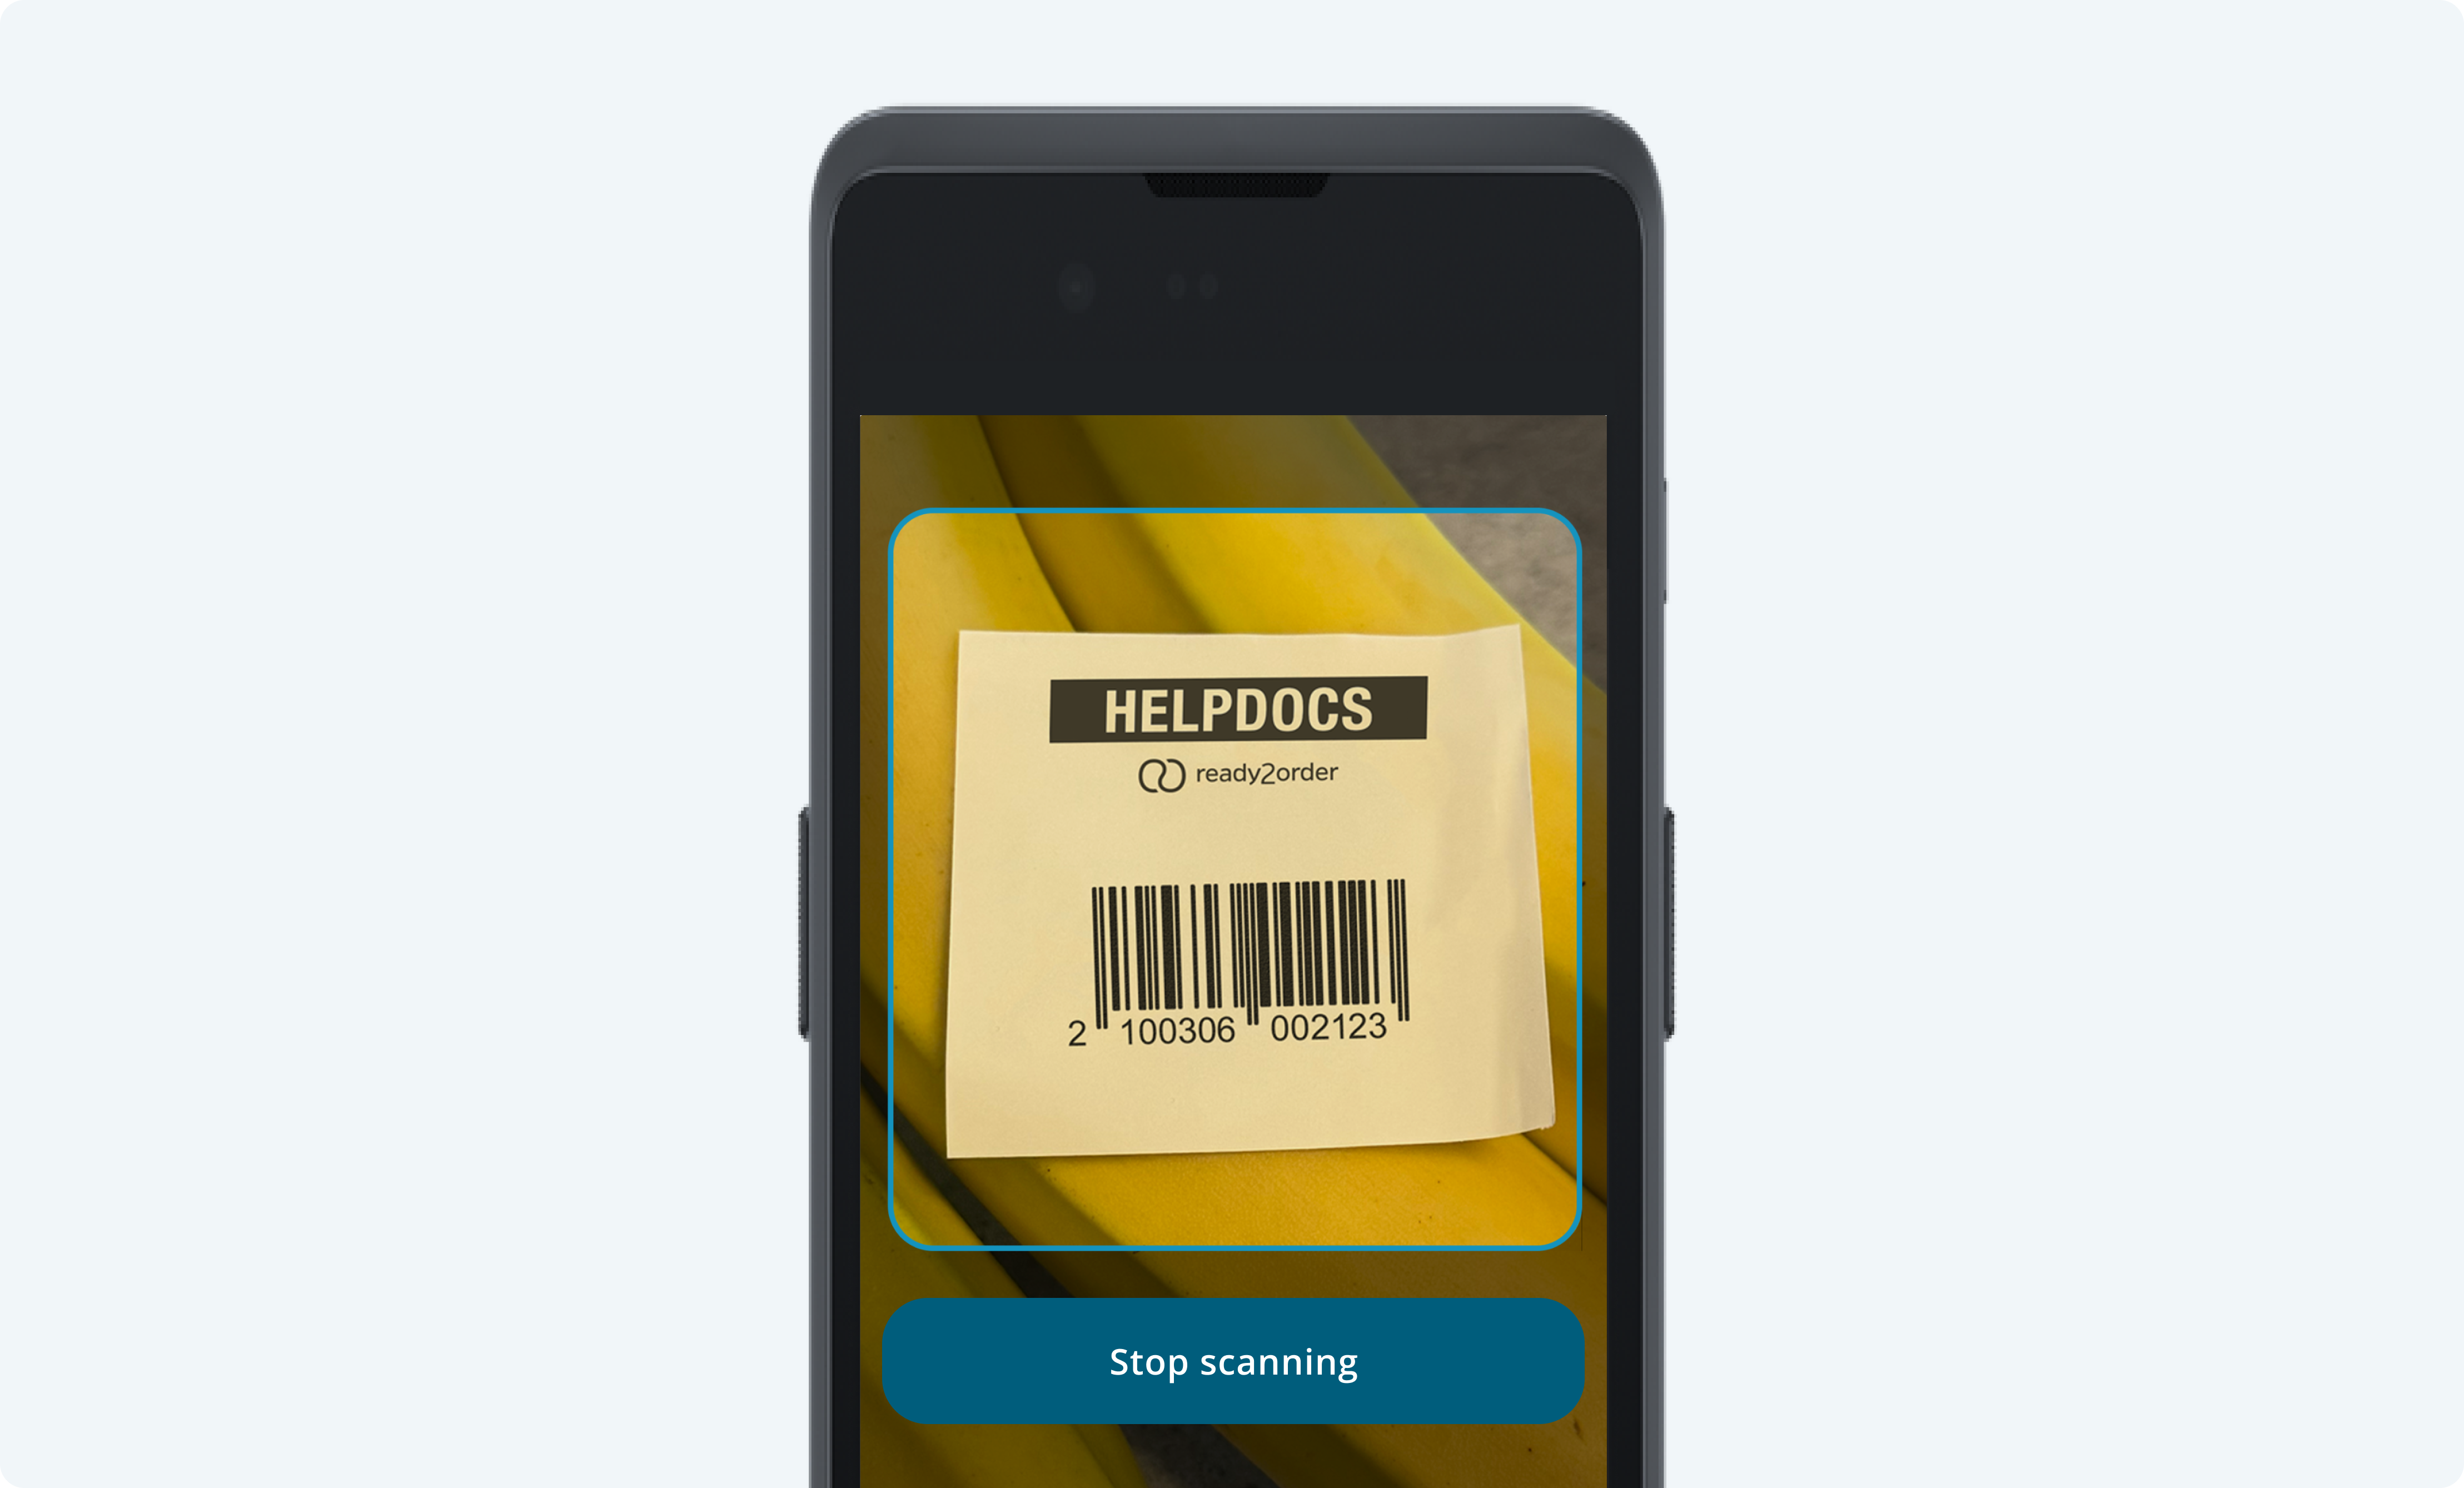
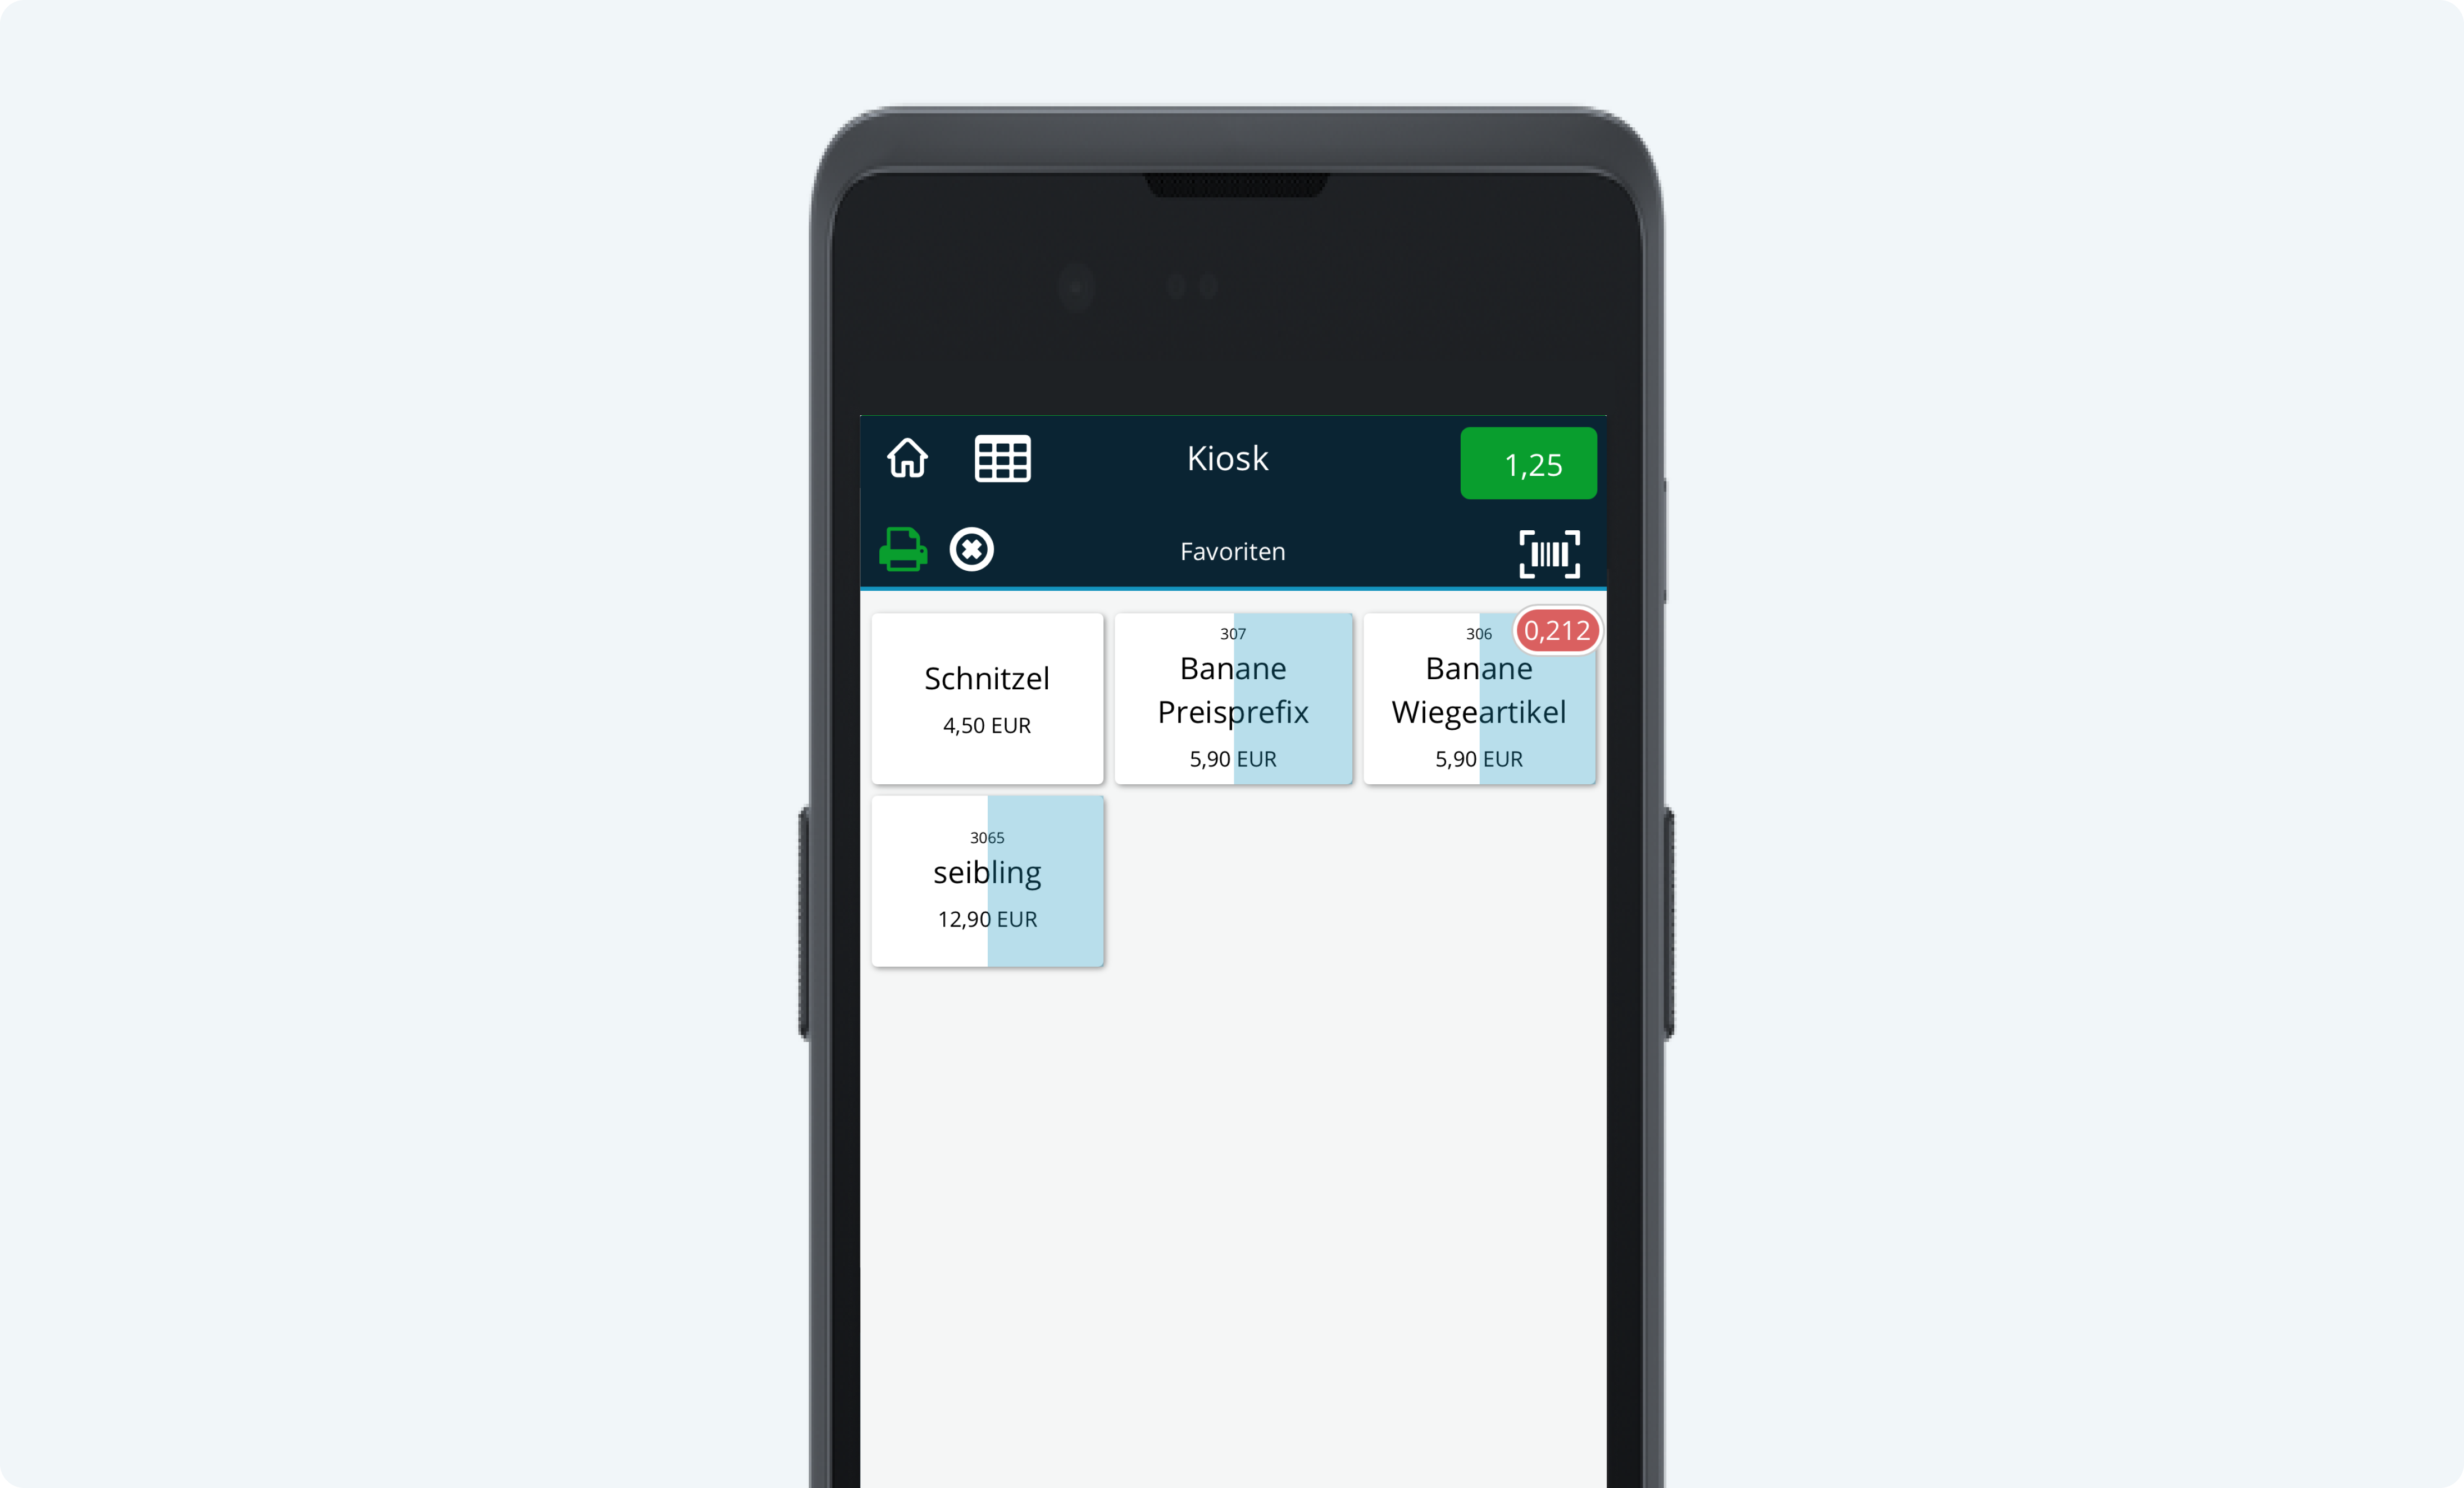
- The weighed weight (212 grams = 0.212 kg) is now multiplied by the stored kilo price (5.90) and the final amount is correctly displayed (0.212 kg x 5.90 euros = 1.25 euros).
Here is the process in quick succession:

Variant B: Price prefix (22)
quantity and price are shown on the label, but only the price is shown on the invoice.
.
In this variant, the item's price is transmitted to the POS system via the barcode. This means that quantity and price are visible on the label, but only the price appears on the invoice. This method is suitable if you want to minimize the effort required to maintain prices, since the prices of the weighed items only need to be kept up to date on the scale.
Advantages:
- The prices of the weighing items only need to be kept up to date on the scale.
- Reduced maintenance effort in the cash register system.
Disadvantages:
- No weight/ quantity information on the invoice, only on the label.
Setup steps:
- Generate Barcode:
Create an EAN-13 code using the scale software or use a free online generator such as the EAN-13 Generator .
This barcode has a total of 13 digits. We explain its structure in the following infographic. You can also download it here .
- In our example, we enter the following into the barcode generator:
- Define price prefix
Enter the number "22" as the prefix. This prefix indicates that the item is weight-dependent. - Enter article number
Use a five-digit item number, for example "00306" . - Enter price as placeholder
Enter the weight in grams as a five-digit value, e.g., " 00590 " for 5.90 euros. This value changes with each weighing. - Generate barcode
Combine the values to create a twelve-digit number:
" 220030600590 " (without check digit). - The barcode generator automatically calculates the check digit, so the complete code is:
"2200306005900" (with check digit "0" in this example).
- Define price prefix

- Enter barcode into the scale
Follow your scale's instruction manual to enter the barcode.
- Enter barcode in the cash register system:
- Go to Products > Create new product or edit an existing product.
- Enter the generated EAN-13 code in the " Barcode " field.
Example: "Banana price prefix"
.
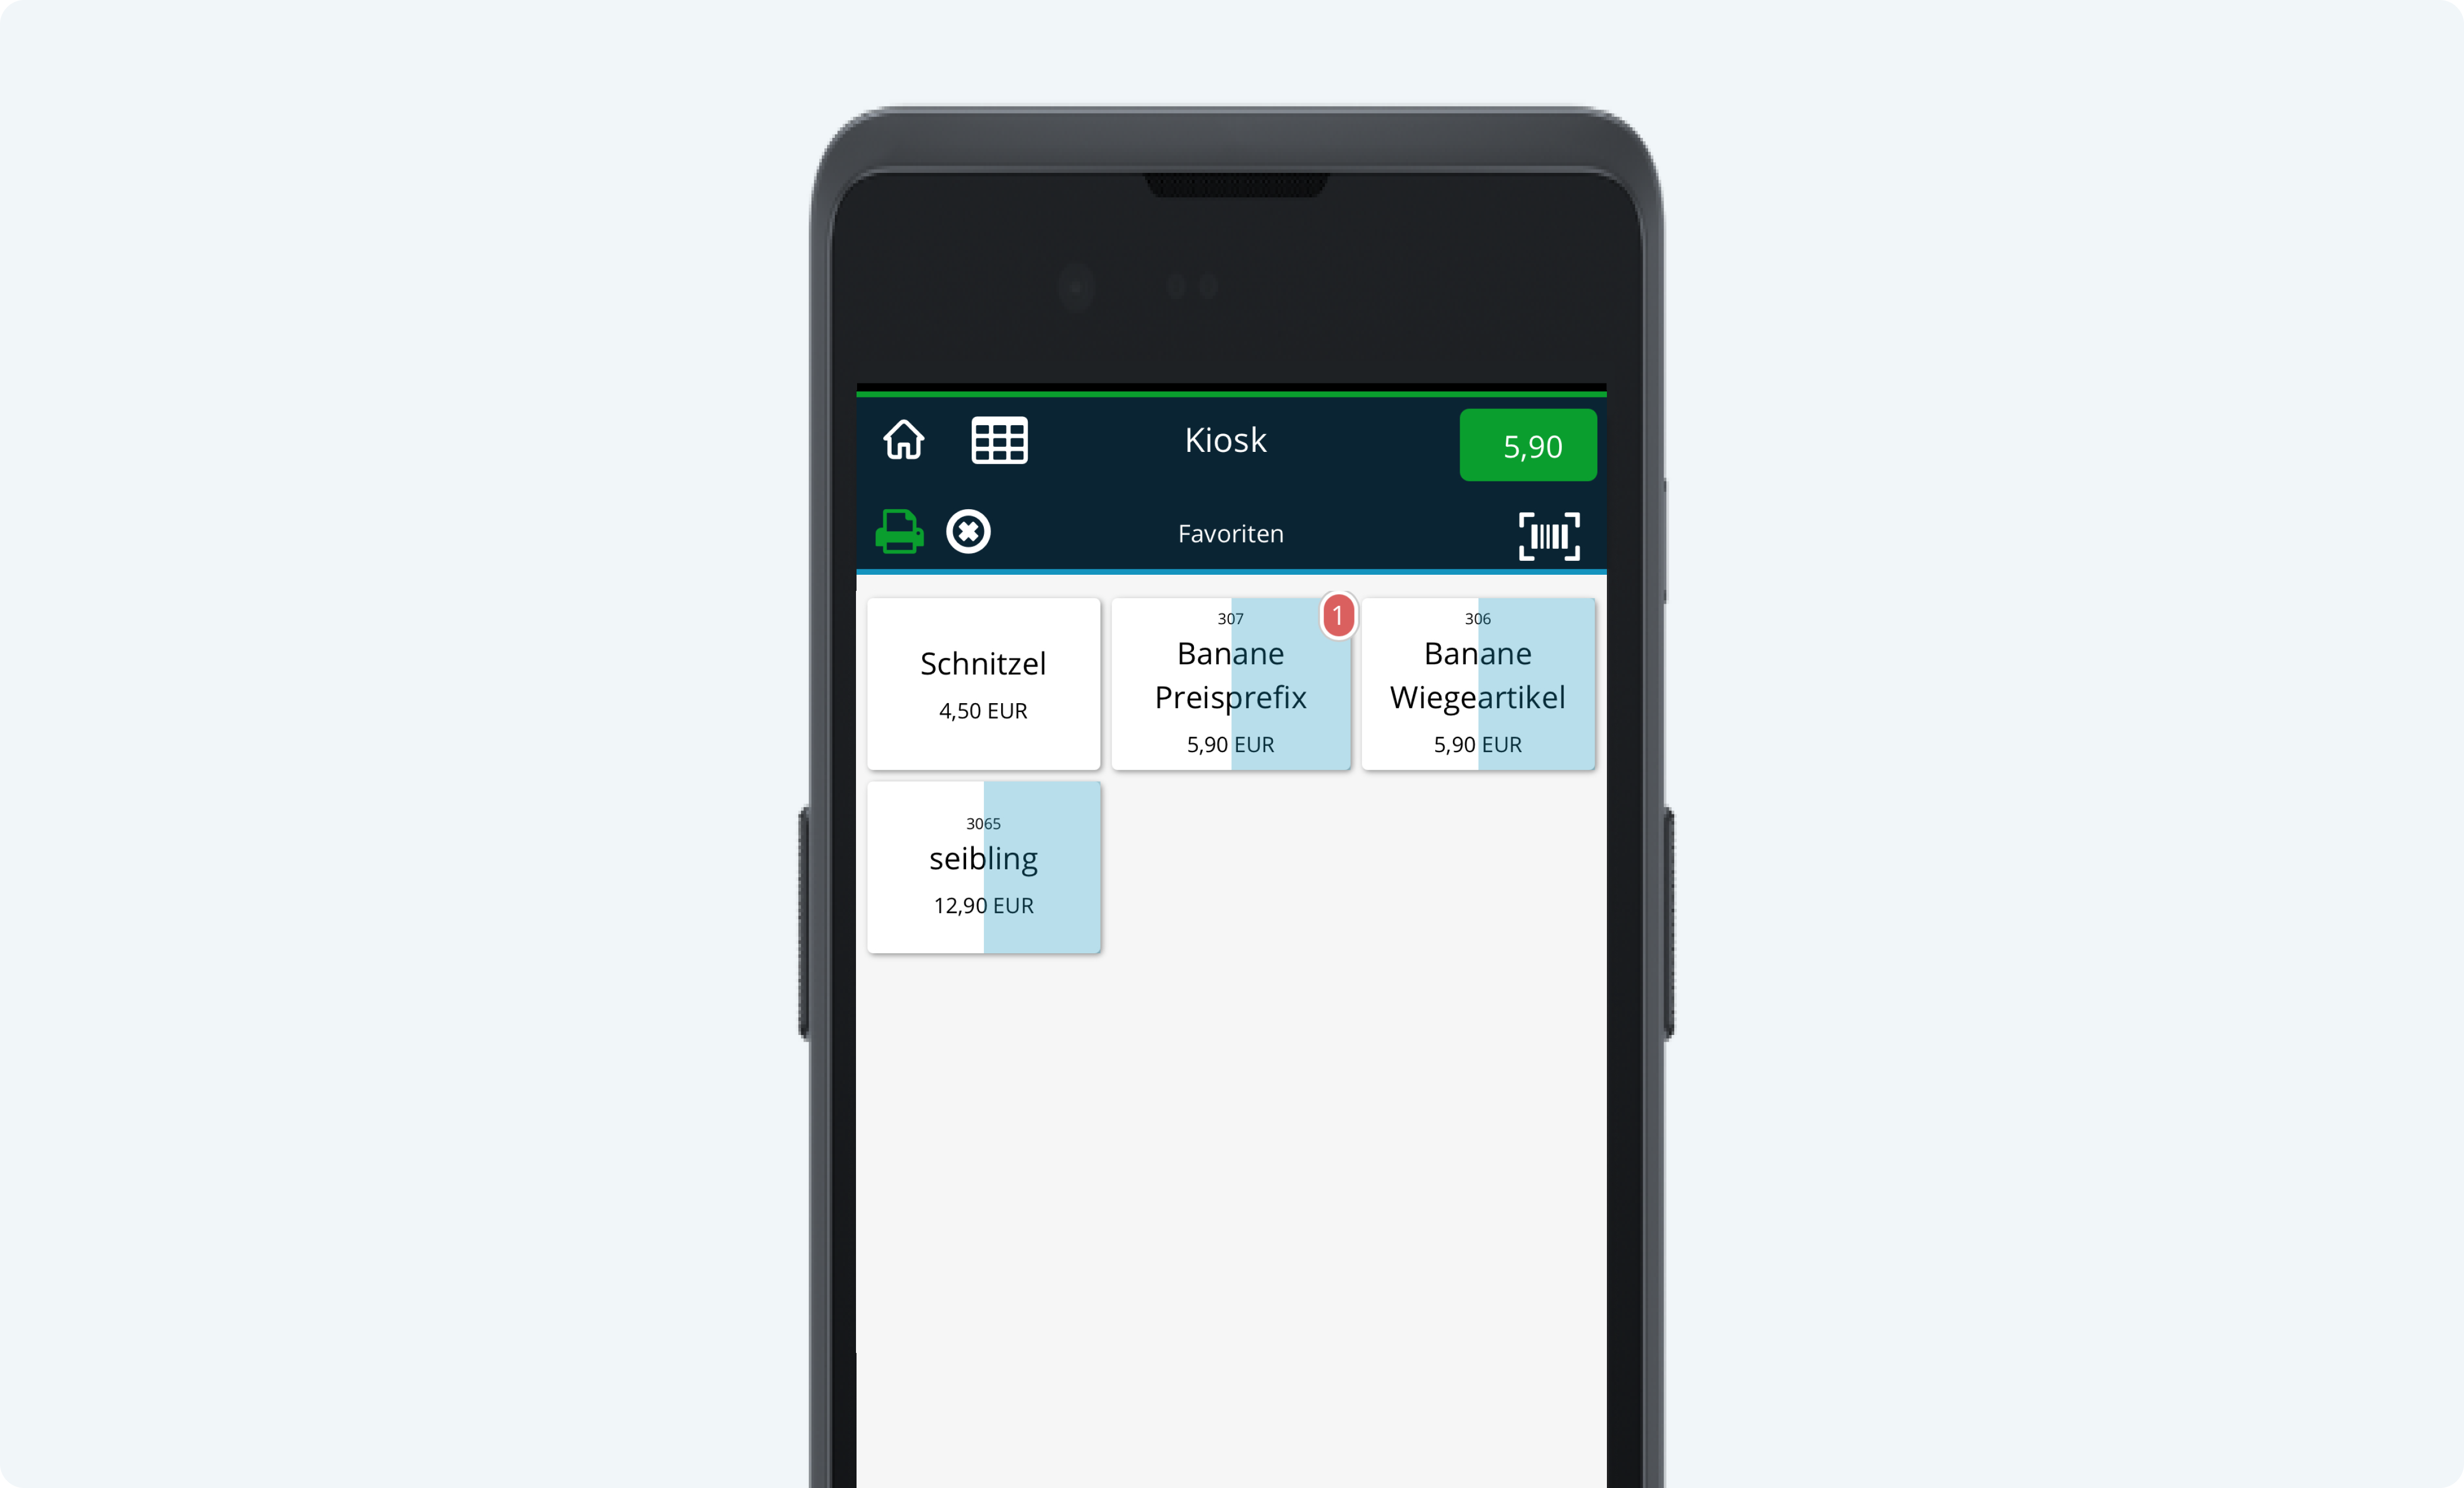
To visualize the price prefix (22), we created a product called " Banana Price Prefix." To edit products, click the pencil icon.

- Test run label printing:
Now the item (banana) can be weighed on the scale (in the example the scale calculates 5.90 euros) and the barcode can be printed out.
- The barcode on the banana can now be scanned:
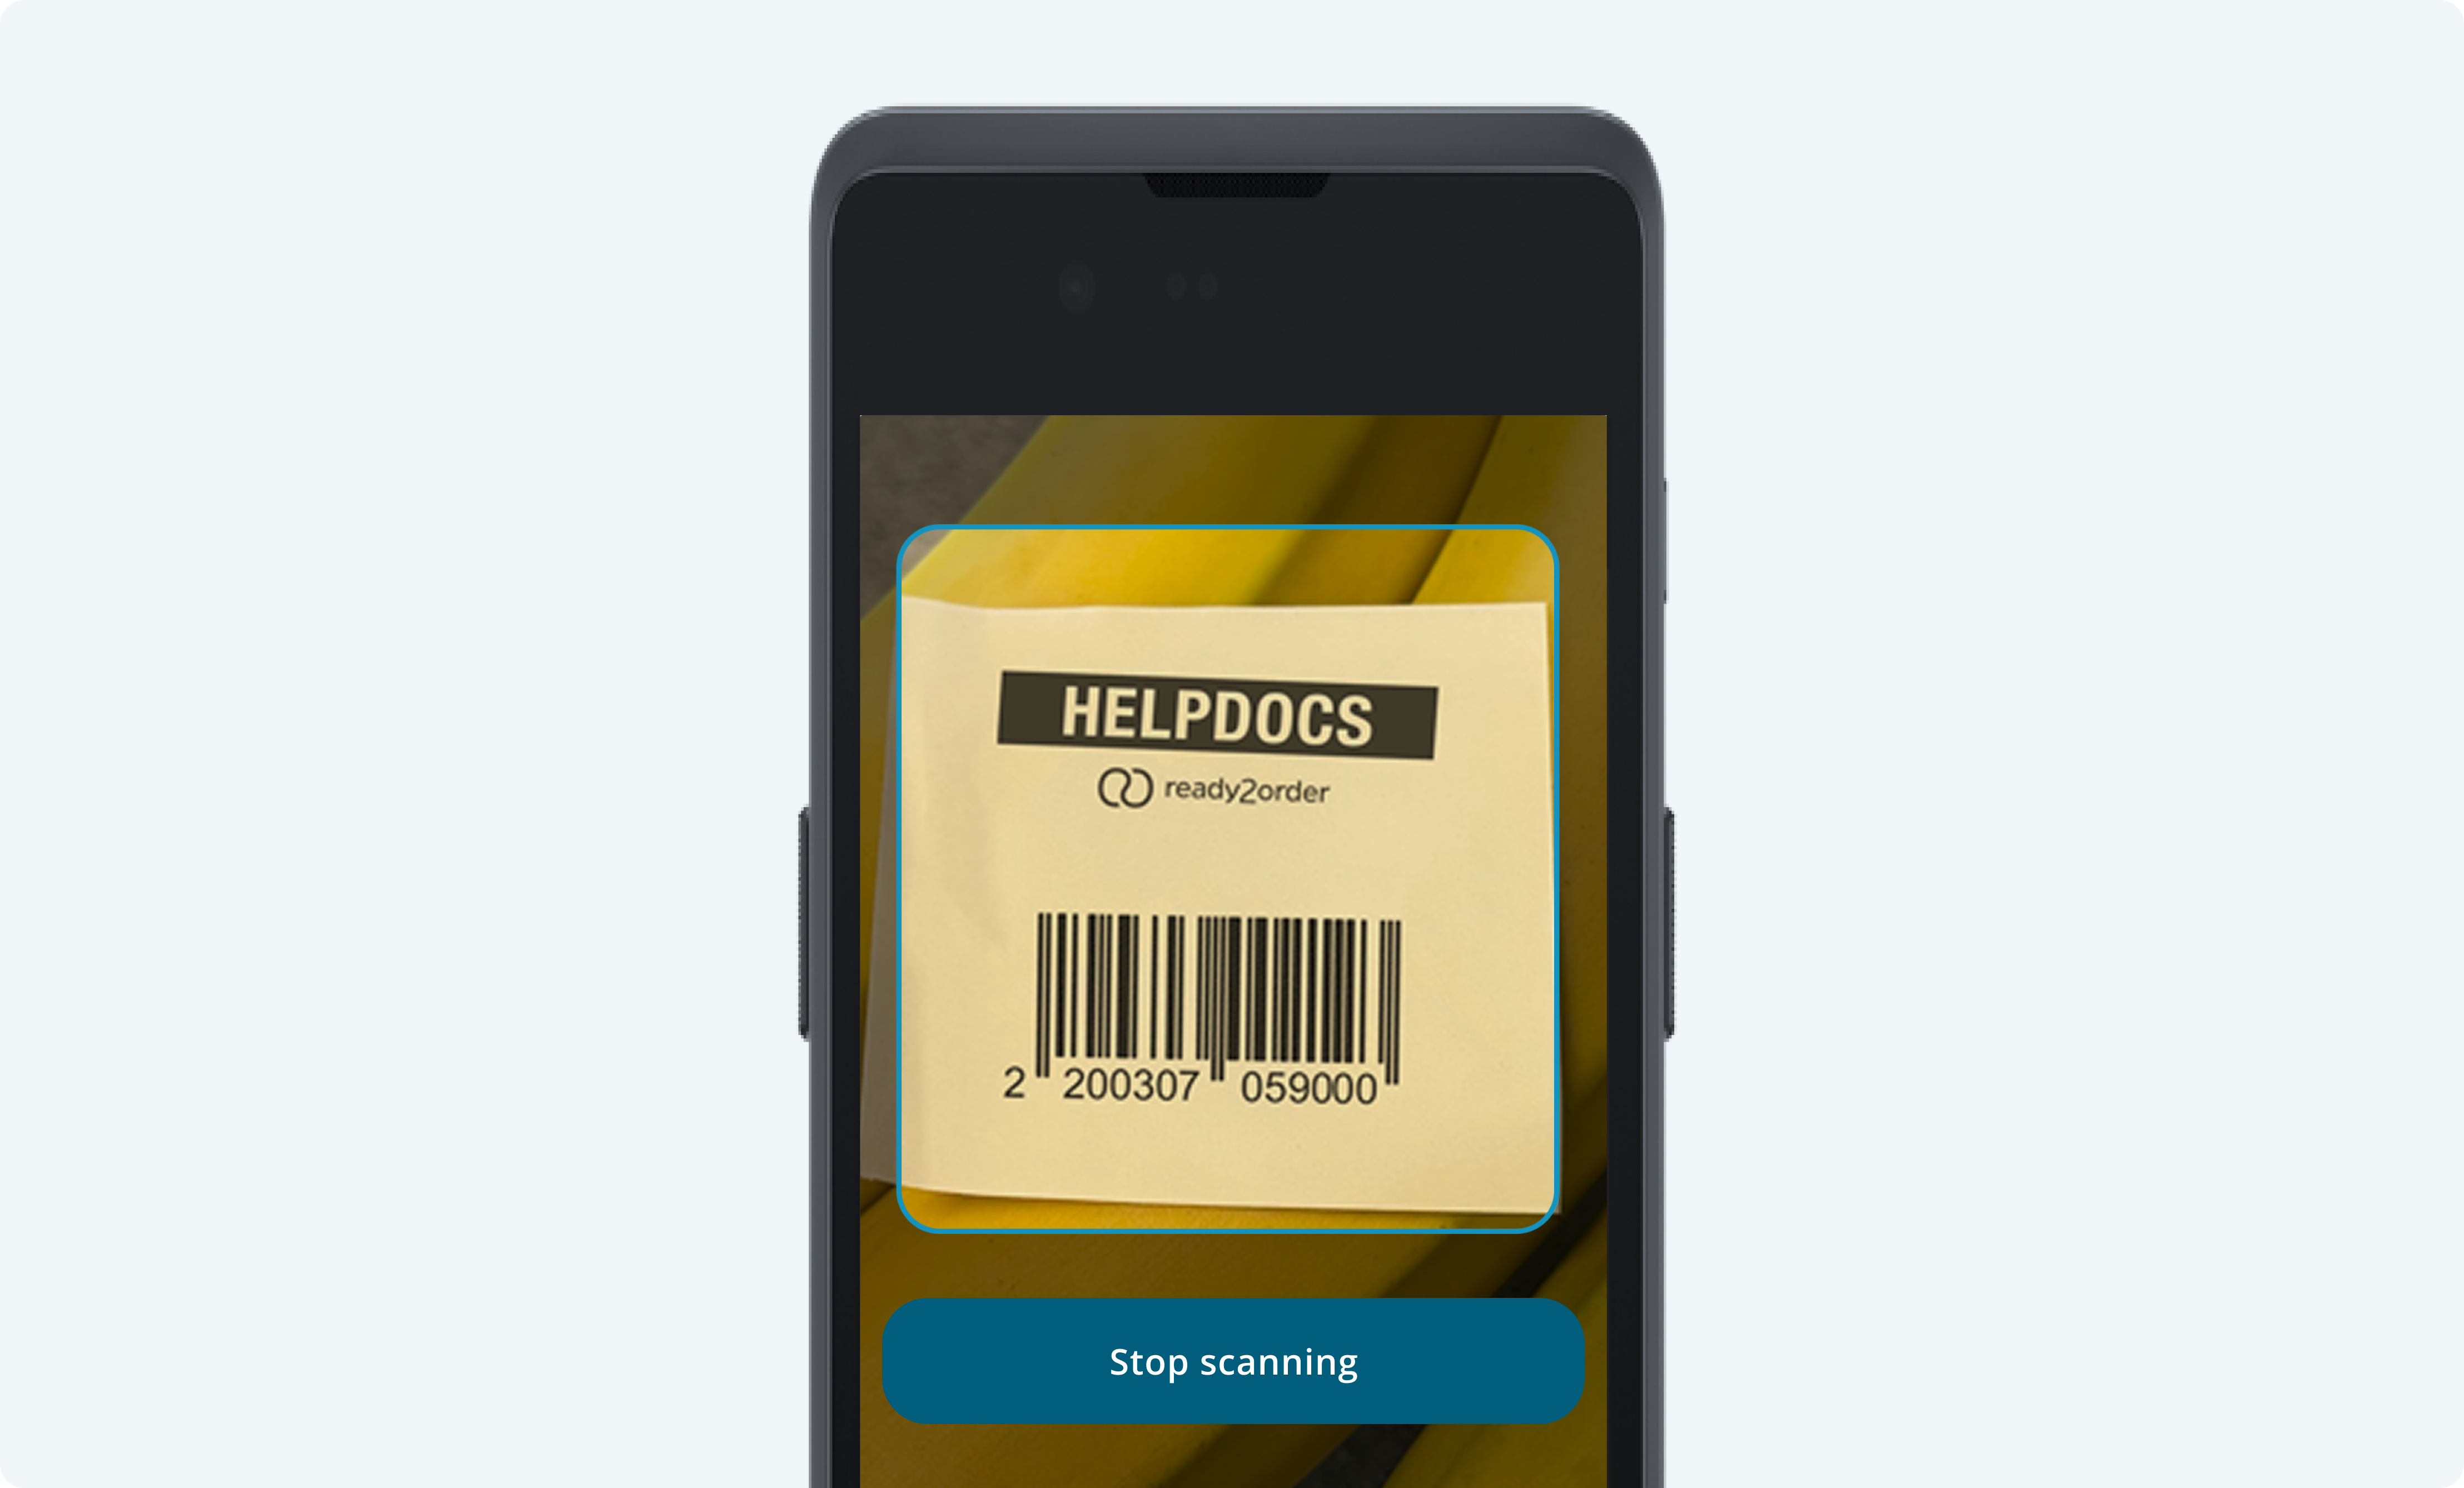
- The price is taken directly from the label and displayed correctly (5.90 euros).
Here is the process in quick succession:
We also answer your support requests via chat. Click here to access the chat.