How can I set the stock and record a goods receipt?

With ready2order you have access to your stock at any time and can assign, adjust and edit it to your products.
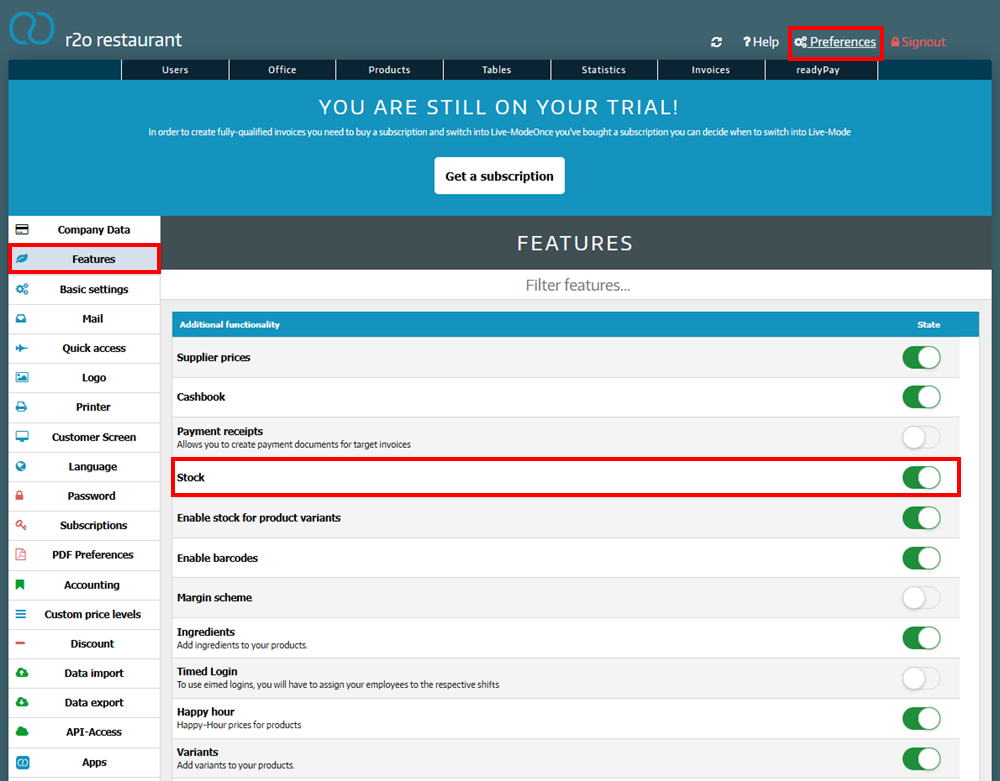
Activate stock
In order to use the stock, it must first be activated. To do this, proceed as follows:
- In your Admin Interface click Preferences.
- Click on Features.
- Activate the button with Stock.
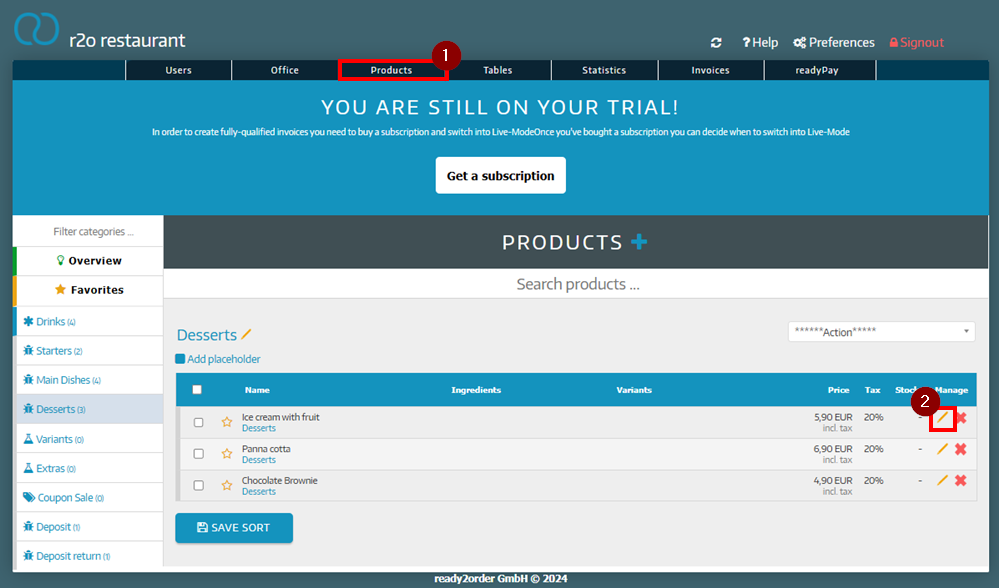
Assign a stock to products
- In your Admin Interface click on Products.
- Click on the yellow pencil next to the product you want to assign stock to.
- In the window that opens, click on the stock tab.
- Click Enable Stock.
- You can now enter your stock, safety stock and reorder level. When you have entered everything, click on Save Changes. If the selected reorder point is reached, you will be informed that you should order new goods.
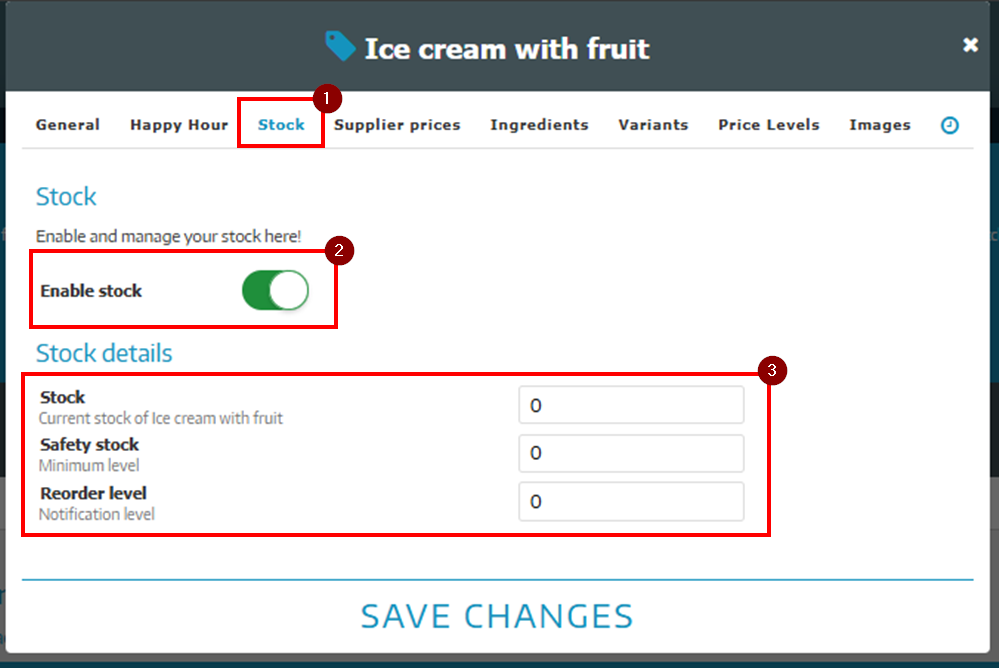
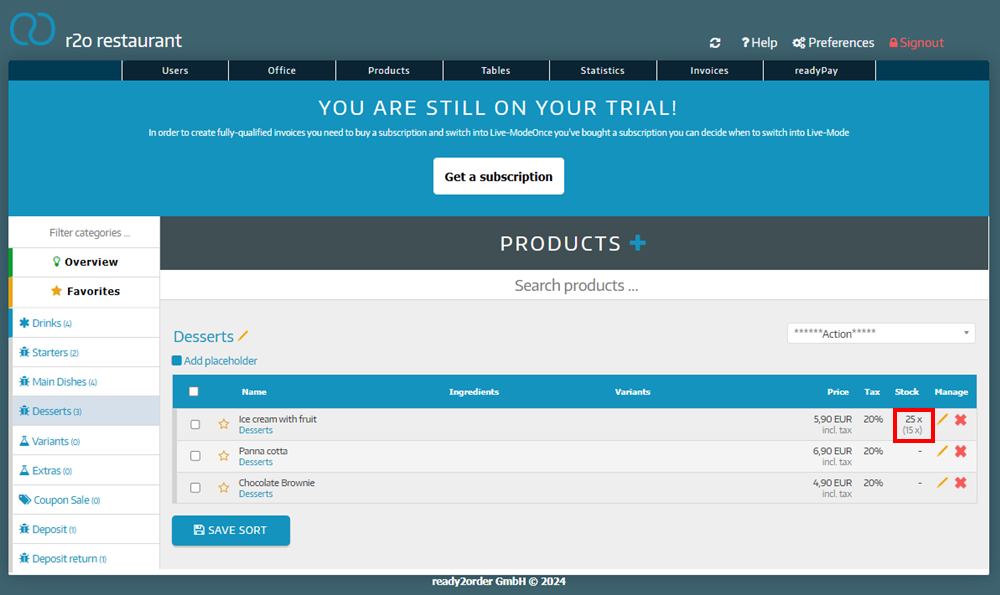
- For your product, you can now see the current stock (above) and reorder level (below).
Display inventory on product buttons in your POS
- In your POS click on Settings (gear icon).
- Select Ordering.
- Activate stock info on product buttons.
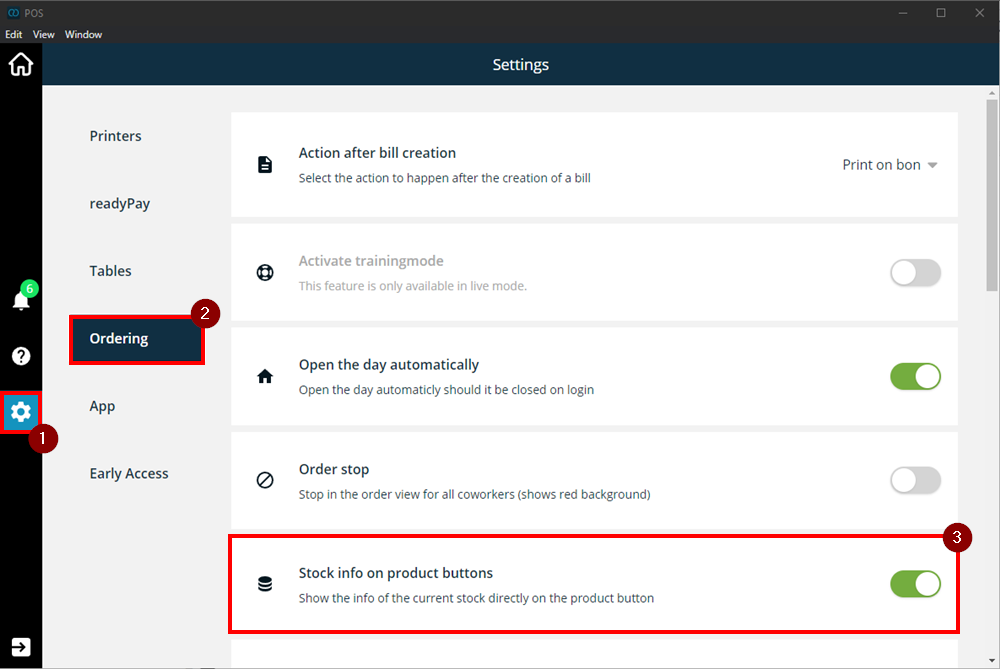
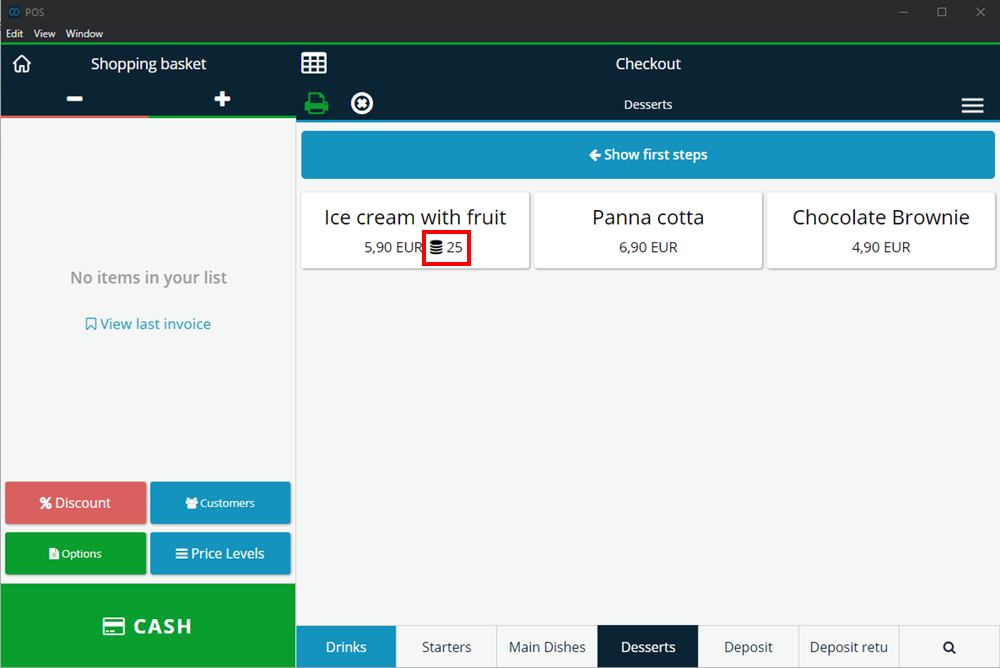
- You will now see the stock displayed. If you sell a product, the reduced quantity will be displayed there. Of course, the stock is also updated in the Admin Interface.
Overview of warehouse management and inventory recording
- In your Admin Interface click stock in the Products tab Stock.
- In the Stock tab you can now see all information regarding the stock level for products for which you have activated stock level.
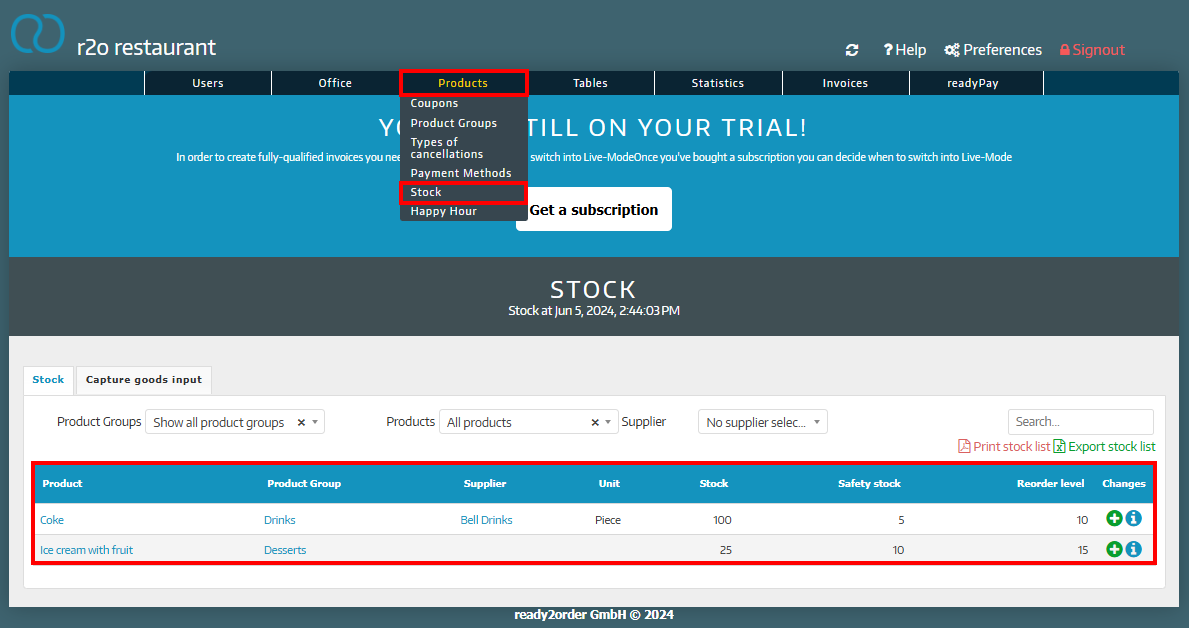
In addition to the current stock the information includes the product group, supplier, unit, stock, minimum and reorder level.
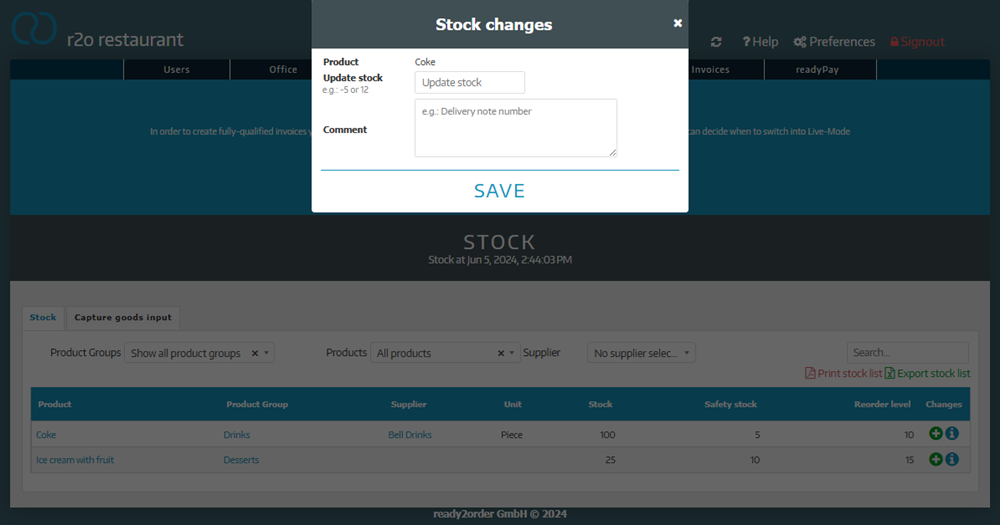
With the green + on the right side you can make inventory changes, i.e. add a stock. If you click on the blue i you get information about which inventory changes were made on which days.
You can also print an inventory list as a PDF and export it as a CSV file.

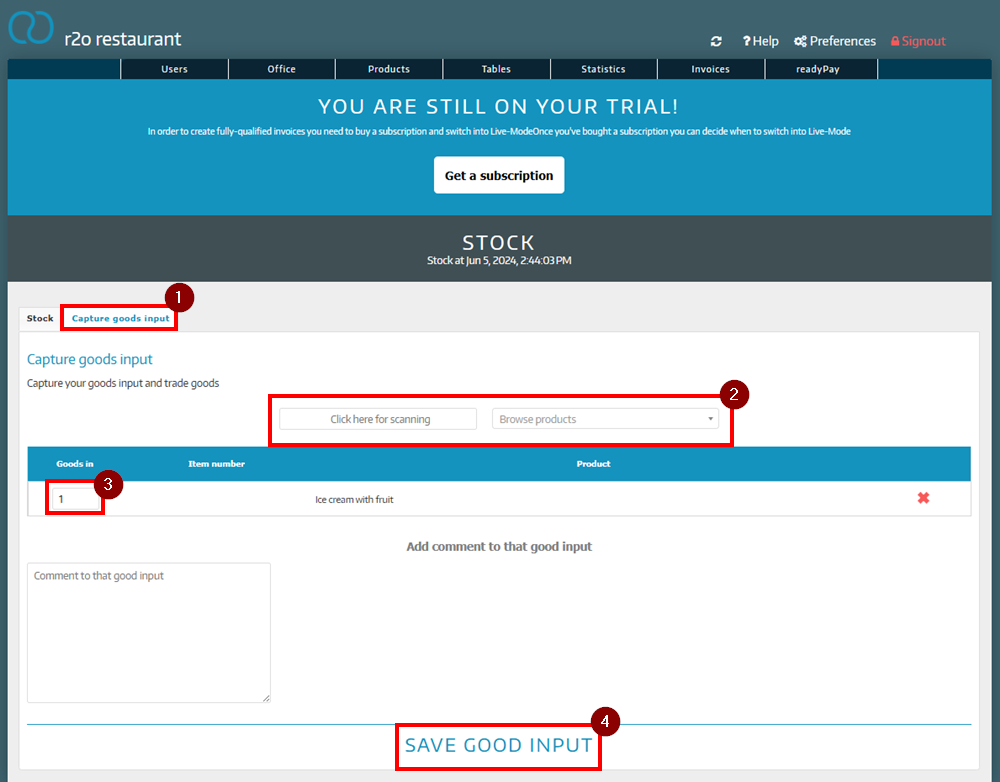
Enter goods input in the Admin Interface
- To record new goods, click Capture goods input in the stock.
- Select the product that is delivered. You can also scan it if you wish.
- Enter the quantity delivered. You can also record another goods receipt by selecting a different product.
- Add any comments if necessary and save your settings by clicking Save good input.
The stock is only recorded by the products for which the stock is activated!
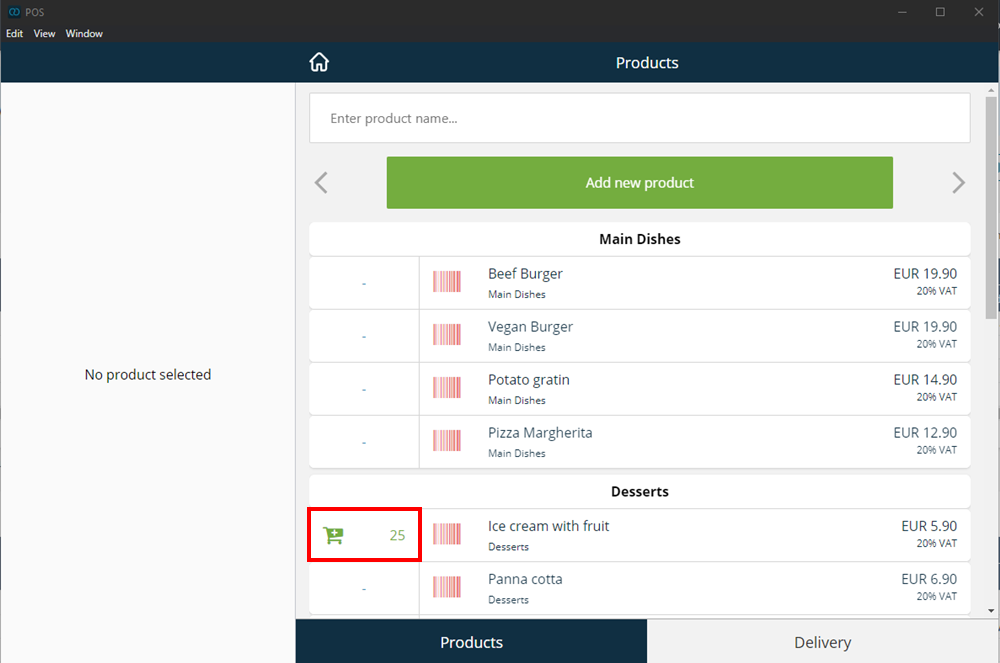
Record incoming goods in the POS
However, you can also record your goods input in the cash register. To do so, proceed as follows:
- Click on Products.
- You can record a new goods receipt for all products that have a quantity listed next to them and a shopping cart shown.
- Now click on the shopping cart.
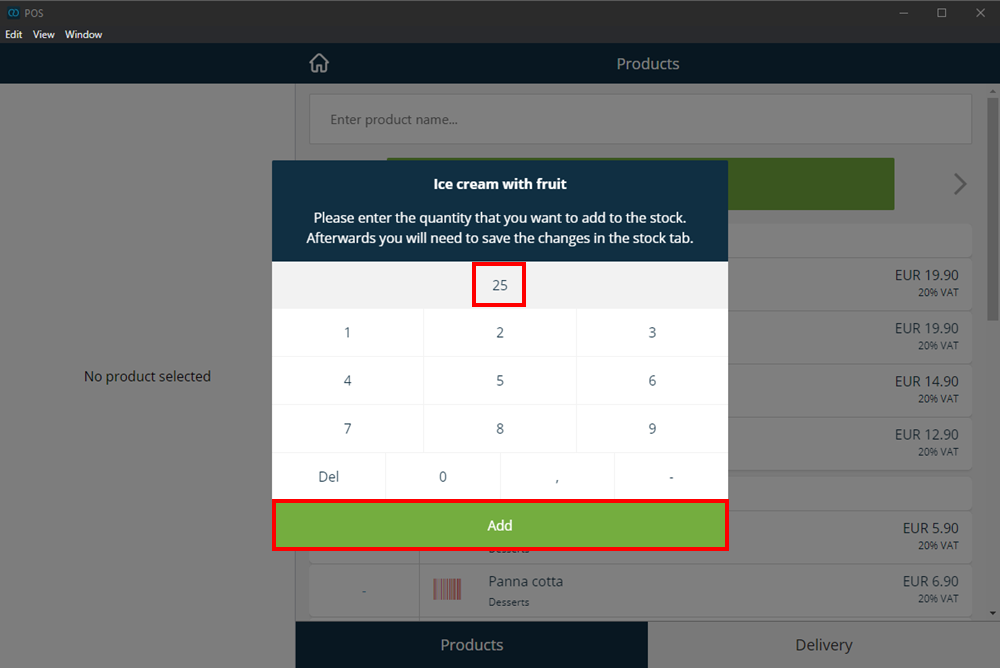
- Enter the quantity for the goods receipt on the number pad and click Add.
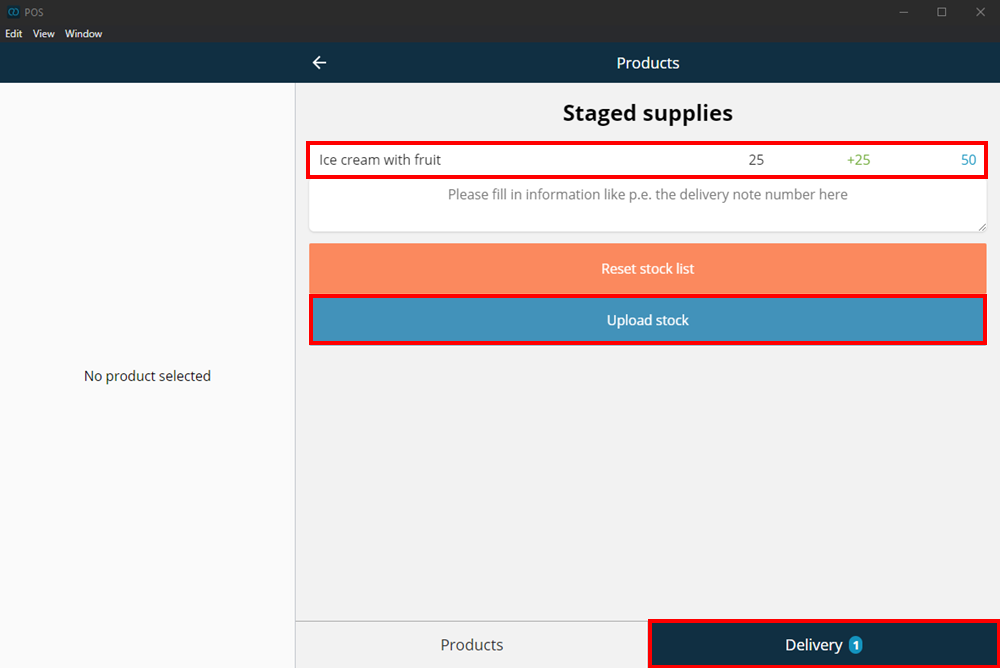
- Click on Delivery
- Check the recorded positions (the inventory change is shown in green).
- Click Save.
To reduce the quantity of the stock, click on the product (in this example on "Pizza Margerita". The stock is reduced by quantity 1)