How can I set up the internal printer on ready2order devices again if it is no longer recognized?
It may happen that the internal printer of a ready2order device (readyGo, readyMax, readyMax 2 or readyTAB) is suddenly no longer recognized. In most cases, the issue can be resolved quickly by logging out and back in again or by restarting the device. This guide shows you how to get the printer working again step by step.
Step-by-step guide
Step 1: Log out and back in
Often, simply logging out and back in is enough for the printer to be detected again.
- Log out of the POS interface.
- Log back into the POS interface using your login credentials.
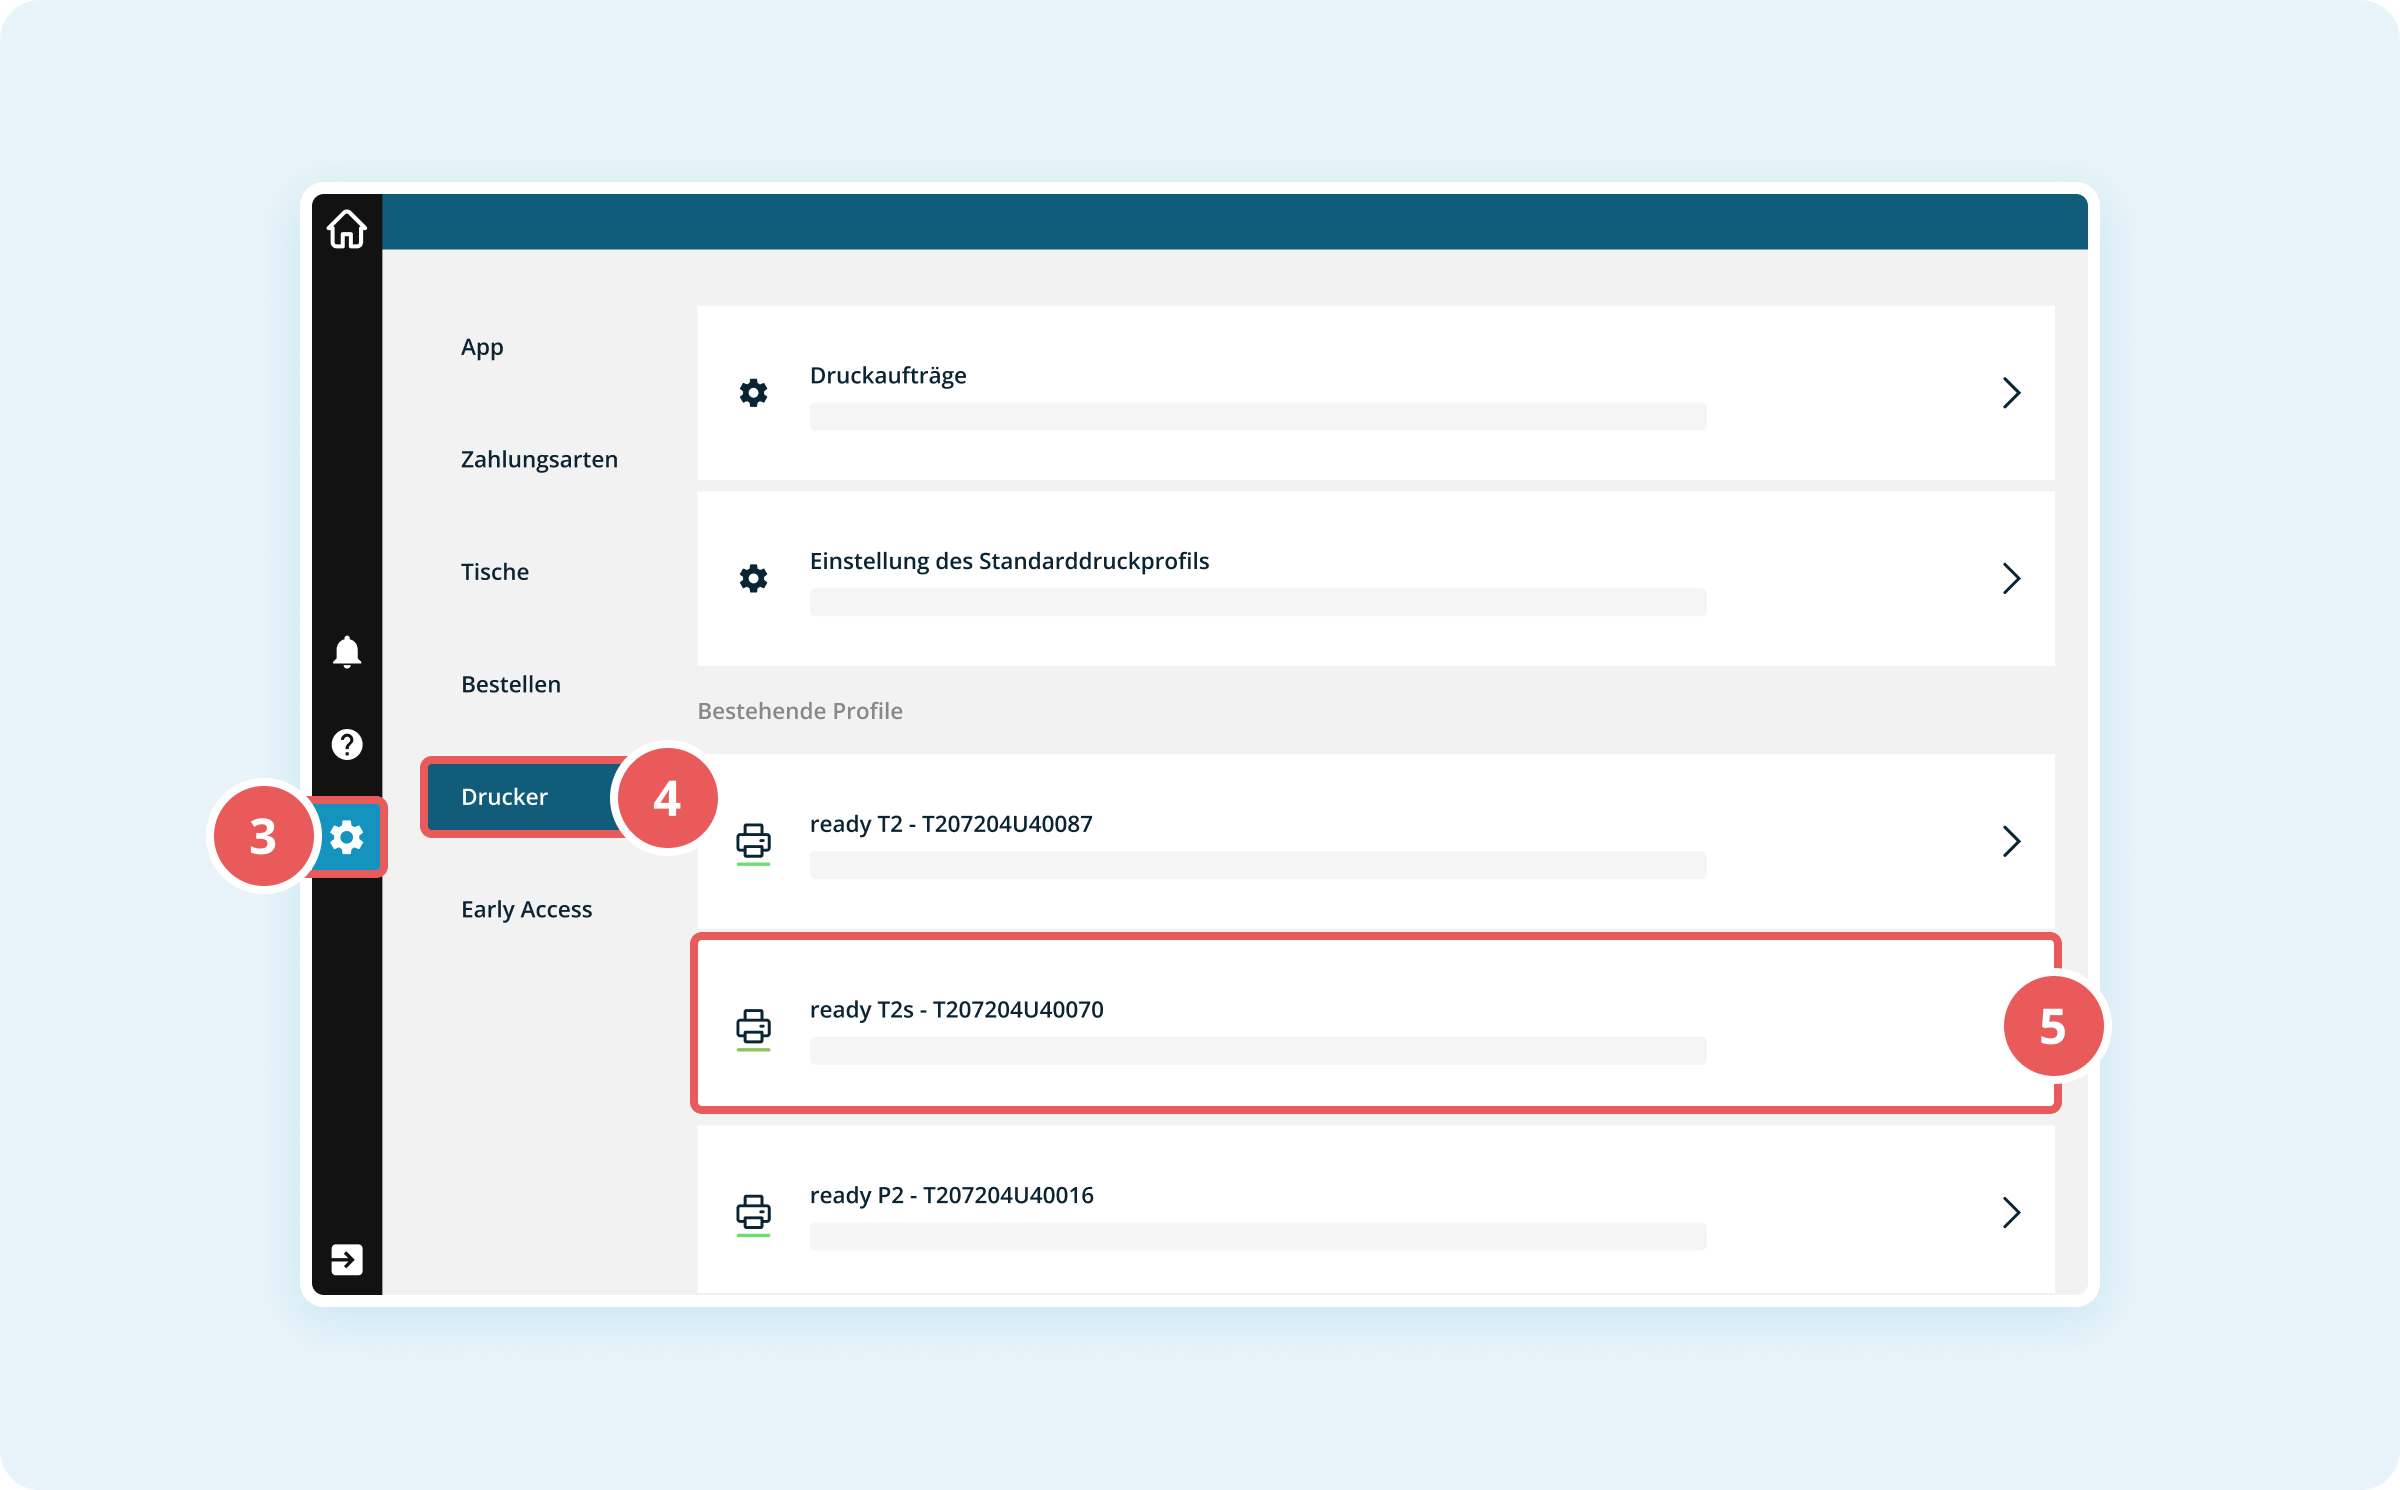
- Click the white gear icon on the left to open the settings. On smaller devices, the gear icon is located in the bottom-right corner.
- Click Printers in the left sidebar.
- Select the desired printer profile under Existing Profiles.
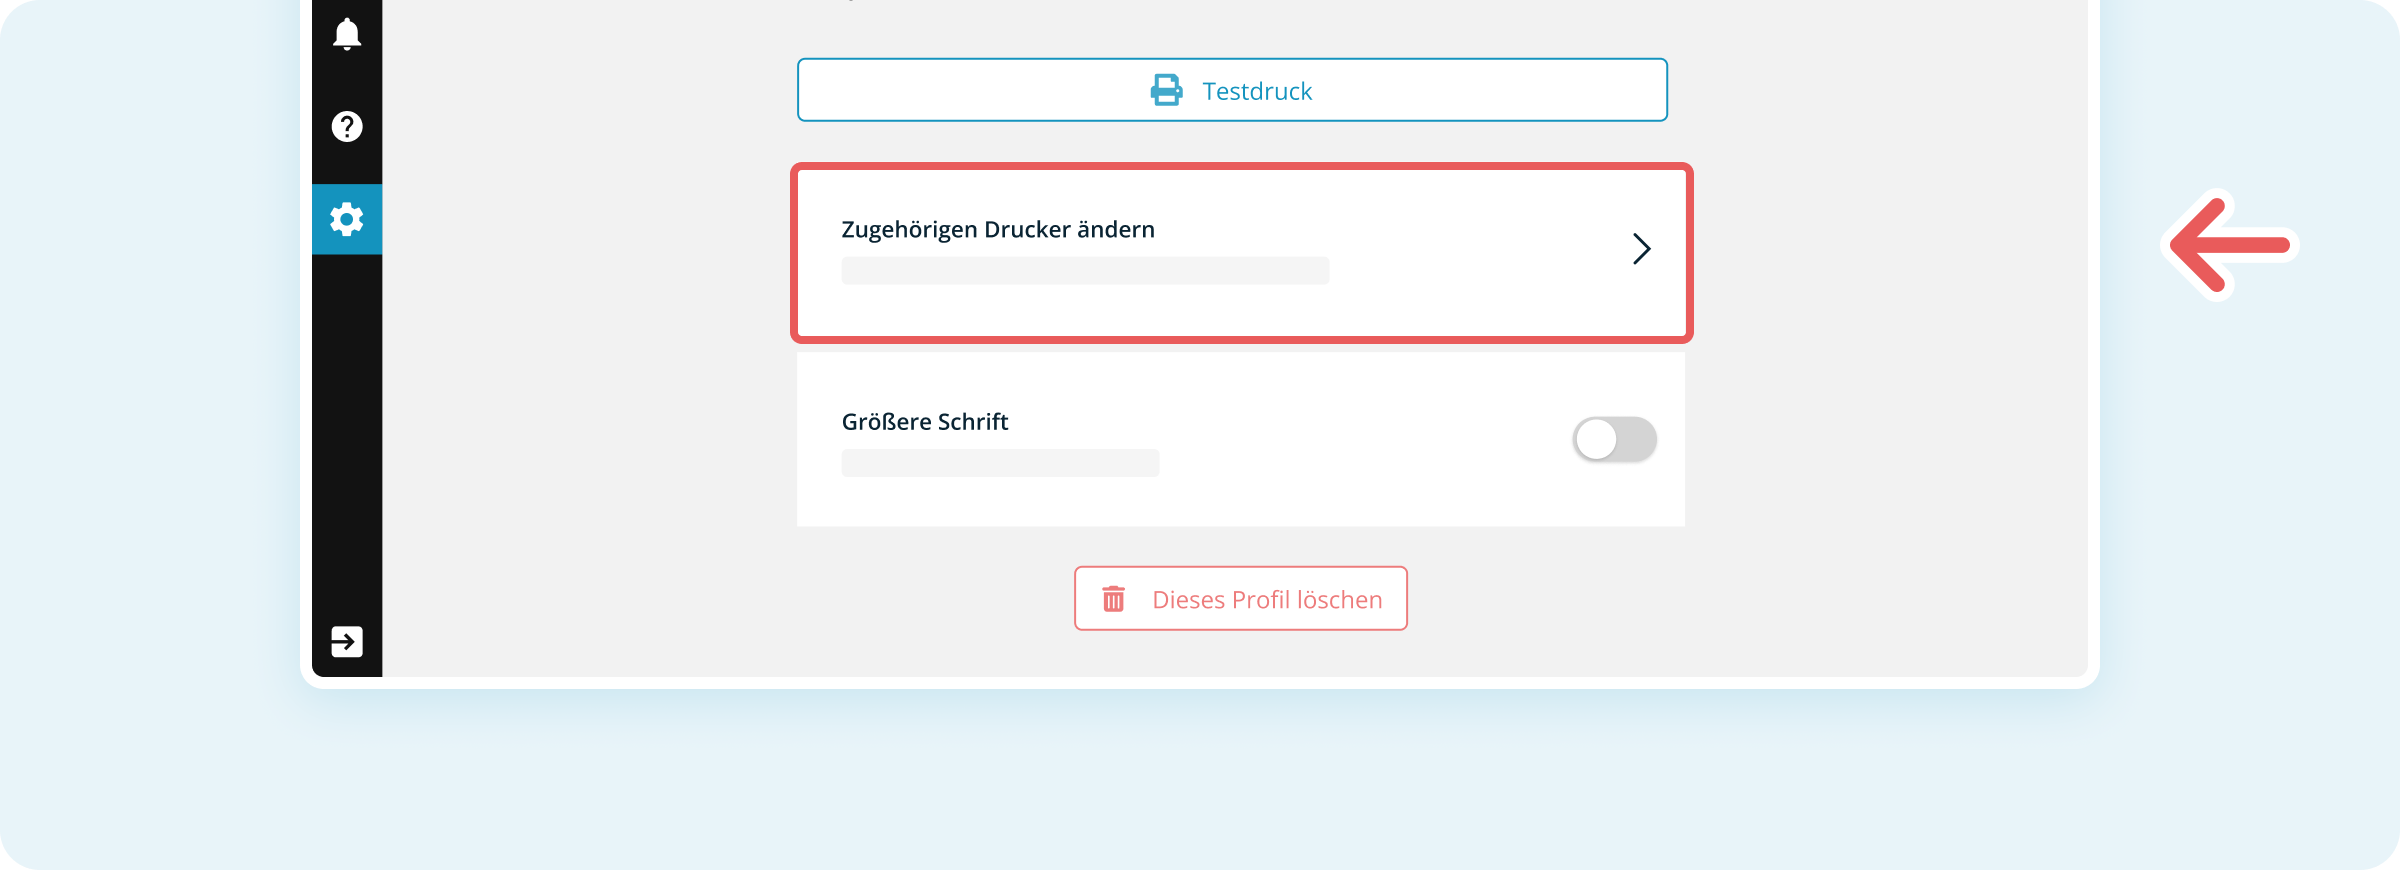
- Click Change Associated Printer.
- The printer should now appear in the list and can be assigned again.
- The printer should now appear in the list and can be assigned again.
If the printer is found after logging in again, the process is complete.
Step 2: Restart the device (if Step 1 does not help)
If the printer is still not recognized after logging out and back in, restart the device.
On readyGo, readyMax and readyMax 2:
- Press and hold the power button.
- Select Restart from the menu that appears.
On readyTAB:
- Press and hold the power button.
- Select Restart from the menu that appears.
After restarting:
- Log back into the POS interface.
- Click the white gear icon on the left to open the settings. On smaller devices, the gear icon is located in the bottom-right corner.
- Click Printers in the left sidebar.
- Select the desired printer profile under Existing Profiles.

- Click Change Associated Printer.
- The printer should now appear in the list and can be assigned again.
The printer is now set up again and ready to use.
Note: readyGo is the successor to readyP2, and readyMax is the successor to readyT2.