Cancel invoices: Wrong payment method or customers information on invoice, what to do?
If you have chosen the wrong payment method for an invoice or want to add customers information, we will show you how to proceed here!
Once an invoice has been created for the first time, it should not be changed. The change results in a newly issued invoice, not a duplicate. This means you run the risk of having to pay sales tax twice separately.
If you need to change the customers information or payment method, the correct procedure is to cancel and reissue the invoice.
We always recommend giving a reason for cancellation. This makes it easier to understand why a transaction was written off from the cash register.
To cancel an invoice, follow these steps:
- Go to Invoices in POS
- Click on the invoice you want to cancel
- Click on Cancellation in the tabs on the left (top right)
- To cancel the entire invoice in one go, click Undo Receipt
- There are three ways to cancel
- 1-click cancellation
Here the entire receipt is cancelled immediately, you do not have to confirm the cancellation receipt in the order interface. However, no reason for cancellation is given either. - Standard cancellation
Here you will be taken to the order interface before the actual cancellation.- The POS opens
- Click on the correction button
- Enter a cancellation reason
- Click on Correction
- Here you can select the reason for cancellation!
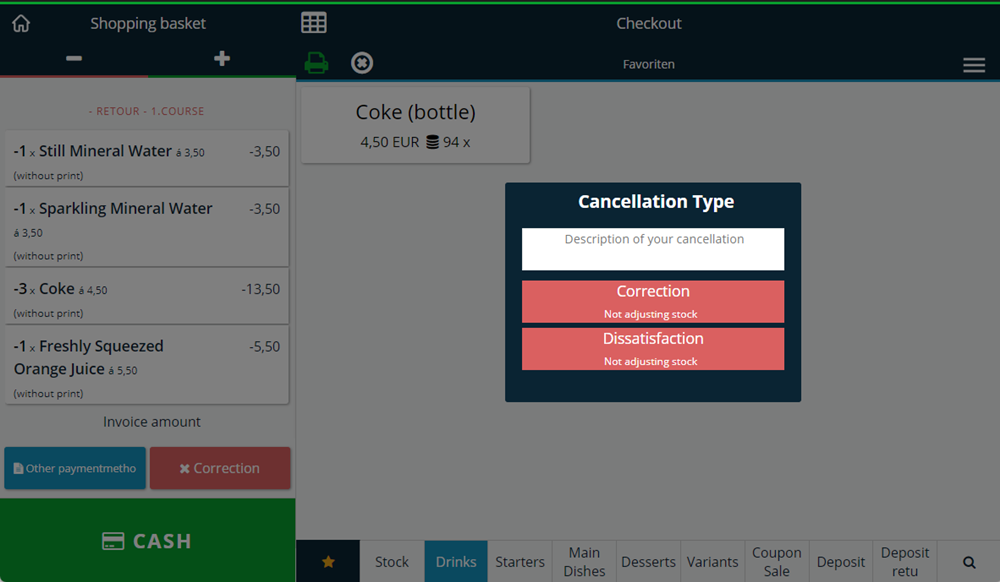
Further down in this article we will explain how you can create your own cancellation reasons in the Admin Interface. - Here you can select the reason for cancellation!
- You can choose the payment method, which in this case is the payout to your customer
- Click on payment to confirm the transaction
- Gastro extension: Restore table
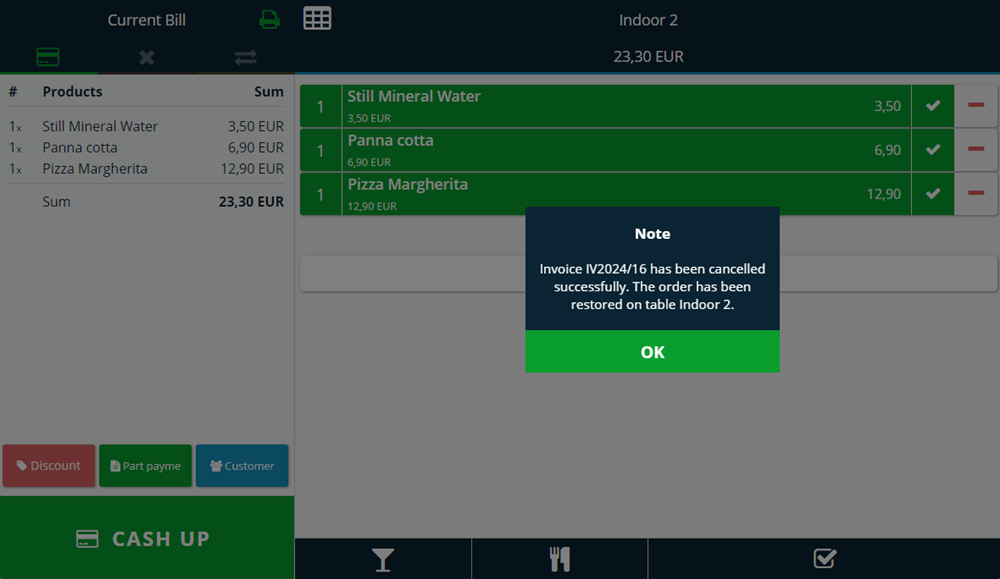
This function cancels the entire invoice and automatically restores your table so that you can immediately recalculate.- Click Cancel invoice & restore table
- The POS opens
- You will receive a notification that your bill has been cancelled and restored to the table
- Confirm with the OK button
- Now you have three different options how to proceed with the invoice
- You can bill again as usual, of course with the changes you wanted to make
- You can cancel the receipt permanently, the process is then the same as the standard cancellation
- You can rebook the table if, for example, your guests sit at another table
- 1-click cancellation
The correct way to process an invoice is always to cancel and restore it!
To cancel individual products on an invoice, follow these steps:
- Go to Invoices in POS
- Click on the invoice you want to cancel
- Click on Cancellation in the tabs on the left
- Check the box next to the product
- Click on Cancel selected products
- The POS opens
- Click on the Correction button
- Enter a Cancellation reason
- You can also create your own standardized cancellation reasons.
- You can choose the payment method, which in this case is the payout to your customer
The cancellation process is now correctly shown under your invoices and you can create a new invoice.
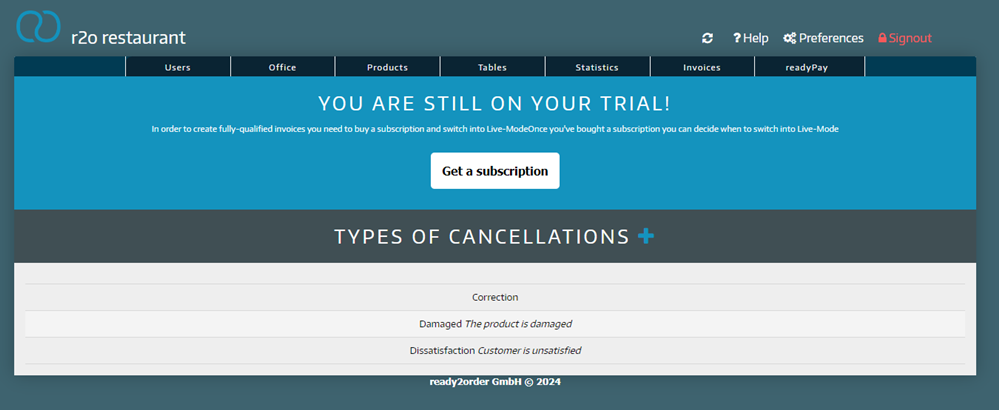
Set cancellation reasons in the Admin Interface
To set your own cancellation reasons, proceed as follows:
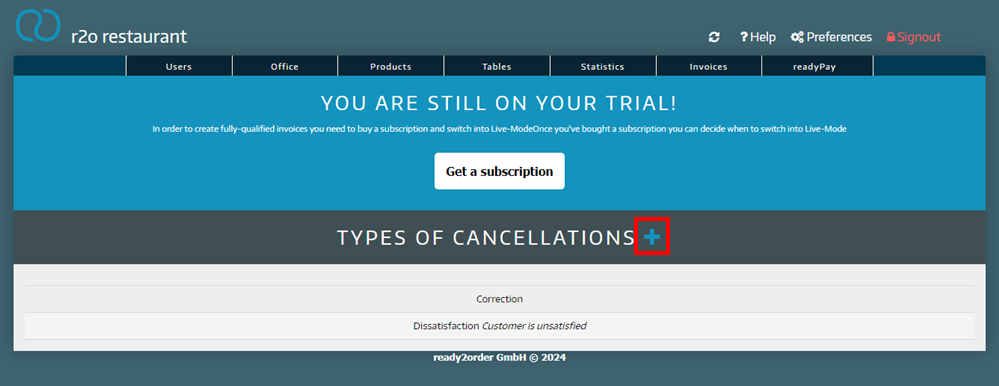
- Log in to the Admin Interface
- Under the "Products" menu, select Types of cancellations
- Here you can see your defined cancellation reasons. You can add new cancellation types using the blue plus
- Select the name and description of your cancellation reason
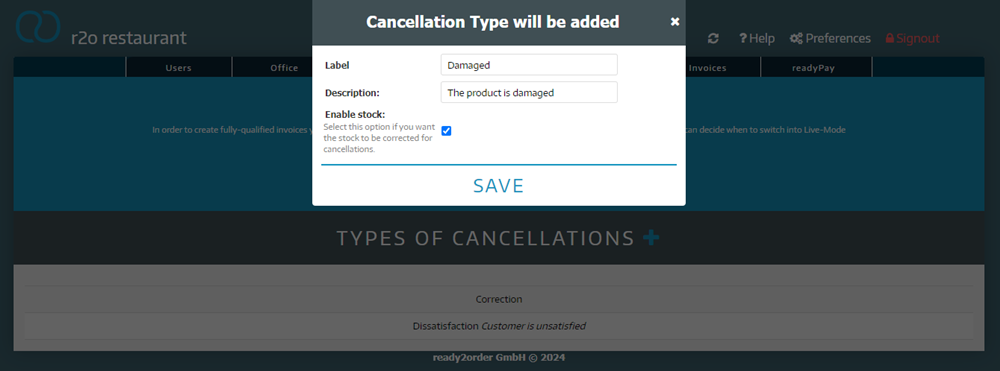
- The name is a required field, the description is optional
- You can also define here whether the item should be added back into stock for this cancellation reason (activate this option if you want the stock level to be corrected in the event of cancellations)
- Now you can see all cancellation reasons, which are now visible in your checkout interface!
This order also determines the order of the cancellation reasons in the POS. This means that the cancellation type that you have first in this list also determines the name of your cancellation button!
Here we show you how the return booking works!
Did you know that our AI assistant readyBot can also answer your support requests via chat? Click here to access the chat.