How can I create and use custom price levels?
Price levels allow you to use different prices or tax rates for products. They are useful for different sales types, locations or other individual pricing setups. As soon as a price level is selected, the stored prices and tax rates are applied automatically.
Requirement: Activate price level feature
Before you can create your own price levels, you need to activate the feature in the administration interface.
- Log in to the administration interface.
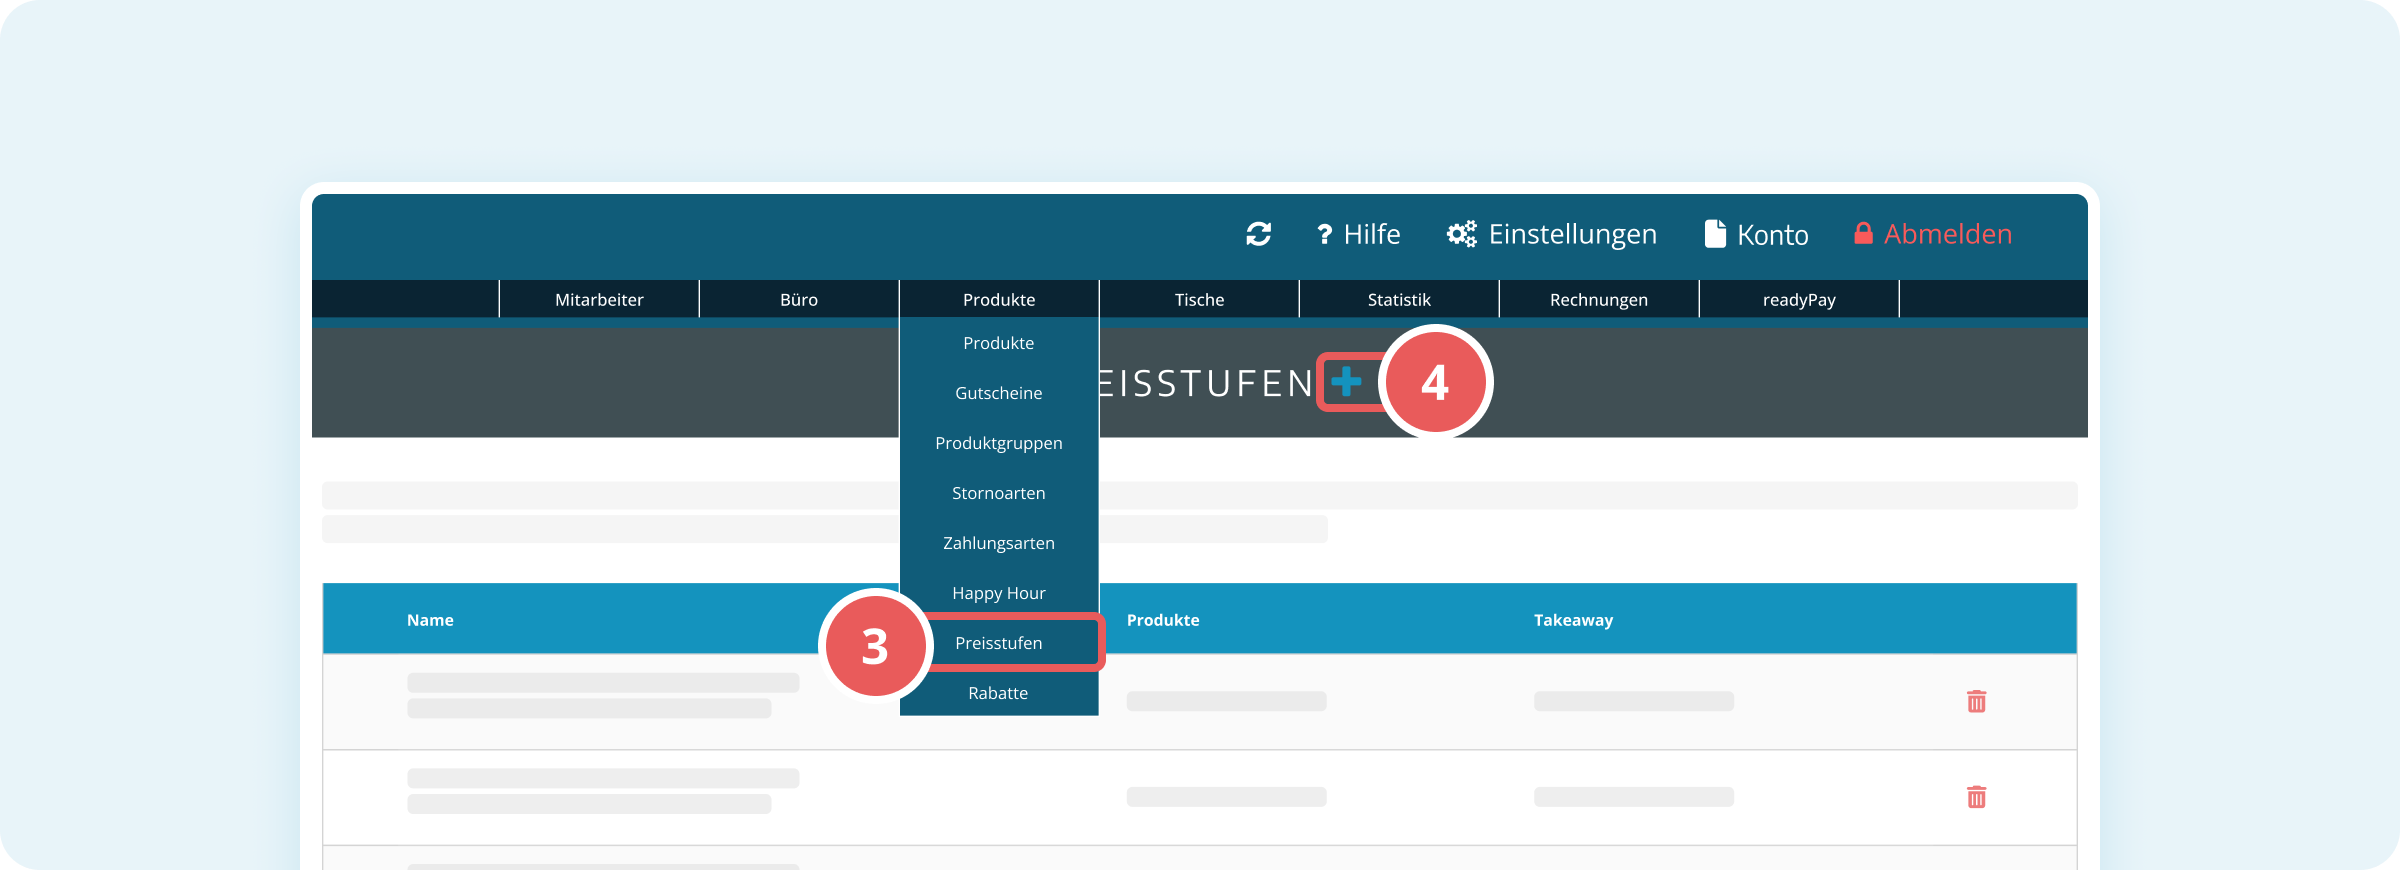
- Click on Products in the top menu bar.
- Click on Price Levels in the dropdown menu.
- If the menu item is not visible: click on Settings, select General under Basic settings, switch to the Products tab and enable the toggle for Use custom price levels.
The price level feature is now activated and you will be taken directly to the overview.
Create a custom price level
In the price level overview, you can create new price levels.
- Log in to the administration interface.
- Click on Products in the top menu bar.
- Click on Price Levels in the dropdown menu.
- Click on the plus icon (+) next to the heading to create a new price level.
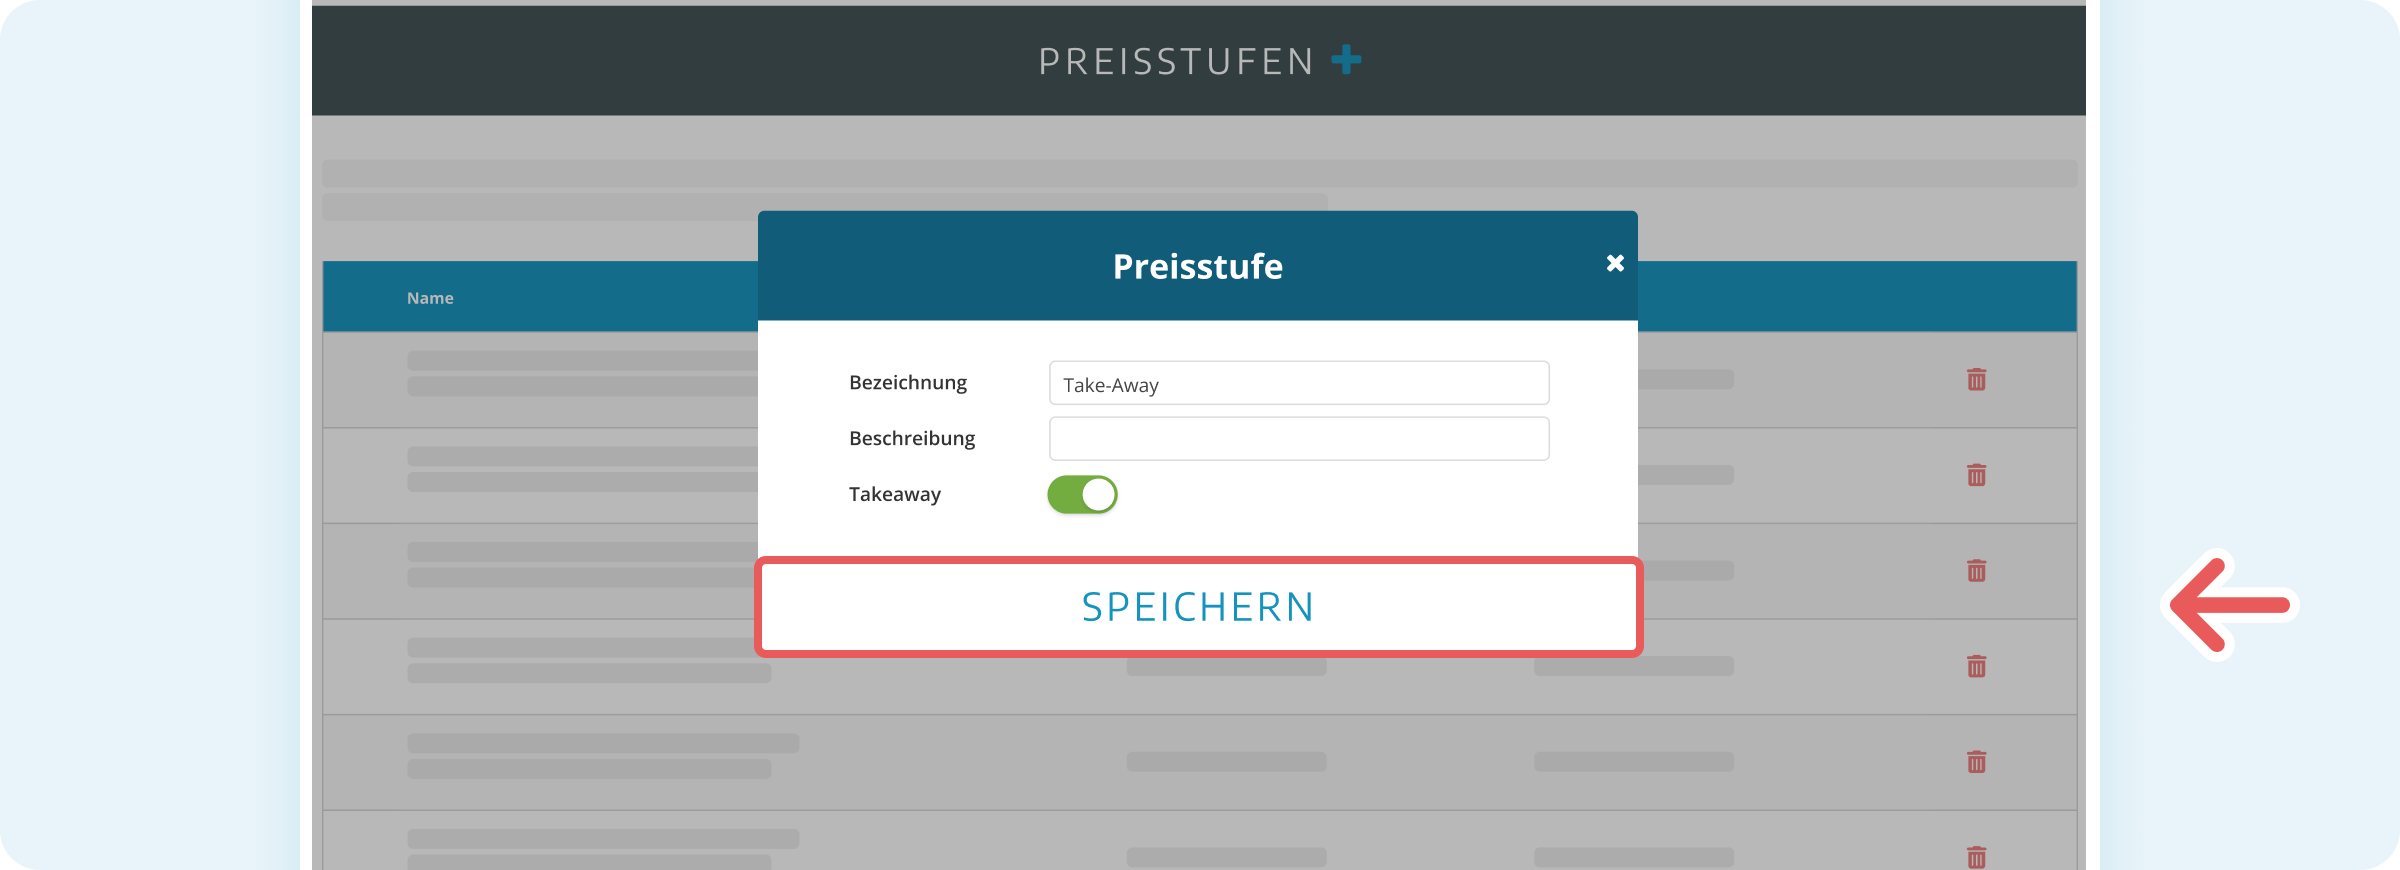
- Enter a name in the Name field (e.g. “Take-Away”).
- Optionally enter a short explanation in the Description field.
- Enable the toggle for Takeaway if this price level should apply to take-away products.
- Click on Save at the bottom of the dialog.
The new price level appears immediately in the overview.
Assign a price level to a product
To make a price level effective in the POS, you need to assign it to the relevant products.
- Log in to the administration interface.
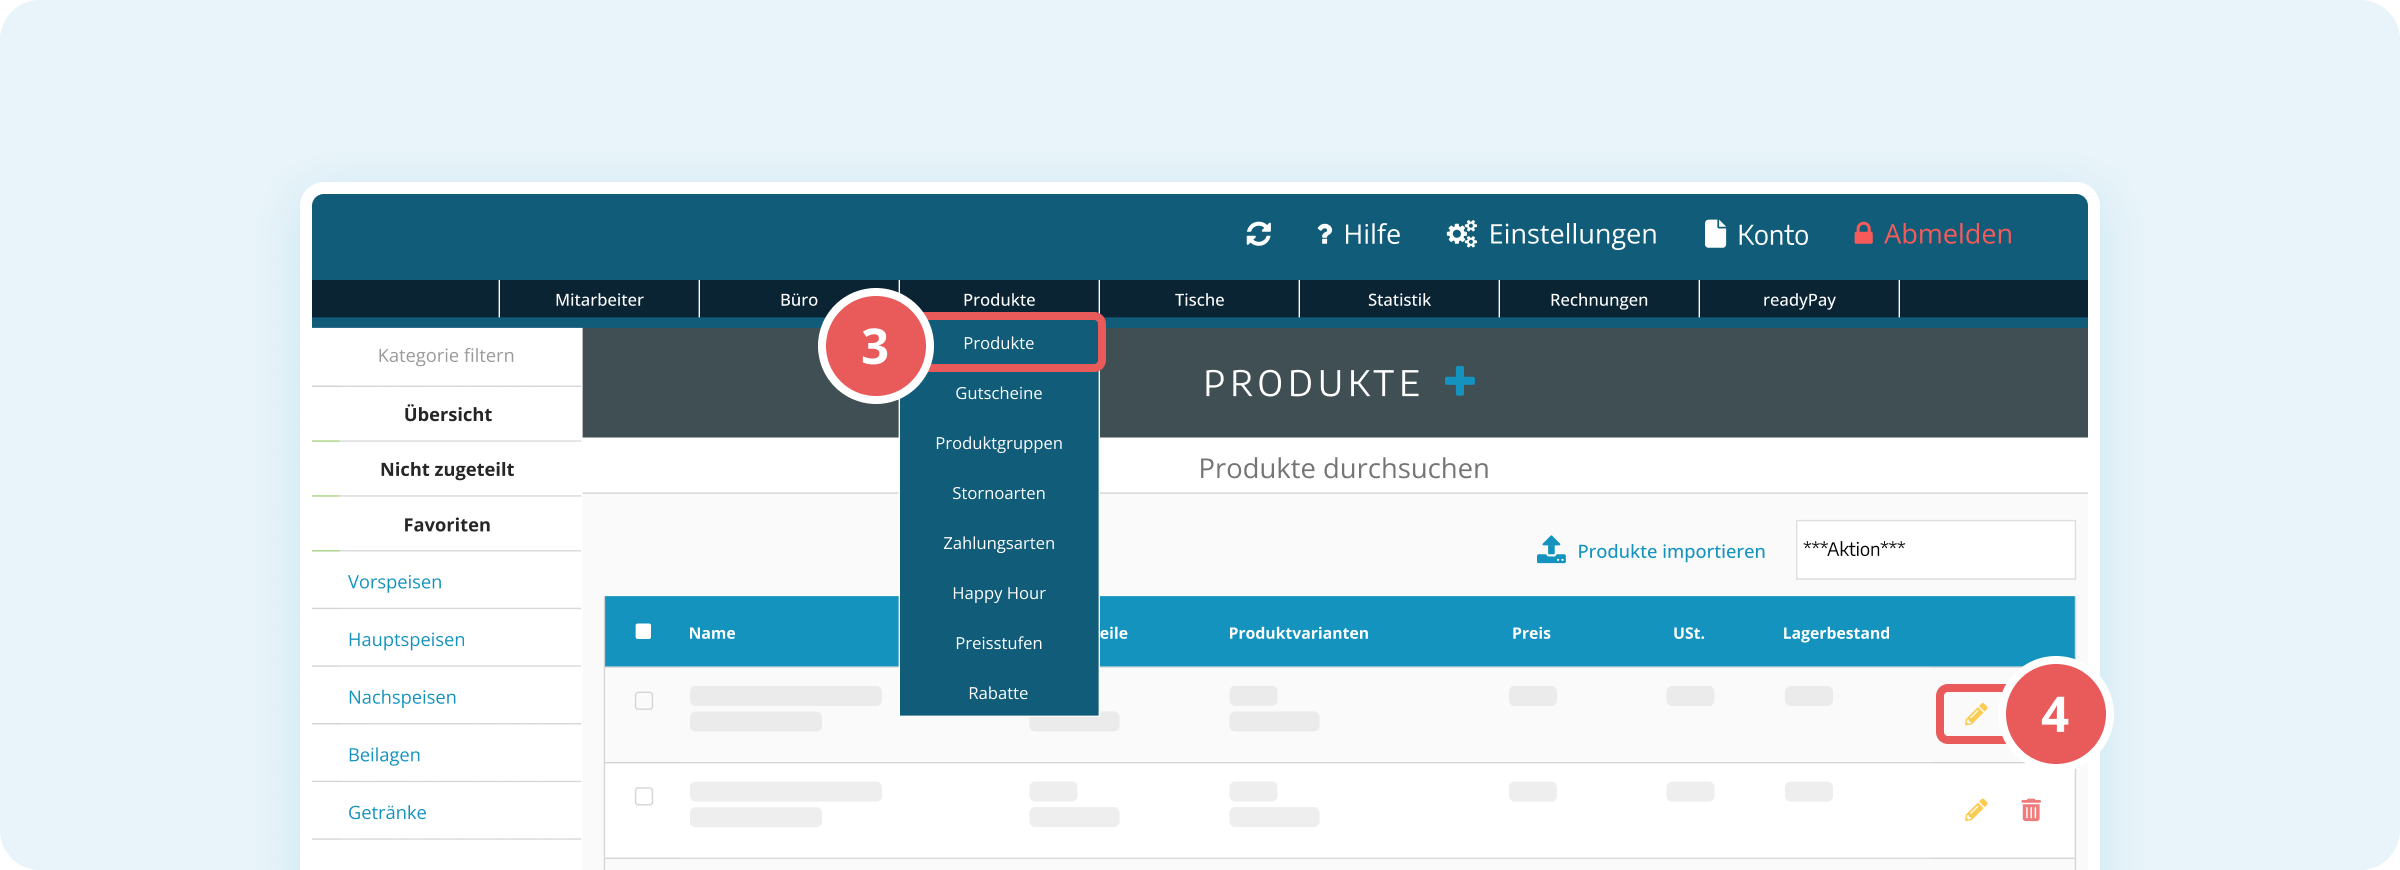
- Click on Products in the top menu bar.
- Click on Products in the dropdown menu.
- Click on the yellow edit icon next to the desired product to edit it.
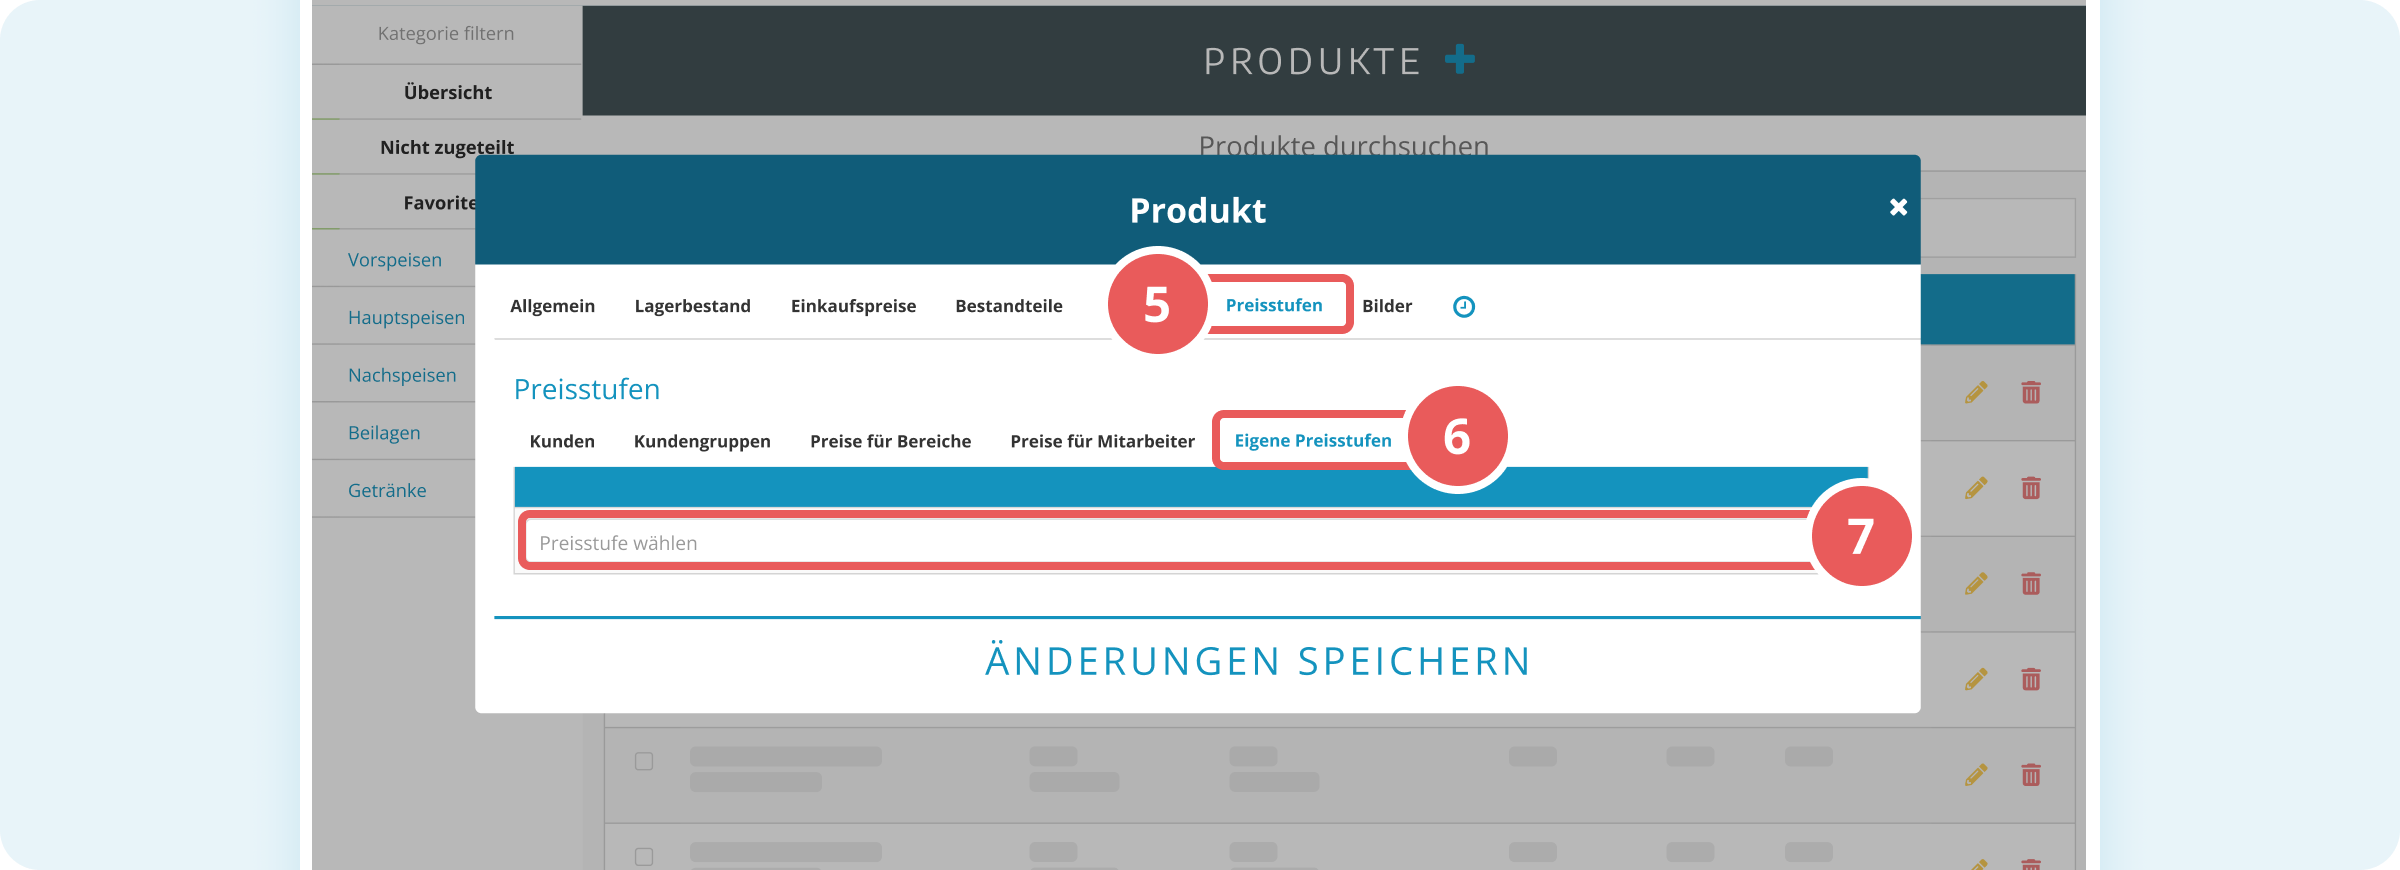
- Switch to the Price Levels tab.
- Click on Custom price levels.
- Select your created price level (e.g. Take-Away).
- Select the desired tax rate from the Tax rate dropdown menu.
- Optionally enter an account in the Account field.
- Click on Save changes to apply the assignment.
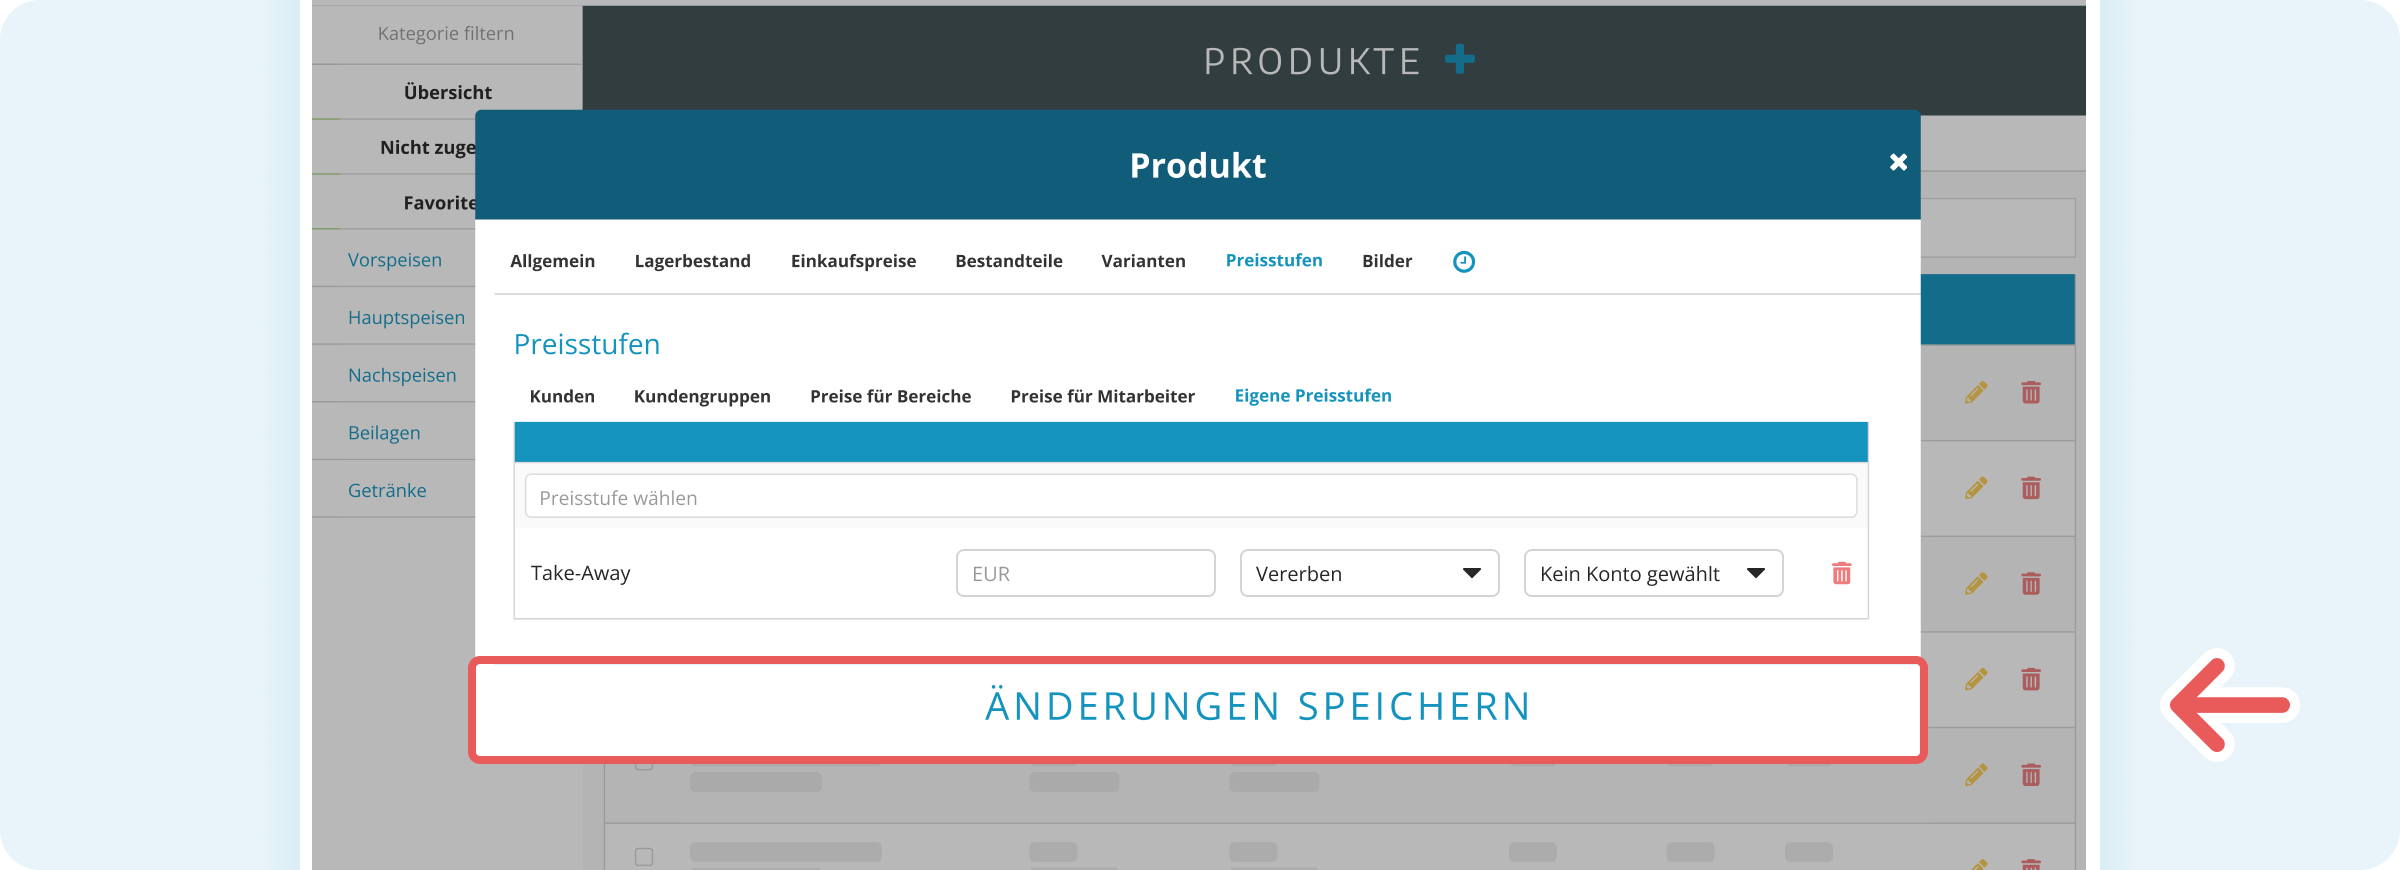
The product is now linked to the price level.
Set up quick access for price levels
To select price levels directly in the POS with one click, you need to configure them as quick access.
- Log in to the administration interface.
- Click on Settings (gear icon) in the top right.
- In the left sidebar, in the Basic settings section, click on General.
- Switch to the Quick access tab.
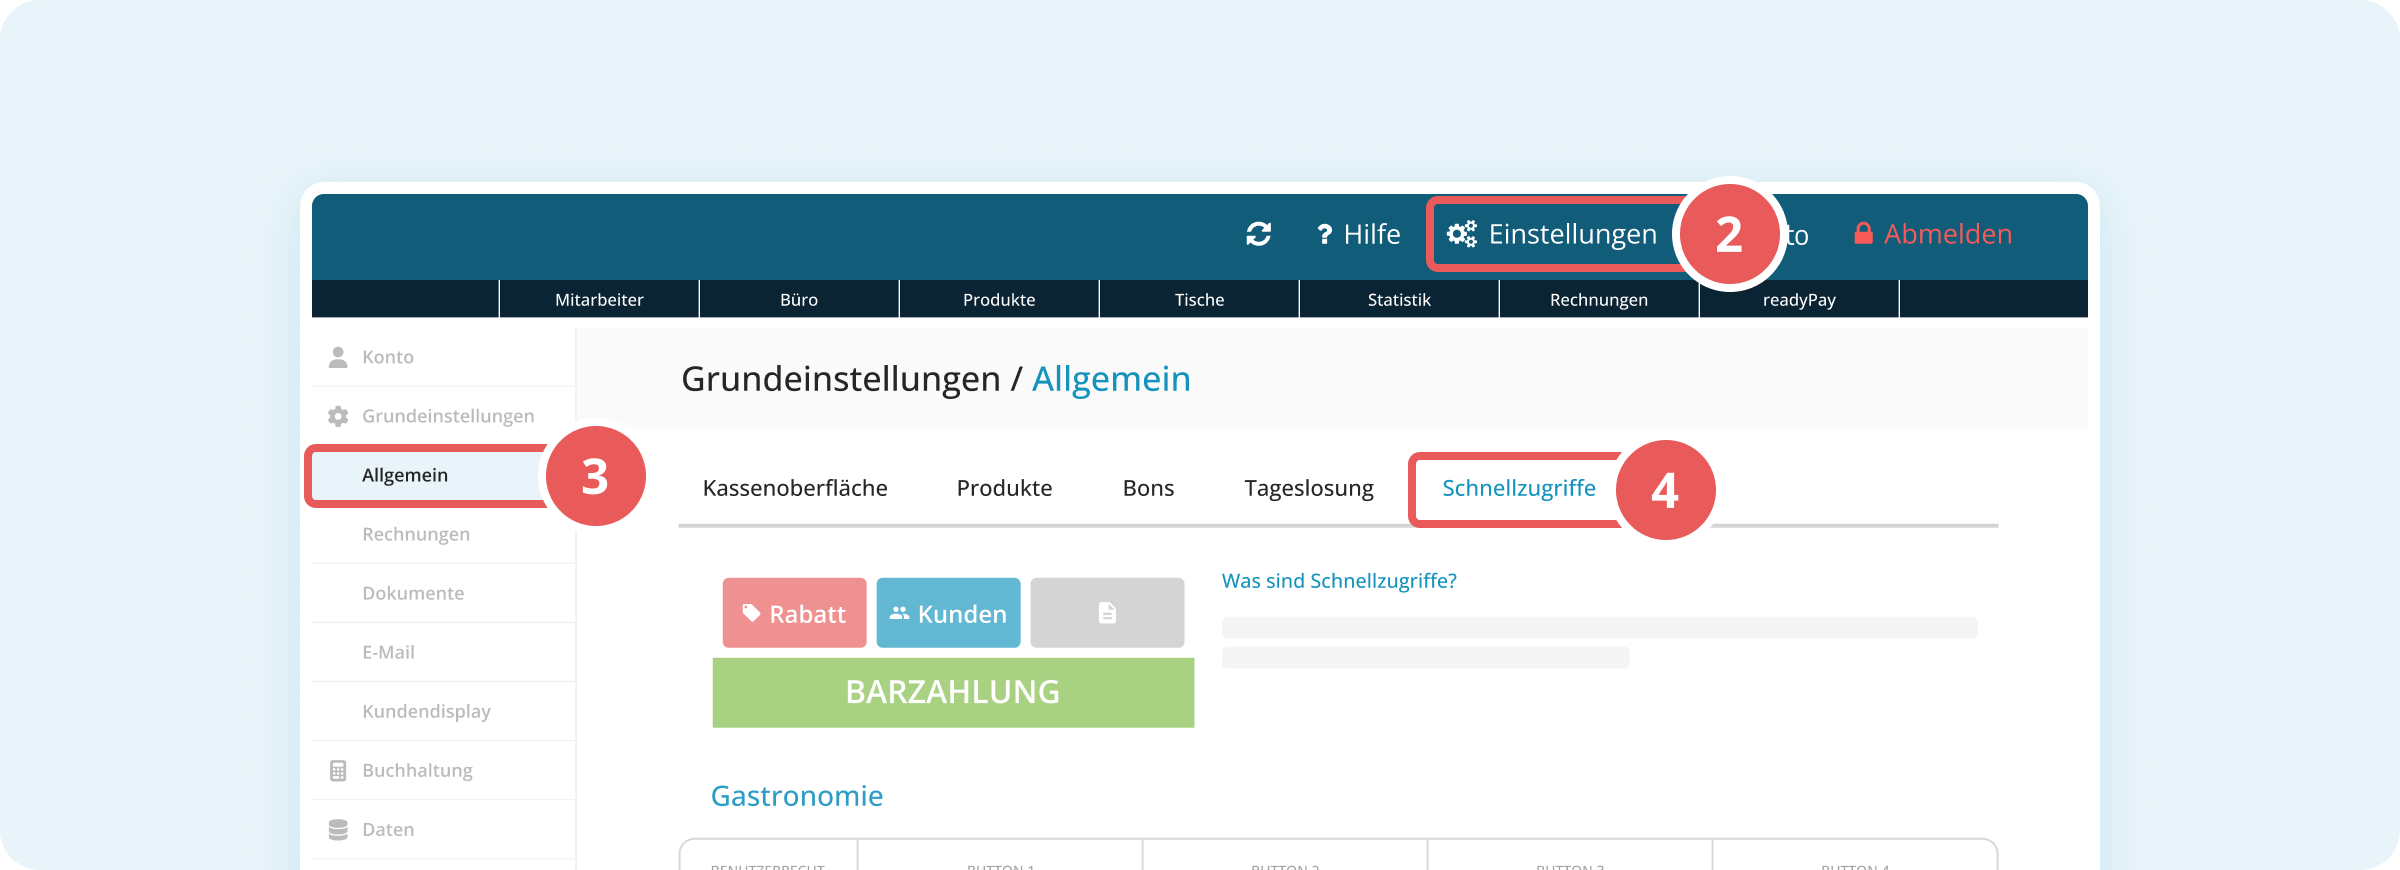
- In the table under Gastronomy or Checkout, select Price levels in a dropdown of your choice.
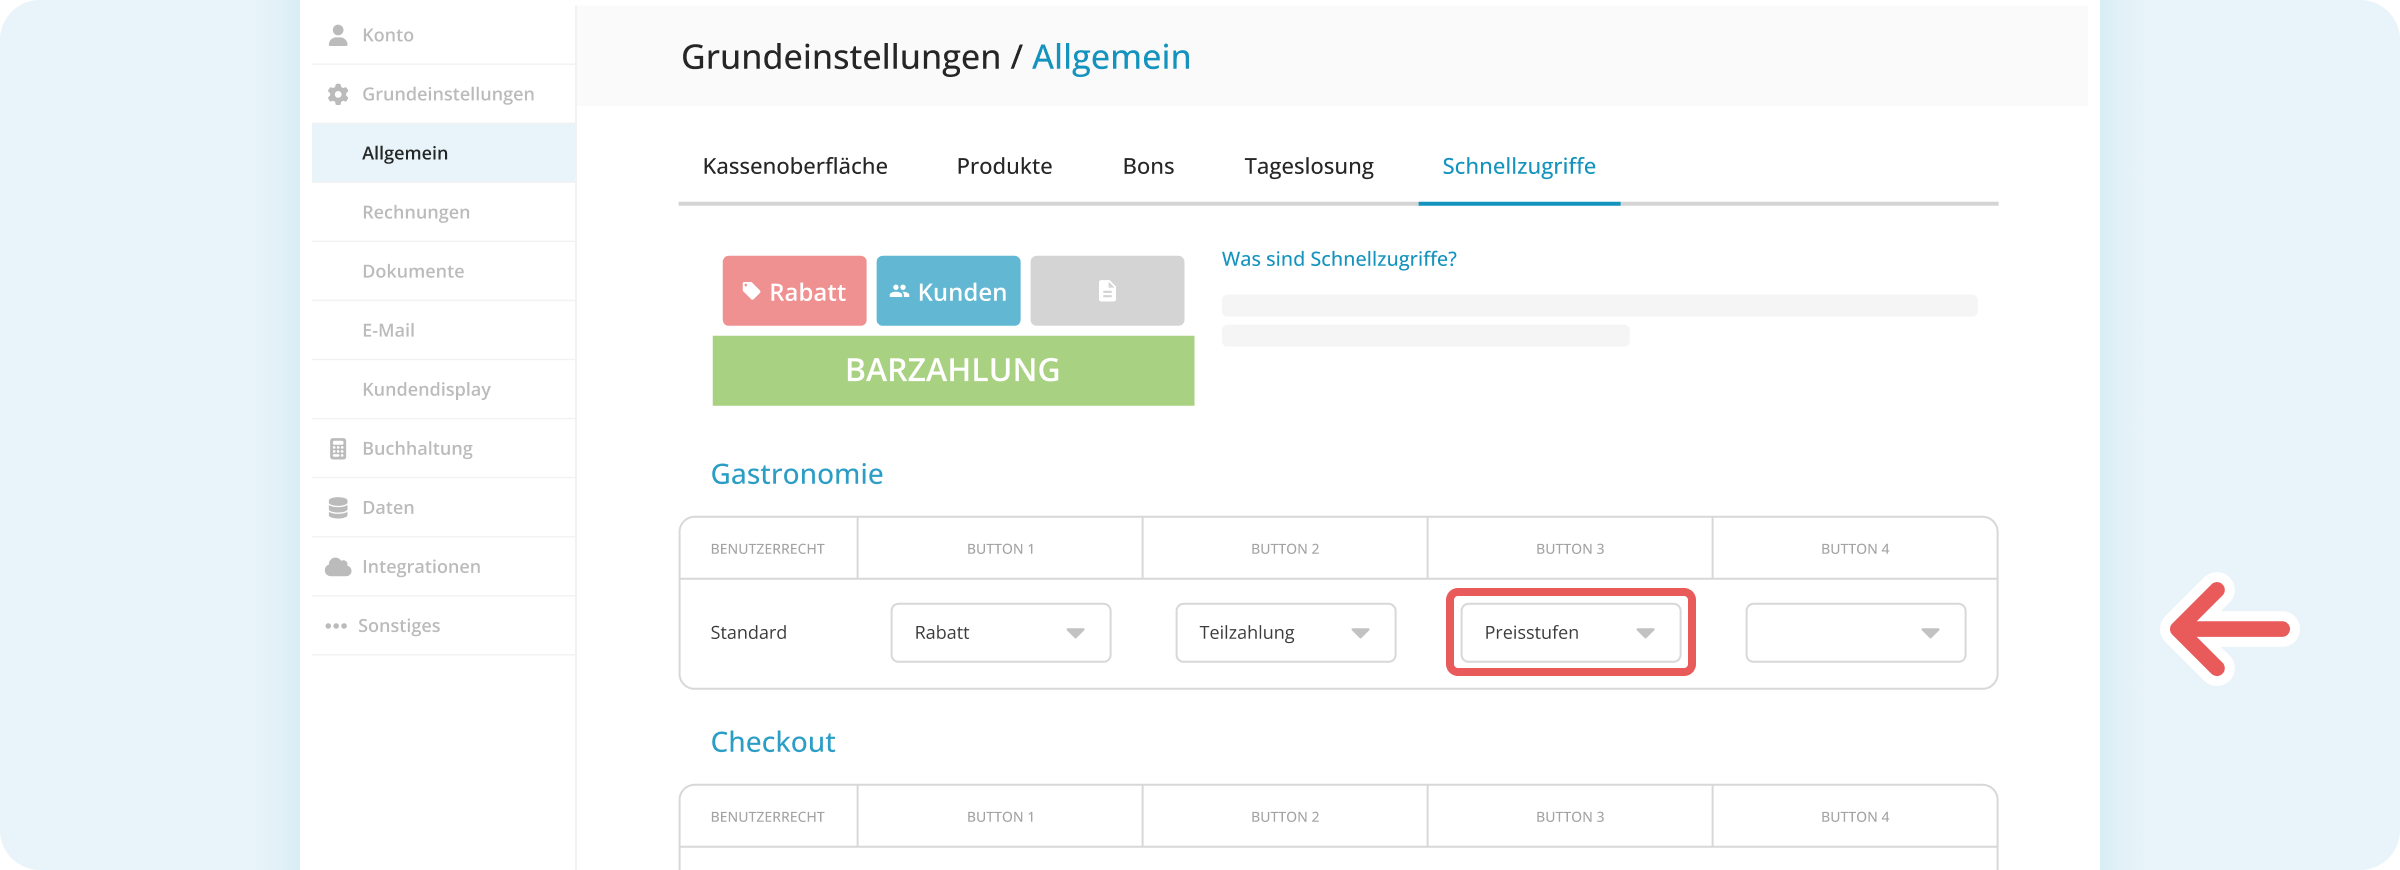
Your selection is saved automatically and the price levels are now available as a quick access button in the POS.
Apply a price level in the POS
- Log in to the POS interface.
- Select the desired product.
- Click on the Price levels button.
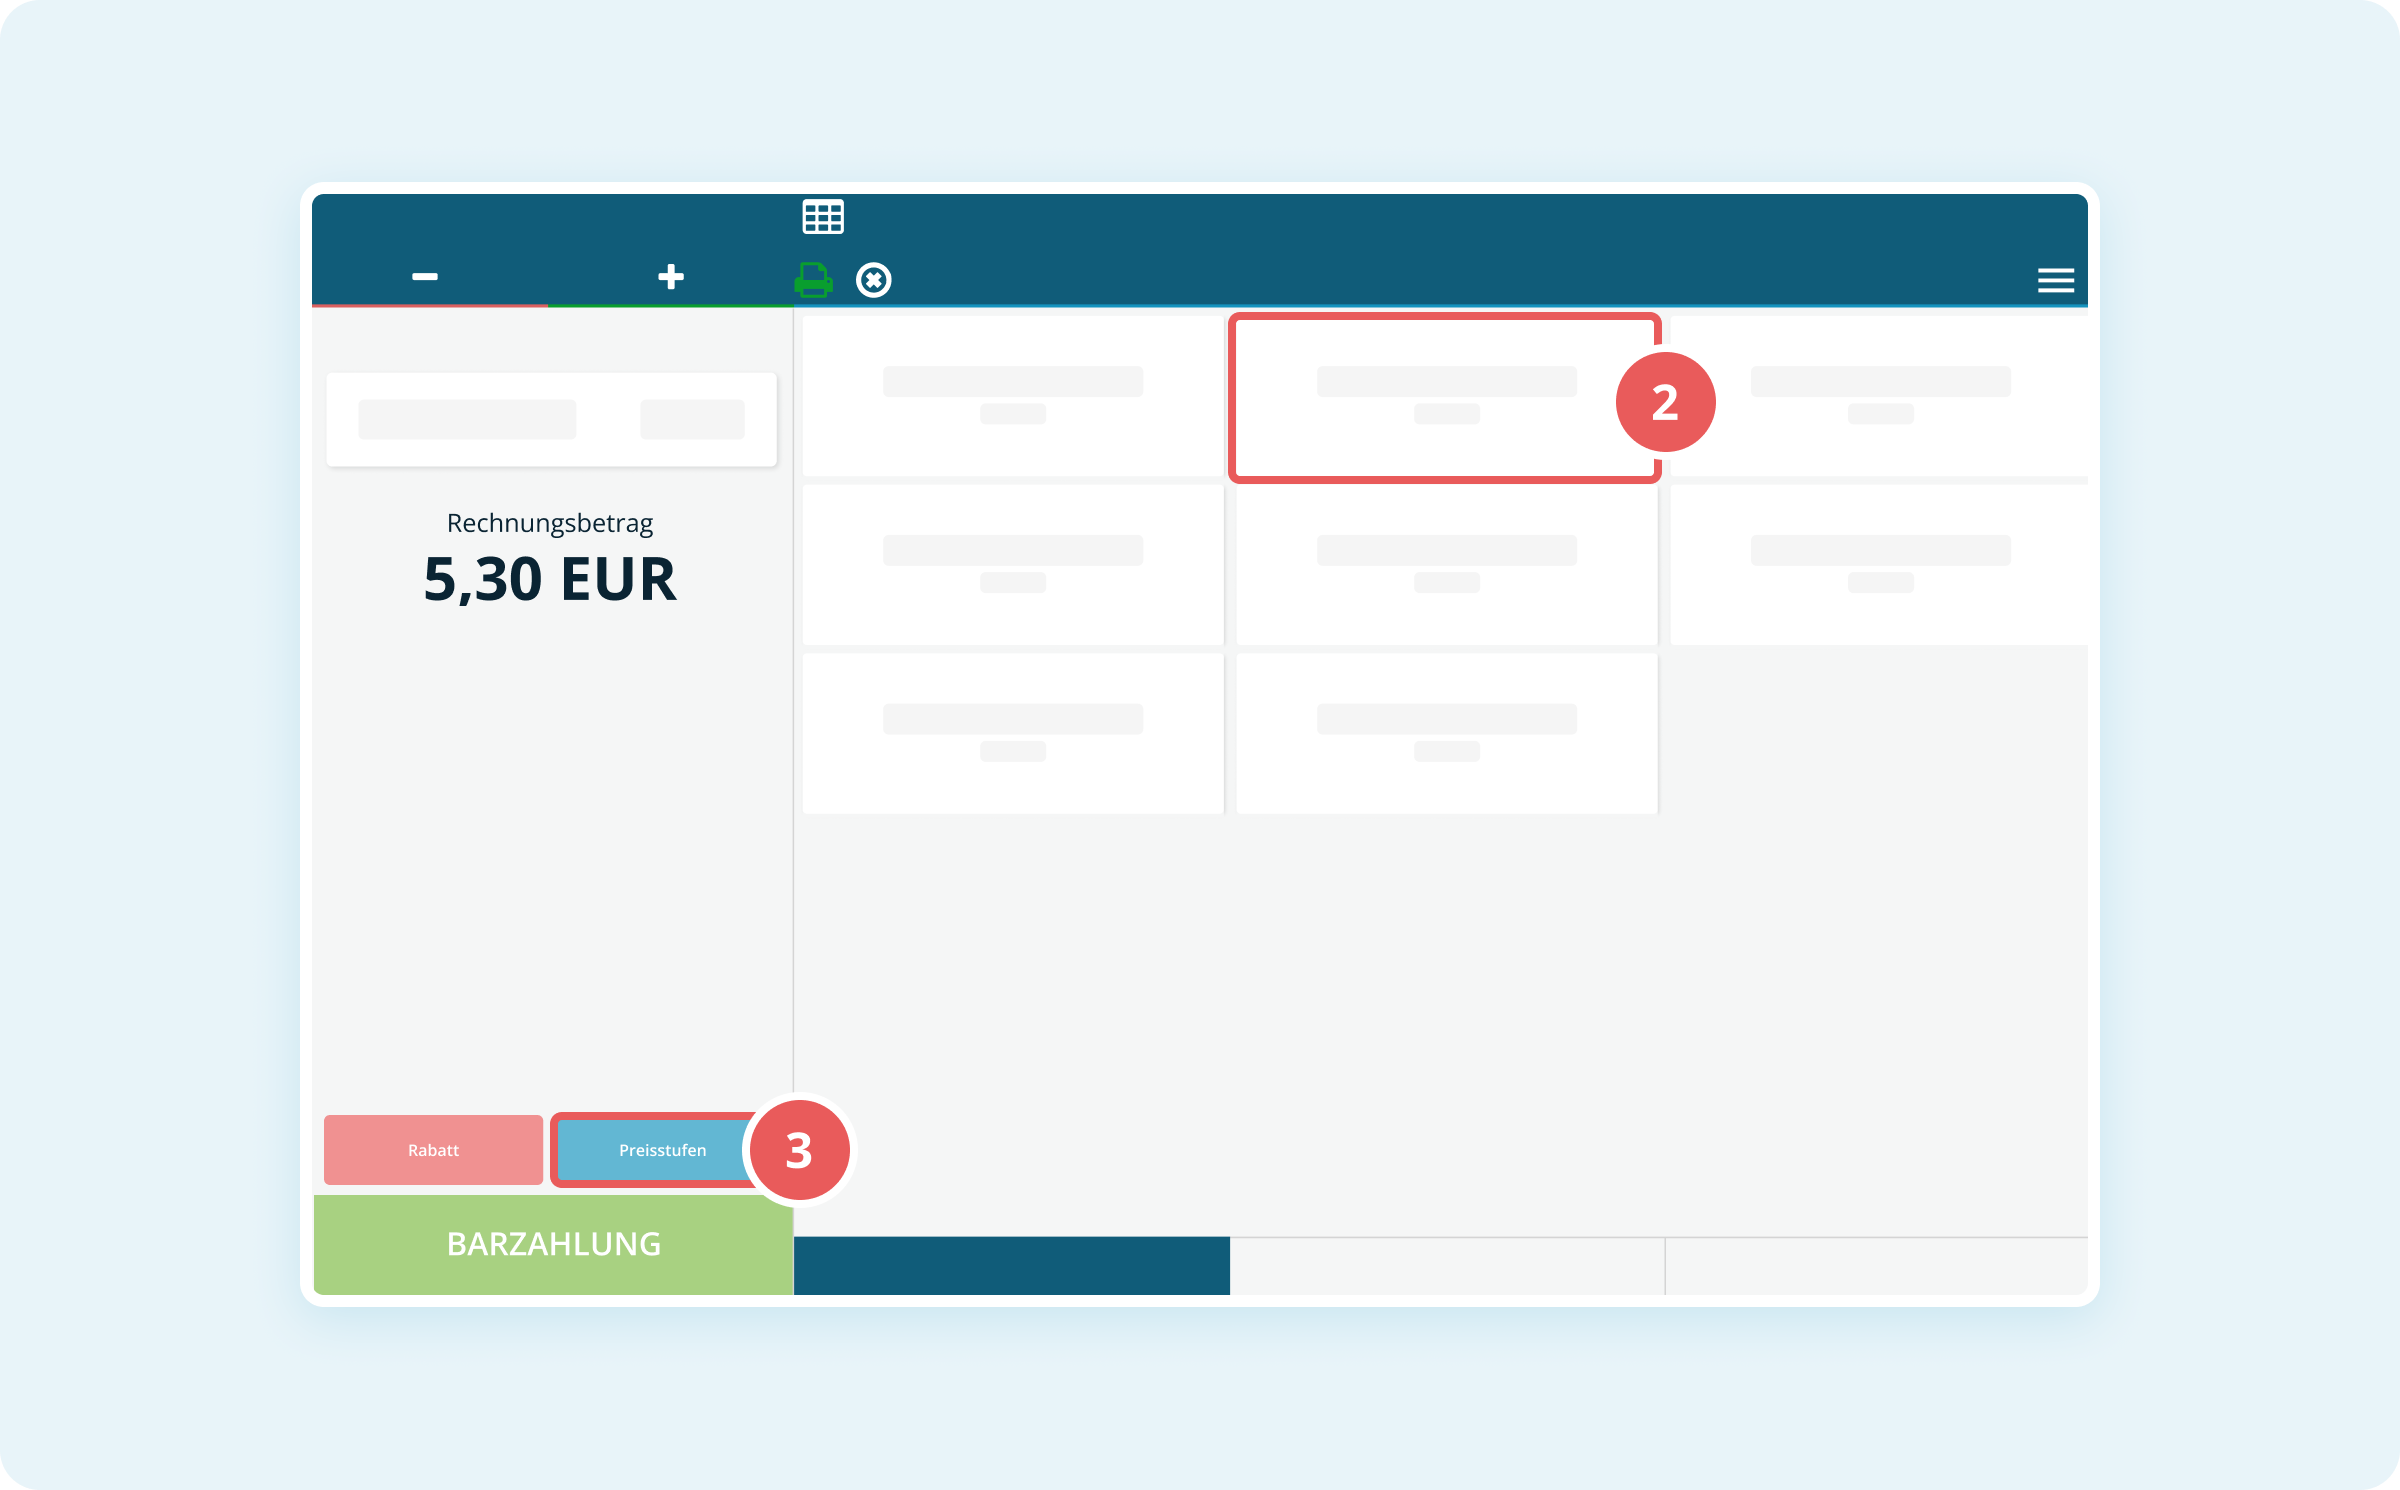
- Select the desired price level (e.g. Take-Away).
The adjusted price is immediately applied to the receipt.
